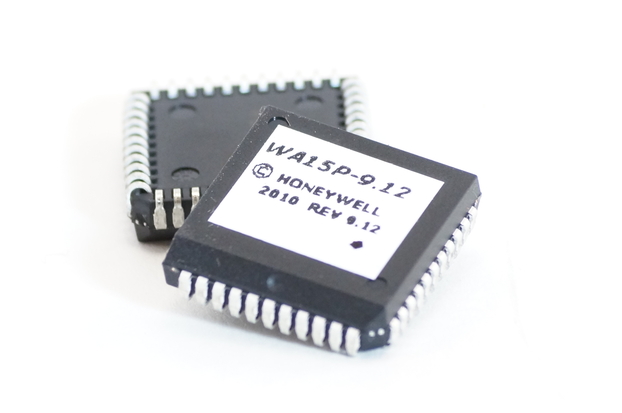
How Do I Replace a PROM Chip For a Honeywell VISTA Panel?
You can replace a PROM Chip for a Honeywell VISTA Panel by powering down the panel, prying off the old PROM Chip, carefully applying the new one, and powering the panel back on. We recommend using the metal end of a binder clip to do this. Never remove a PROM Chip with the panel powered on.
The PROM Chip on a Honeywell VISTA System is a small black chip on the main circuit board. This chip determines the firmware version for the system. You can determine the firmware version of your panel by reading the code on the white sticker on the PROM Chip. The code will begin with the letters "WA", and it will list the firmware version.
The main reason to replace a PROM Chip is because the panel is running an old firmware version. Upgrading to a new firmware version will unlock new features and capabilities for the system and help it run more smoothly. Most users upgrade a PROM Chip because they want to use their VISTA System with Total Connect 2.0. A VISTA 15P or VISTA 20P must be on at least firmware version 9.12. A VISTA 21iP must be on at least firmware version 3.13.
An example of a PROM Chip can be seen in the following image. This is a VISTA 21iP running firmware version 4.23.

Please note that on the VISTA 15P and VISTA 20P Systems, you must make sure the current PROM Chip is 2.0 or higher. Any 15P or 20P System that is running a firmware version of less than 2.0 cannot be chip upgraded. Unfortunately, the only option on these systems is to replace the panel entirely.
Alarm Grid sells VISTA 15P PROM Chip Upgrades, VISTA 20P PROM Chip Upgrades, and VISTA 21iP PROM Chip Upgrades. For all other VISTA PROM Chip Upgrades, including VISTA TURBO Series Panels, you should contact your alarm monitoring company for more information. Alarm Grid monitored customers can do this by sending an email to support@alarmgrid.com.
Also note that on the VISTA TURBO Series Panels like the VISTA 128BPT and the VISTA 250BPT, you will need to first remove a metal cover to access the PROM Chip. This can be done using a screwdriver. Additionally, the PROM Chips for these systems are rectangular in shape and considerably larger than the square PROM Chips used with the VISTA P-Series Systems. However, it can be removed and replaced in the same manner as the other VISTA Systems. You can see an example of the metal cover in the picture below:

Complete the following steps to replace the PROM Chip on a VISTA System:
1. Power down the panel. Power the panel completely down by disconnecting the backup battery and unplugging the transformer. Any keypads powered by the panel should go completely blank. There should be no lights on the panel. This indicates that the system is completely powered down. Never attempt to remove or replace a PROM Chip while the system is powered on.
2. Remove the old chip. If necessary, remove the metal cover that hides the PROM Chip on a VISTA TURBO Panel. Locate the PROM Chip. Use the metal end of a binder clip to carefully remove the PROM Chip. For VISTA TURBO Panels this involves pulling the chip straight away from the main board. For the VISTA-P Series Panels, this involves inserting the metal clip in the upper right corner and levering the chip up and away from the board. Do the same in the chip's lower left corner until it can be removed. After removing the chip, the holster should be empty and capable of supporting a replacement chip.
3. Apply the new chip. Take your new PROM Chip, and line its metal prongs up properly with the holster. Make sure the chip is facing the proper direction and that the prongs are aligned properly. Press straight down onto the new PROM Chip to secure it in the holster. Be very careful not to bend any of the prongs. The new chip should be nice and secure.
4. Power back on. Plug your transformer back in, and reconnect the backup battery to power the panel back on.
Did you find this answer useful?
We offer alarm monitoring as low as $10 / month
Click Here to Learn MoreRelated Products
Related Categories
- Answered


