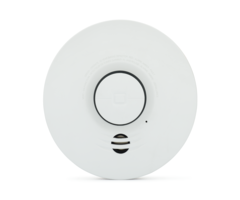
Interlogix SDX-135Z Wireless Smoke Interconnect Setup
Related Products

Related Categories
Document Transcript
Relea
se Note: SDX
-
135Z, interconnect setup
1
©
09/10
/2018
U
nited Technologies
Corporation. Interlogix is part of UTC
Building & Industrial Systems
, a unit of United Technologies Corporation.
All rights reserved.
Application
note
SDX
-
135Z, interconnect
setup
1.0
Release Date:
09/
10
/2018
Creating an interconnect netwo
rk:
1.
Power up all smoke detectors.
2.
Once the LEDs on all detectors are pulsing red press and hold the button on one detector until it beeps
twice.
3.
The LEDs on all detectors will start pulsing green.
4.
Once all de
tectors are pulsing green
the detector that
was
used to create the network will be
pulsing at
twice the rate of the others.
5.
Locate this detector centrally in the house.
6.
Either wait 15 minutes for the network to automatically close itself or close the network by pressing and
holding the button on any of
the detectors until it beeps twice.
7.
Do not power down any of the detectors for at least 10 minutes after the network is closed
.
Adding a detector to an existing network
1.
Open the network
:
a.
Place a magnet on the test point on one of the existing detectors.
b.
W
hen the detector beeps twice and the LED flashes red rapidly remove the magnet.
c.
While the LED is flashing red rapidly press and hold the button until the detector beeps twice.
d.
The LEDs on all existing detectors will start pulsing green.
2.
Power up the new
detector.
3.
T
he new detector’s LED will switch from pulsing red to
pulsing green
when it finds the network
.
4.
Either wait 15 minutes for the network to automatically close itself or close the network by pressing and
holding the button on any of the detectors
until it beeps twice.
5.
Do not power down any of the detectors for at least 10 minutes after the network is closed.
*For more
troubleshooting details
, please reference to the
installation guide under “Troubleshooting Guide”
2
Release Note: SDX
-
135Z, interconnect setup
©
09/10
/2018
UTC
Fire &
Security Americas Corporation, Inc. Interlogix is part of UTC Climate Controls & Security, a unit of United Technologies Cor
poration.
All rights reserved.
One detector in the interconne
ct acts as a coordinator. This detector should be located
centrally in the installation.
To identify which detector is the coordinator:
1.
Open the network
:
a.
Place a magnet on the test point on one of the existing detectors.
b.
When the detector beeps twice and th
e LED flashes red rapidly remove the magnet.
c.
While the LED is flashing red rapidly press and hold the button until the detector beeps twice.
d.
The LEDs on all existing detectors will start pulsing green.
2.
One detector will be pulsing at twice the rate of the
rest of the detectors, this is the coordinator.
3.
Place this detector centrally in the installation.
4.
Either wait 15 minutes for the network to automatically close itself or close the network by pressing and
holding the button on any of the detectors until it
beeps twice.
5.
Do not power down any of the detectors for at least 10 minutes after the network is closed.
- Uploaded
