Honeywell 5811: Program to L5210
Related Products


Related Categories
Description
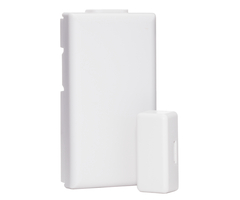
The Honeywell 5811 door and window sensor is a wireless sensor used on any door or window to detect intrusion. As with any sensor in your system the 5811 must be activated and enrolled in your control panel.
This video will walk you through the procedure for enrolling the Honeywell 5811 using the L5210 control panel. While the process is fairly straight forward, you should follow along with the video to ensure proper set up.
Before you can enroll the sensor into the system it must be powered up. The 5811 wireless door and window sensor uses a CR2032 3-volt battery for power. Follow along with our video to see how to open the sensor and insert the battery.
You should note that the CR2032 is a flat battery with each of the entire sides being positive or negative. As the video will show, you need to make sure the negative terminal is aligned with the negative marking on the battery slot of the sensor.
Once the battery has been installed and the sensor cover replaced, you will need to program the control panel to see the sensor and begin monitoring.
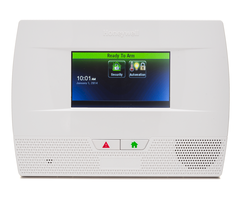
To access programming on the L5210 control panel, start from the home screen and select “Security” then press the more button on the bottom of the screen and finally “Tools”. You will be prompted for the installer code.
The video will show you how to enter the menu and the code to gain access to the tools menu. When you are in the tools menu, go through the menu to “Programs” and then “Zones.” You will need to enroll the sensor to the system by auto enrolling.
The video will show you how this is done. To auto enrol (which is the easier and more precise method) enter the serial number menu screen. You will need to activate the sensor a total of three times to auto enroll.
This is done by placing the magnet against the read switch and pulling it away. Each time you do this the control panel will beep, alerting you that it has been read at activated. The second activation will populate the serial number and the third will lock in the information.
Follow the video to learn how to set the zones, zone type and the chime mode. You also want to select the supervision. This should be supervised at all times. When it is, every 12 hours the system will check that the sensor is active and reporting properly.
Once all the settings are correct save and exit the programming section. You will save and then press the back button until you see a pop up warning to allow back to programming. As the video warns, you must hit yes on this warning.
Once you have exited the system you can test you new Honeywell 5811 door and window sensor to ensure it functions properly.
Transcript
Hi, DIYers. This is Frank at Alarm Grid. Today we're in the Alarm Grid Lab working on the Lynx Touch L5210 Alarm System. This unit will replace the previous L5200 Lynx System which actually comes along with our wireless security system kits.
In those kits, we also have the 5811 Wireless Door Window Contact. This is our favorite contact for its versatility as far as the install goes. It's very slim profile. It works very well on any door or window. You want to keep in mind with this unit, or with any wireless door window contact in general, you want to stay away from metal. So if you do have any metal doors or windows, you want to get some separation. The included foam adhesive tape is very thin. Sometimes some thicker tape can add some separation and offer some better dealing with issues of interference.
So today we're going to program the 5811. We're going to start by opening the box which it comes in, and we're going to pop the tab. I find that a flat head screwdriver works best. We're going to insert the flat head, pop the sensor. We're going to take our Panasonic 2032 3 volt coin cell battery, and we're going to insert that into our contact.
- Uploaded
