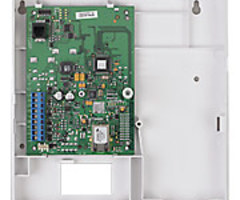
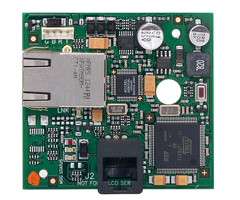
Honeywell 7848i-L Quick Install Guide
Related Products


Related Categories
- Alarm Monitoring Communicators
- Cellular Alarm Communicators
- Dual-Path Alarm Communicators
- Internet Alarm Communicators
Document Transcript
800-05885 2/10 Rev. A
Internet Communications Module
This supplement provides updated instructions for installing the Alarmnet 7847i-L in the LYNX PLUS Series Controls and an alternate configuration for the LYNXR-2 Series Controls.
7847iAlarmNet ® 7847i-L
Installing the 7847i-L in the Lynx Plus Series Controls
The 7847i-L Internet Communications Module must be programmed with the 7720P before it can be mounted in the LYNXR-2 OR Lynx Plus Series case.
Ethernet Connections
UL
1. For UL installations, the Cat. 5 Ethernet connection between the 7847i-L and the router cannot exceed 12 feet with both the 7847i-L and the router located within the same room. 2. A UL listed cable/DSL router suited for the application should be used.
Electrical/Ethernet Connections 1. Connect one end of the Ethernet cable (Category 5) to the RJ45 Ethernet connector and the other end to a cable/DSL router as shown in Figure 1. 2. Connect the provided ECP Power/Communications cable PN 900-00801 between the device and the ECP/Communications receptacle on the Lynx Plus as shown in Figure 1. 3. When programming the module, plug the programming cable from the 7720P Programming Tool into the programming connector on the 7847i-L module (Refer to the 7847i-L Installation Instructions for Programming Details.)
LEDs GRN YEL YEL RED
Xmit Shift
BS / ESC /
A
1
D
2
E
B
3 6 9 #
X Enter F
C
4
N /Y Shift S
5
T
7
Space
8 0
7720P PROGRAMMING CONNECTOR REGISTRATION/ TEST ALARM BUTTON
RJ45 (FOR INTERNET CONNECTION)
TO ROUTER
ETHERNET CABLE CABLE CONNECTION TO LYNXR-2/LYNX PLUS PC BOARD
7847i-L-002-V1
Figure 1 – Electrical/Ethernet Connections
Installing the 7847i-L in the Lynx Plus Series Controls
Mounting and Connecting 1. Install the module into the Lynx Plus Series back case as shown in Figure 2 and secure it with the two provided screws. 2. Connect the provided ECP Power/Communications cable PN 900-00801between the module and the PC board as shown in Figure 2. This cable provides DC power and ground and data in/out connections for the module.
LOCKING TABS TAPE BACK CASE SCREW (2) ECP/POWER CABLE P/N 900-00801
TIE WRAP MOUNT
WIRE STRAIN RELIEF CLIP
ECP POWER/COMMUNICATIONS RECEPTACLE
FRONT CASE
7847i-L-023-V0
Figure 2 - Mounting the 7847i-L
Cable Routing 1. To ensure proper communications, route the cables as shown in Figure 3.
WIRE ROUTING TUNNELS TIE-WRAP POINT
BACK CASE
7720P PROGRAMMING JACK
MOUNTING HOOK TIE WRAP MOUNT
MOUNTING HOOK WIRE STRAIN RELIEF CLIP BATTERY CABLE TIE WRAP
ECP/POWER CABLE P/N 900-00801
FRONT CASE
7847i-L-022-V0
Figure 3 – Lynx Plus Cable Routing
Installing the 7847i-L in the LYNXR-2 Series Controls
Mounting and Connecting 1. Install the module into the LYNXR-2 Series back casee as shown in Figure 4 and secure it with the two provided screws. 2. Connect the provided ECP Power/Communications cable PN 900-00801between the module and the PC board as shown in Figure 4. This cable provides DC power and ground and data in/out connections for the module.
7720P PROGRAMER CONNECTION SCREW (2) RJ45 (FOR INTERNET CONNECTION) COMMUNICATION PORT FOR INTERNAL 7847i-L MODULE ONLY
ECP/POWER CABLE P/N 900-00801
7847i-L-017-V2
Figure 4 - Mounting the 7847i-L
2 Corporate Center Drive, Suite 100 P.O. Box 9040, Melville, NY 11747
Copyright © 2010 Honeywell International Inc. www.honeywell.com/security
Ê800-05885xŠ
800-05885 2/10 Rev. A
- Uploaded
