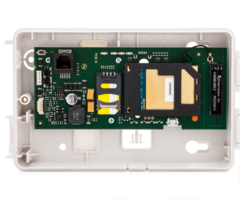
Honeywell GSMX, GSMX4G and GSM Quick Installation Guide
Related Products


Related Categories
Document Transcript
GSMX GSM Communicator – Quick Installation Guide
For Online Support visit: http://www.security.honeywell.com/hsc/resources/MyWebTech/
General Information
The GSMX GSM Communicator (the module) easily connects to your security system's control panel and sends alarms and messages to AlarmNet for subsequent transfer to the central monitoring station. For most installations it can be mounted directly on the control panel. NOTE: This guide addresses a simple installation using default programming values where possible. For detailed information on all aspects of this product, refer to the GSMX GSM Communicator Installation and Setup Guide. ! The GSMX requires an AlarmNet account. ! The GSMX is for control panels that support LRR-ECP communication. Standby current is 25mA, and Transmit Current is 200mA (Average). REMOTE SERVICES Honeywell offers secure web based services that enable users to remotely monitor and control their security system. These web services enable users to: monitor and control their security system from a website, receive email and text message notifications of system events, and control the system and receive confirmations using text messages. Dealers can enroll their customers for "Remote Services" by using the AlarmNet Direct website. Once enabled, the specific programming fields associated with these features can be programmed into the communications device either remotely using the AlarmNet Direct website or locally using the 7720P programming tool.
REG TX/RX FAULT SIGNA L
1. Mount and Wire the Module
1. Ensure power to the control panel (both AC and battery) is off, then remove a knockout on the top right. 2. Open the GSMX cover and remove the bottom knockout for the threaded mount. Remove the Hole Cap attached to the plastic, and snap it into the top of the enclosure. 3. Install the threaded mount so it snaps into the plastic retaining tabs. Mount the GSMX assembly on the cabinet's knockout, and fasten with the locking nut. 4. Connect the ECP cable to the GSMX circuit board and thread the wires through the threaded mounting adapter. 5. Power up the system.
ECP Cable
Control Panel Cabinet
Threaded Mount
GSMLX-Quick Guide
To ECP Bus on control panel circuit board.
PANEL DATA IN - Green GND - Black AUX PWR (+12V) - Red PANEL DATA OUT - Yellow
2. Activate, Program, and Register the Module
Go to: https://services.alarmnet.com/AlarmNetDirect/ Please have the following information available: ! Primary City ID (two-digit ! Primary Subscriber ID (fournumber) digit number) ! Primary Central Station ID ! MAC ID and MAC CRC number (two-digit hexadecimal (located on outside of box and number) on label inside module). 1. Log into the AlarmNet Direct website. 2. From the navigation bar, select Program New Device GSM / I. 3. Enter the requested data, and select Enable Remote Services if desired, then click Done. 4. From the navigation bar, select Show Programmed Devices GSM / I. 5. From the Actions pulldown menu select Edit, then click GO. Accept all default settings except the following prompts which need to be set. Device Address Remote Access (if desired) Keypad Address Keypad Type Multimode (for email notifications) Multimode address
6. Then choose; Save and Transfer Data to Device. Click Exit to proceed. 7. From the Actions pulldown menu, select Register, then click GO. 8. Exit AlarmNet Direct.
2 Corporate Center Drive, Suite 100, P.O. Box 9040, Melville, NY 11747
Ê800-04773-1YŠ
800-04773-1 9/09 Rev. A
Copyright" 2009 Honeywell International Inc. www.honeywell.com/security
WARRANTY For the latest warranty information go to: http://www.security.honeywell.com/hsc/resources/wa/
- Uploaded
