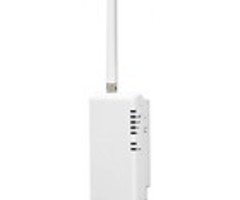
Telguard HomeControl Flex With DSC Power Series Neo - Install Guide
Related Products


Related Categories
Document Transcript
Rev
3.0
1
© 2016
Telguard
HomeControl Flex
Installation: TG
-1 Express with DSC Power
Series Neo
The
following information is to serve as a guide for installations of TG
-1Express devices enabled for
HomeControl
Flex service
with the DSC Power Series Neo
V1.0
and the latest
V1.2
+
. The configuration
shown in the diagram below is an example of how a p
roper installation could look. The output and zone
could differ from the diagram, without changing the outcome of the installation.
Installation Diagram
STC
2
STC
2
STC
1
STC
1
TRIP IN
GND
DC
+
D1
D2
D3
D4
D5
D6
D7
D8
1: Ring return
2: GND
3: STC
4: Ring
5: Tip
6: STC
7: DC
+
8: Tip return
Note:
Although a resistor is not depicted here, one may be required by the Keyswitch
zone in accordance to the
Panel’s specifications. For more information, please refer to the Panel’s Installation and/or Programming Manuals.
Rev
3.0
2
© 2016
Telguard
Programming Steps
After getting into configuration mode, check/do the following:
Program Keyswitch
zone
:
Keypad
Display
Enter on Keypad
Comments
Enter Section
___
001
*
Zone 1.
* moves into
next section.
Enter Data
066
# #
066
is for Zone Type
Momentary Arm. #
to return
to Enter Section.
# again to go
back to main menu.
Program Output
:
Keypad Display
Enter on Keypad
Comments
Enter Section
___
009
*
To program Output 1.
Enter Data
115
# #
115
is Armed status.
# to return
to Select
Section.
# again to go back to main menu.
Enable Open/Close Reports:
Keypad Display
Enter on Keypad
Comments
Enter Section
___
308
Event Reporting
Enter Section
___
201
201 enters Open/Close Events section.
Toggle Option
1 for Y/N #
User Closing. Enabled
(section is enabled
when Y is displayed)
. # to return to
Select Section.
Move to Next Section
>
> Moves to User Opening
section.
Toggle Option
1 for Y/N
# #
User Opening. Enabled
(section is
enabled when Y is displayed)
.
# to
return
to
Select
Section.
# again to go
back to main menu.
Enter Section
___
311
To program
partition
1 call direction.
Enter Section
___
003
003 enters
partition Opening/Closing C
all
direction.
Toggle Option
1 toggles
Receiver
#1 to Y
/N
Opening/
Closing Call Direction
for
Receiver #1
. Enabled
(section is enabled
when Y is displayed)
.
Set
to
Contact ID:
Keypad Display
Enter on Keypad
Comments
Enter Section
___
350
*
Program Alarm Format.
* moves to Rc #1
.
Toggle Option
> toggles to
Contact ID Auto # #
Option on the screen should read Contact
ID Auto. # to return
to
Select
Section.
#
again to go back to main menu.
Rev
3.0
3
© 2016
Telguard
Optional Forced Arming:
Keypad Display
Enter on Keypad
Comments
Enter Section
___
002
Zone attributes
Select zone
001 *
Select any zone you want to force arm in
this option
Toggle option
> right to option 5
This option is for force arming. Repeat for
all zones that apply.
Activate option
* to toggle Y or N
Y is for yes and means the option is on, N
for no means the option is off.
Reference Note
For CP01 compliant panels, the
panel
will
need to detect
an exit delay zone opening
in order to
Arm
-Away. Please
see
the
“TG
-1X
HC Flex
- DSC Neo CP01 Addendum
” document in the Ma
nuals
section for a work
-around to Arm Away.
- Uploaded
