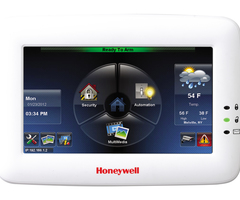
Tuxedo Touch Remote Services
Related Products


Related Categories
Document Transcript
Tuxedo Series with Remote Services – ADDENDUM
ADDENDUM TO: Tuxedo Touch™ WiFi Installation Guide and User Guide (800-10300 & 800-10301 dated 11/11)
and Tuxedo Touch™ Installation Guide and User Guide (800-08221 & 800-08091 dated 7/11)
SUBJECT: Total Connect™ (Remote Services) Integration with Tuxedo Touch™ and Tuxedo Touch™ WiFi
Keypads
Tuxedo Touch™ and Tuxedo Touch™ WiFi with Remote Services and Additional Features
NOTE: It is assumed that Z-Wave® devices have already been enrolled in Tuxedo. If not, refer to the Automation section in the Installation Instructions for details on enrolling Z-Wave devices and creating scenes. It is also assumed the installer has an AlarmNet Direct account and is familiar with Total Connect. If not, contact an AlarmNet representative to open an account.
General Information
The following features have been added to the event triggers and conditions when defining Scenes: • Zones • Security • By Clock Time feature • Sunrise/Sunset Time feature • Weather Display Enable/Disable See the section on “Additional Features and Updates” later in this document. The Tuxedo Touch™ and Tuxedo Touch™ WiFi (herein referred to as Tuxedo) now supports Remote Services for controlling Z-Wave devices and scenes remotely from an associated Total Connect account (Z-Wave devices include lamp modules, dimmer modules, door locks, and thermostats). The following describes the related features and caveats. TM • Tuxedo [automation] can now be controlled from a smart phone, i-Pad , AndroidTM Tablet, Blackberry® or PC using Total Connect • Tuxedo includes webpage support for iOS6, IE8 and IE9. The following table summarizes the relationships between Total Connect scenes and Tuxedo scenes: Scenes created in Total Connect Scenes created in Tuxedo Controlling Device View Edit Scenes View Edit Scenes Total Connect yes yes no no Tuxedo yes no yes yes • For troubleshooting purposes, Total Connect server information (including IP addresses) can be viewed on the Total Connect Server Setup screen by pressing the TC Server Info button (see next page).
Remote Services Setup/Activation
NOTE: If used for Remote Services, Tuxedo should NOT be configured as a secondary controller. To use Remote Services with Tuxedo, do the following: 1. Verify the Tuxedo is connected to the Internet via WiFi or its Ethernet connector. NOTE: Tuxedo WiFi is not compatible with Linksys Cisco routers Model: WRT4GL v1.1 Wireless-G broadband router. 2. Using AlarmNet Direct, enroll the communication device and Tuxedo keypad, and enable Total Connect usage. NOTE: After enabling Tuxedo automation, the Tuxedo Keypad must be reset. The screen displays “using Tuxedo Automation Module” (Yes /No); select Yes. You will need the Tuxedo keypad’s MAC ID and CRC number, which can be found on a label on the back of the Tuxedo keypad, on its carton and on Tuxedo’s System Information screen. NOTE: Only the Primary keypad (if there is more than one in the same installation) can be enrolled into Total Connect. 3. Open a Total Connect account for the user if an account does not already exist. 4. Enable automation devices to be controlled by Total Connect. See “Enabling Devices for Total Connect “on the next page. After devices have been enabled for Total Connect, follow the Total Connect prompts to synchronize the data with Tuxedo. IMPORTANT: Syncing is required before the enabled devices will display in Total Connect.
Controlling Automation (Z-Wave) Devices Remotely
Use Total Connect to control Z-Wave devices (lamp modules, dimmer modules, thermostats, etc.) from a smart TM phone, i-Pad , AndroidTM Tablet, Blackberry® or PC. 1. Access the Total Connect account and navigate to the Automation section of the dashboard. 2. Select a displayed device and click the desired action. Refer to the Total Connect online help guide for further details on controlling Z-Wave devices.
Typical Total Connect Automation Screen
Creating Scenes in Total Connect
Use the Automation section of the dashboard in Total Connect to create up to 20 scenes. Refer to the Total Connect Online Help Guide for further details and device limitations for creating an automation scene. 1. Access the Total Connect account and navigate to the Automation module. Click Create New. Enter a name for the scene, select an icon, and then click on the check boxes for the various device actions desired for that scene. Set the thermostat, if used, to the desired mode and/or temperature for that scene. Click Save when done. NOTE: Scene triggers and actions created in Total Connect can be edited only from Total Connect. Scene conditions cannot be programmed from Total Connect. 2. After scenes have been created, follow the Total Connect prompts to synchronize the data with Tuxedo. Syncing is required before scenes created in Total Connect will display in Tuxedo.
“Create New” Button from Total Connect Automation Screen
Total Connect Automation Scene Definition Display
Viewing and Controlling Total Connect Scenes from Tuxedo
Use the Scenes icon to display and control scenes that have been created in Total Connect. 1. From the Home Screen, press the Automation and Scene Setup icons, then press the Remote button. The screen displays a list of scenes created in Total Connect. NOTE: The Local button allows you to view a list of scenes created in Tuxedo, and enable/disable those scenes. 2. To control a Remote Scene, select the desired scene, then click the appropriate action (ex. Run).
Enabling Devices for Total Connect
Remote Scene Setup Screen
1. From the Home Screen, press Automation > Z-Wave Setup; the Z-Wave Device Management screen is displayed. 2. Press the TC Enable icon; the Z-Wave Device Management For Total Connect screen is displayed. 3. Select the device that you want to enable/disable in Total connect. Note: Some devices may need to be enabled after a software upgrade. 4. Press the Save icon when done. 5. After devices have been enabled for Total Connect, follow the Total Connect prompts to synchronize the data with Tuxedo. Syncing is required before the enabled devices will display in Total Connect. NOTES: 1. Device IDs for Z-Wave devices could be different on Tuxedo and Total Connect web pages. 2. Total Connect supports the first 40 switches, 3 thermostats, and 4 door locks that are enrolled in Tuxedo.
Z-Wave Device Management Screen 2
Z-Wave Device Management Screen For Total Connect
Total Connect Server Screen for Troubleshooting
The TC Server Info screen displays the current server information and Z-Wave device status. This information is typically used for IP connection troubleshooting purposes in collaboration with a service technician. To access Total Connect Server Information and Z-Wave Status from the Tuxedo keypad, do the following: 1. From the Home Screen, press the Setup icon and then press System Setup > CS Setup; enter the installer code (if required). Press the TC SERVER INFO button. 2. The Total Connect Server Setup screen is displayed with the current Server information and Z-Wave Status (enabled/disabled). NOTE: These fields are for reference only and cannot be edited. 3. Press the Connect icon to test the connection to the AlarmNet servers.
Screen Showing TC Server Info icon
Server Information Screen
Additional Features and Updates:
Scene Options
Feature Zones Feature Description When defining a local scene, a zone event can now be set to trigger a scene. Set the Condition or Trigger ‘event type’ by pressing the Zones button and from the drop-down menu select the zones to be controlled in this Scene. Press the Restore, Alarm or Fault button. Press Save when done. Notes: • Do not use 24 hr silent zone restore/fault in the pre-condition and trigger fields on commercial panels. • Scenes cannot be triggered when using panic zones 995, 996, and 999 on commercial panels and panic zones 95, 96, and 99 on residential panels. Security Feature When defining a local scene, the Home Partition in the Security feature can be set in the DISARM, NIGHT, AWAY (triggers upon arming away) STAY, AWAY SECURED (triggers when exit delay has expired) and ALARM modes. Select the Security button, and in the Home Partition field, select the desired mode. Press Save when done. On for Time When adding a Scene, the Action for lights can now be set to activate for a specified period of time. When defining the Action for a scene, press the Light button and select the light number from the drop-down menu. Feature Press the ON FOR TIME button and enter the hour and minutes the light should remain on. Press Save when (for lights) done. NOTE: This option is available only for selected lights. It is not available for the “All Lights” option. Sunrise/Sunset When adding a Scene, the Time can now be set to execute automatically at sunrise or sunset. If desired, press the Time button and then press the By Clock button to scroll between the Sunrise or Sunset options. Time Feature (By Clock Button) Press Save when done. NOTE: This feature is dependent on the “Region” selected in the “Weather Forecast” section and requires internet access for accuracy.
Weather Display Enable/Disable
The weather feature can be completely disabled from the Home screen if Tuxedo is used in an area not supported by the weather service or the user does not want to see weather on the Home screen. 1. From the “Home” screen, press Setup > System Setup > CS Setup and enter your Authorized Code, if required. 2. Press the Options icon and select the Weather Forecast option to turn the weather feature on or off; press Apply.
3
Device addresses for use with (RIS) Remote Interactive Services
Tuxedo ECP Address and RIS Automation Address Selection After initially powered, the "Set ECP Address/RIS Automation Address Selection" screen is displayed. If the system is using only one keypad, leave the ECP address set to 1 and press Apply. If there is to be more than one keypad, power-up each keypad one at a time, and set its address to one of the addresses you enabled in the control panel. If using Remote Services, set the RIS Automation Address to the appropriate RIS address for using Total Connect. Refer to the Control Panel Installation Instructions for additional information. NOTE: The Tuxedo ECP address (1-30) is defaulted to 1 and the RIS Automation address (1-30) is defaulted to 25. This screen can also be accessed by pressing the following icons: Setup > System Setup > CS Setup > ECP Address. IMPORTANT: In order for Tuxedo’s automated functions to fully operate, the control panel must be enabled for RIS.
Updated Electrical Specifications
Electrical Specifications:
Backlight OFF, Sound OFF, LAN ON, Cat 5/6 connected to: Backlight ON, Sound OFF, LAN ON, Cat 5/6 connected to: Backlight ON, Sound ON, LAN ON, Cat 5/6 connected to:
Tuxedo
9.6VDC 170mA 280mA 340mA 9.6VDC 170mA 280mA 340mA
12VDC 140mA 225mA 260mA 12VDC 140mA 225mA 260mA
13.8VDC 125mA 200mA 240mA 13.8VDC 130mA 200mA 250mA
Electrical Specifications:
Backlight OFF, Sound OFF, WIFI ON Backlight ON, Sound OFF, WIFI ON Backlight ON, Sound ON, WIFI ON
WIFI
For additional information, visit the Tuxedo Toolkit at: http://www.tuxedotouchtoolkit.com/index.html.
Ê800-13779ÀÀÀ†Š
800-13779 4/13 Rev. B
2 Corporate Center Drive, Suite 100 P.O. Box 9040 Melville, NY 11747
Copyright © 2013 Honeywell International Inc.
www.honeywell.com/security
- Uploaded
