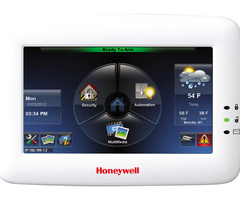
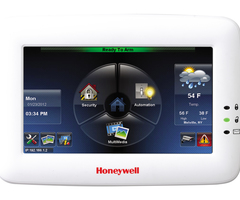
TuxWIFI as Secondary Controller - Z-Wave Device Name Sync
Related Products


Related Categories
Document Transcript
-
1
-
Updated:
5/16/18
Company Internal
Step
-
by
-
Step
How to perform the Z
-
Wave Device Name sync on the
TuxWifi
(the secondary controller must
already
be included in
to
the
primary before this can be done
, they must also be on the
same WiFi
network
)
1.
From the home screen
of the Secondary Controller
“
Select
tools
”
.
2.
Select
“
System
”
.
-
2
-
Updated:
5/16/18
Company Internal
Step
-
by
-
Step
3.
Select “
Tuxedo SYNC
”.
4.
Select “Discover
Tuxedo
”
.
Note: The Primary and Secondary controllers must be on
the
same WiF
i network.
-
3
-
Updated:
5/16/18
Company Internal
Step
-
by
-
Step
5.
If no device(s) are found, they may be added
manually
.
Press “ADD” in the lower left of the screen.
6.
Enter the IP Address an
d Mac of the Primary Controller.
The IP address can be found on home page bottom left.
The MAC can be located by
pressing the “Tool” icon, then
. Once the information has been entered,
press
“Save” located in the lower left corner.
Note: The MAC must be entered in all CAPS.
-
4
-
Updated:
5/16/18
Company Internal
Step
-
by
-
Step
7.
If the Primary Controller is on the
Wi
-
Fi network
.
Its
information will be displayed in the device list.
8.
Select the Primary controller from the device
(
s
)
displayed.
The Primary Controller can be determined either by the IP
Address or Mac Address. The IP address of the Primary
Controller can be found
on the bottom left hand corner of
the home screen. Then press “Sync Z
-
Wave Device
Name.
-
5
-
Updated:
5/16/18
Company Internal
Step
-
by
-
Step
9.
Select
“Yes” to synchronize the device name(s) with the
Primary Controller. If a pop
up error window occurs
indicating
the “Selected tuxedo device is not in n
etwork.
Please check the
network setup of primary device
”
t
hen
the Primary controller is not on the same Wi
-
Fi network as
the secondary or the Primary and Seco
ndary controllers
are no longer communicating on the Z
-
wave network.
There m
ay also be settings within the R
outer that need to
be enabled to allow devices to be discovered
. T
h
is
option
in the
router may also be referred to as: Routing
Discover,
Network
Discover
, P2P
-
Discover,
Neighbor Discover,
P2P, Application Discover, SIP
Pass
-
through
and SIP
ALG.
10.
If the
Z
-
Wave
name
sync
is successful you will receive an
“Ok”
option on the screen. S
elect “Ok” and the names of
the
Z
-
wave devices on the Secondary will now match that
of
the Primary.
-
6
-
Updated:
5/16/18
Company Internal
Step
-
by
-
Step
11.
You can test the IP connection
to the gateway (gateway
is the ISP that gives
access to the entire Internet)
by using
the built in
“
Sync IP
to Server tool
”
. From the home
screen, select
the “
Tool” icon in the lower left corner. Then
select “network”
, “
Sync IP to Server.”
-
7
-
Updated:
5/16/18
Company Internal
Step
-
by
-
Step
12.
When performing the “
Sync IP To
S
erver” test, the test
should be ran on both Primary and Secondary
Controllers. You will see the following screens to
indicate a successful test. If the test fails, the WiFi
internet connection to the Primary and Secondary
Controllers
should be checked. From the home screen
ensure there is an IP address in the lower left corner
and you have signal bars. Press the “Tools” icon, on the
second screen choose the “
” icon and ensure the
Controllers in the top left corner ind
icate “Connected
to”
the selected
WiFi network.
-
8
-
Updated:
5/16/18
Company Internal
Step
-
by
-
Step
13.
To test the Z
-
wave network status, from the home screen
select
“Automation”, then Z
-
wave setup.
14.
Select “SCAN”, all devices on the Z
-
wave network
should have the status of “Success”. If the Secondary is
showing “Failed”, the Z
-
Wave name Sync will fail. You
must correct the Z
-
wave communication between
Primary and Secondary
to complete the Z
-
Wave name
Sync
.
- Uploaded
