Adding Wired Motion Detectors to the Vista 20P
Related Products


Related Categories
Description
http://alrm.gd/get-monitored.
Transcript
Hi, DIY-ers. Joe from AlarmGrid. And today, we're going to show you how to wire motion detectors to the panel. We're also going to show you how to connect two motion detectors to the same zone. Now, this is two-wired motion detectors on one zone. This is a useful technique that you can use. It works on just about any wire alarm system. And the reason that it's useful is that you can have two separate motion detectors. They'll both work as alarm zones, and they connect and only occupy one zone on your system. The downside to this is that if either motion detector triggers, it's not going to tell you specifically which motion detector went off. So you won't have that fine-grained information about exactly which motion detector triggered the zone, but you can save a zone by attaching two or more motion detectors to one zone. So let's show you how to wire up the motion detector in the first place, and then we're going to join it to another motion detector and have it all go back to the one zone.
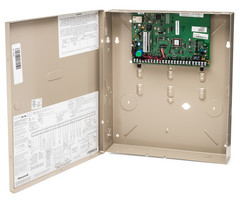
So we have a VISTA-21iP panel right here and we've taken most the wires off to make it really simple and so that you can see where we're going to make our connections. And I have this wire set up for later but if you can see, we have a four-wire connector right here. We have the black and the red on a 12-volt power. And then we have the yellow wire on the zone 1 plus.
Now, if we're going to just connect one motion detector, I'm going to connect the other zone wire to the Z1 minus. And this is the first zone on the panel. So I'm just going to screw this in. And then at the motion itself, this is the DSC LC-151 motion detector. This is a front plate on it. I've taken it off because we have to get to the terminals. So in this motion, we actually have a port where we can insert the wires from the back and to, so I'm just going to slip this through. And we're good to go.
And you're going to want to make sure that everything is off before you do this as you will be working with the power connection for the motion and you don't want to short anything. Our system is fully powered down. So now the wires in here. So if I only wanted to connect this one motion, you can see we have plus-12 volt and a minus-12 volt. So that would be our power connection. So I'll just throw these wires in real quick.
Then if we wanted this is the only motion on this particular zone, we would just have to wire one of these to the common and one to the normally closed. So I'm going to put the green on the common, and the yellows on the normally closed. And now, we have our single motion detector connected. You can add a resistor to this motion in the line on the zone wires if you want to supervise it. But for most single device security installations, you don't have to worry about that. We are going to add a resistor onto our second motion when we connect that. It's always a good idea to add a resistor on your zonal loop when you're doing two motions on a one zone because there's more than one device on the zone and you're going to want to know if something happens with the wiring.
So to prepare for our second motion, we're going to have to remove one of these wires. And as you can see, we have our green on our Z1-minus. And again, this doesn't really matter right now because it's just a zone terminal, so the polarity, it doesn't have anything to do with power. Well, let's just keep continuity going throughout the whole loop. So if we have our zoom in on our minus, I'm going to undo our yellow from the Z1-plus. So now, when the zone connection comes back from our second motion, it's actually going to land on this first zone terminal. So in our motion detector as we've disconnected the yellow, let's disconnect the yellow from here. So we just have our green wire connected to the common on the motion and to the Z1-minus on our panel.
So now we have to take one wire from this motion and get it over to the second motion. We have another DSC motion right here. This guy's called the Encore EC-301. It's not a wired motion. I've taken the cover off so that we can go to our terminals. So I have another wire setup right here. I'm going to take this guy, I'll slip it through this port, and I'm going to connect this wire to our normally closed wire that we took the other wire off of. Seal it tight. Great, so now this motion is pretty much all set. So I'm going to put this guy down, I'm going to come over to our second motion.
Now when you have a second motion, it will need to get power from the panel somehow. What I've done is I've actually made another power whip right here for this second motion just to show that we're going to connect it. If you can't get a wire back to the panel itself, you can always jump off of the other motion to get your power, just so you know. So let me insert this in the back. And I'll make my power connection. I can see I have a 12-volt and a GND. So the 12-volt is going to be the positive and the GND is going to be the negative.
So I actually was able to get pulled the wires in both at the terminals, just going to tighten it down. Now, as this is the second motion, we have to connect the wire from the normally closed on our first motion, and then we're going to have to connect the wire from this motion back to our panel, back to our open zone terminal. So let me slip the wire from the first motion in this guy, and this is coming from the normally closed. I'm to connect this to the common.
And then from this motion, I have another wire set up. And on this one, I've installed a 2K resistor in line so that this whole loop throughout our motions will be supervised. If anything happens to the wiring connections on these motions, the system's going to see that the resistance got interrupted and it's going to tell me that there's an issue, which is again, is very helpful when you're doing these sort of setups that have more than one device because you're going to want to know if something goes wrong.
So this one, I'm going to slip this in through the back. And I'm going to connect this wire to our normally closed. Wire connections are tight. Then over here, we're going to take-- I've attached the resistor to our wire with a dolphin connector. These are really good to use you just twist the wires together, slip it in, crimp it, and then it gives you a nice secure connection. I'm going to insert this in the zone 1, and then we can pop our covers back on.
Then we would have to program to make them work as we want, but we have them both wired up and ready to go. Now on this system, after we program it, these two motions are going to both function on the same zone. So they'll both be able to trigger an alarm. But if one of them goes off, we won't know which one actually triggered as they're both going back to the same zone terminals.
As a side note, whenever you do install devices like this or devices in general that have a resistor, it is a recommended practice to put the resistor at the device that's furthest away from the panel. This will give you true supervision of the wiring for that zone. Reason being, wherever you put that resistor, that's how far the supervision goes. So if we install the resistor on the terminals on the panel, we won't know if something happens to the wire integrity on the line. If we put the resistor where the device is, that resistance is going to be on the whole line all the way back to the panel. And if anything happens that wire, that'll tell us that there's a trouble with that zone.
So if we go and look at our stuff over here, we have our two motion detectors. Let's say that this motion is the one that's furthest away from the panel, and this is the one that we want to use then to supervise our wires back to the panel. All you have to do to do this is take off one of the legs of the zone wiring, pop it out, take your resistor, splice it off, and then ideally, you want to use a B-connector or some kind of secure connector to really make that connection nice and tight. Crimp it down. Now our resistor is attached very securely. Fold the wires so they fit in your motion, and then take your other leg of the resistor, and we're going to slip that into the terminal for the zone where we took the other wire out of. If you do this when you first install the motion, you don't have to remove the wires and go through the headache that I'm going through. So that's the recommended way to do it. But either way, it works.
Now the resistor at the motion that's furthest away from the panel, we're going to have supervision from that motion all the way back to the panel, which is the best way to install a resistor. A lot of times, you may find that it's just not convenient or that you're not able to get to that device. Remember, the device is made, doesn't really fit resistor easily. If you do put it on the panel, it will work. Just know that that supervision isn't going to be supervising the whole line.
That's how you wire a motion detector to your wired alarm system and how you connect a second one in series so you can have two motions on zone terminal. If you have any questions about this process, give us a call at 888-818-7728. Head over to our website, www.alarmgrid.com or send us an email to support@alarmgrid.com. If you like the video, feel free to subscribe. And if you want to be notified when we post future videos, hit the notification button below, and we'll send you an update when we do so. Thanks for watching and have a great day.
- Uploaded


