Enrolling a PowerG Smoke Detector Into A Qolsys IQ Panel 2 Plus
Related Products


Related Categories
Description
In this video, Joe from Alarm Grid discusses the proper method for enrolling a DSC PowerG Smoke Detector into a Qolsys IQ Panel 2 Plus System. This is done by putting the IQ Panel 2 Plus into its enrollment mode and then activating the enrollment function on the PowerG Smoke Detector to auto-enroll.
All versions of the Qolsys IQ Panel 2 Plus include a built-in PowerG daughtercard for supporting PowerG Sensors. These sensors can be used from up to 2,000 feet away from the IQ Panel 2 Plus when used in an open air environment. They also utilize 128-bit AES encryption to make them virtually impossible for others to hack or takeover. This also prevents RF jamming techniques that could successfully disable less secure sensors. That is why PowerG Sensors are seen as very useful devices for an IQ Panel 2 Plus.
In all cases, the PowerG Sensors auto-enroll by putting the system into its auto-enrollment mode and then activating the sensor's enrollment function. However, the process for activating the enrollment function on a PowerG Smoke Detector varies between different devices. Some PowerG Smoke Detectors enter auto-enrollment mode by pressing and holding an enrollment button somewhere beneath the device's tamper cover. Others have a battery tab, and they will enter enrollment mode as soon as the device is powered on.
Once the PowerG Smoke Detector has been acknowledged by the system, you will be able to configure its programming settings. This is an important step for making sure the system responds properly when the sensor is activated. After saving, you will want to test the sensor. The PowerG Smoke Detectors have test buttons for testing signal transmissions to the panel. But if you want to test for smoke detection, you will need canned smoke. Always place your system on test mode before testing a smoke detector.
Transcript
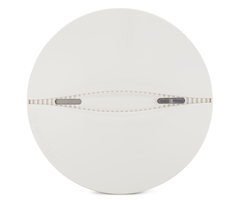
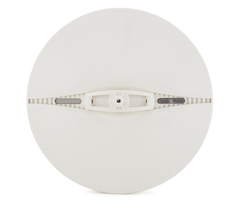
Hi, DIYers. Joe here from Alarm Grid. And today, I want to talk about and see how to enroll a PowerG smoke detector to a Qolsys IQ2 system. PowerG devices are great, in that they're encrypted when communicating between them and the alarm system that they're talking to. This encryption is going to help prevent anyone from spoofing the device or tricking the system into thinking something is going on that isn't actually occurring. Another big benefit of PowerG devices is the range that they can communicate to the system. It's very long. And in a lot of instances, it will be able to cover whatever location you're trying to install these devices in. So right here, we have our PowerG smoke detector. It looks like any other smoke. Nothing really stands out that's going to tell us it's a PowerG. And right here, we have our Qolsys IQ2 system. Now PowerG devices, as they are encrypted, when they program to a system they marry with that system, meaning that until they're factory defaulted, or until they're deleted from the system, you won't be able to enroll them into another system. So if you're doing a system take over, or if somebody gave you some devices that they're not using anymore that you're going to program in, they're finding that you're having some trouble programming them to the system. Do a factory default on the device and give it another shot. And you may find that that resolves the issue. Programming them into a system is as easy and simple as any other device on our IQ2. First thing that we're going to do is scroll down from the top. Click on Settings, Advanced Settings, 2222. Installation, Devices, Security Sensors, and then Auto Learn Sensor. So PowerG devices, not surprisingly, they do need their batteries installed to be able to enroll them to the panel. They also have-- or most of them have-- a button called an enrollment button that we're going to have to hit to actually get them to learn into the system. So first thing I'm going to do is take the back plate off. [LOUD BEEPING] It's going to beep. To stop this, I'm just going to pop the battery out, and then put it back in. [BEEP] Flip that down, and we're good to go. This button right here on the side, that's the enrollment button for this particular device. So I take my screwdriver. I'm going to press that button until I see this LED turn on. Once I see that, I'm going to let go. And we should get it to learn into the system. So let's take a look. There is the LED. I let go, and there's the sensor. To confirm, it says sensor 200-7-182. If you look at this sticker right here on the bottom, that's the serial number of the sensor, 200-7-182. This tells us that the system did hear this sensor and we're actually programming it in. Sometimes, if you have lots of sensors up, especially motion detectors, somebody walks in front of one of those or it triggers, you could get the system to hear something else that isn't the sensor you're working on. Looking and comparing the serial number from the sensor that you're trying to learn in to what shows up on the screen just tells you that you actually have the right one in programming right now. So if I click OK, we're going to get to our sensor programming menu. Sensor Type is a smoke detector. Sensor Group is smoke and heat. Our sensor serial number, or the DLID, is correct. And everything else works for us. If we did, we could change the sensor name. But I'm not too worried about that right now. After checking that all this is the way you want it, click Add New. That locks it into the system. And then you're good to go. The next thing that you want to do is do a test on your smoke detector before you install it to make sure it works, and you'll be all set. If you do have any questions, though, about installing PowerG devices, about the IQ2 or sensor programming, feel free to give us a call at 888-818-7728. Send us an email to support@alarmgrid.com, or head to our website, www.alarmgrid.com. If you did enjoy the video, feel free to subscribe. And if you want to be updated when we post future videos, hit the notification button below, and we'll send you an update when we do so. Thanks for watching, and have a great day.
- Uploaded

