Honeywell VISTA-20P, VISTA-15P, VISTA-21iPLTE: Custom Word or Phrase on Alpha Keypad
Related Products


Description
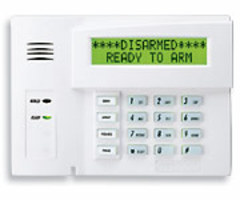
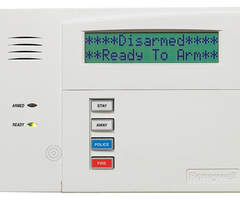
In this video, Michael from Alarm Grid shows you how to set a customized word or phrase on an Alphanumeric Keypad for a Honeywell VISTA P-Series Security System. This is a great way to add a touch of personalization to your VISTA System, as the message will be there to greet you whenever you use the keypad to operate the system. It will also be displayed on any other Alphanumeric Keypad that is on the same partition as the message that you adjust. For reference, the Honeywell VISTA-15P is a single-partition system that you can just treat as Partition 1, while the Honeywell VISTA-20P, VISTA-21iP, and VISTA-21iPLTE Systems include Partitions 1 and 2, plus a Common Lobby Partition.
The process for setting the customized word or message can be a bit tricky at first, but it really isn't so bad once you get the hang of it. First, you must get into programming by using the command [Installer Code] + [8] + [00]. Remember that the default Installer Code is [4112], so try that code first if you don't know what else it may be. Then get into the Alpha Programming Field with the command [*82]. Choose [1] for Yes, and then enter the two-digit code for the partition whose custom word you are editing. This is [11] for Partition 1, [12] for Partition 2, or [13] for the Common Lobby Partition. Then you will enter the custom word or phrase. The word or phrase can be up to 16 characters maximum. Use [#] plus a two-digit code for enter a character, with character codes ranging from [#32] to [#90]. For reference, letters start at [#65] for A, and run thru [#90] for Z. You can use [6] to move to the next character slot to the right, and [4] to move to the previous character slot to the left. Refer to the system's Installation Manual for a complete list of two-digit character codes. Once you have the desired word or phrase entered, press [8] to save. Then exit programming by entering [00] at the Custom? screen, followed by [0] at the Program Alpha? screen, and lastly [*99] to exit programming. The change will be saved, as long as you pressed [8] at the screen when entering the custom word or phrase.
https://www.alarmgrid.com/faq/how-do-i-adjust-the-default-screen-on-an-alpha-keypad-for-a-vist
https://www.alarmgrid.com/faq/how-do-i-edit-the-default-screen-on-an-alpha-keypad-for-a-vista-
https://www.alarmgrid.com/faq/how-do-i-change-the-default-screen-on-an-alpha-keypad-for-a-vist
http://alrm.gd/get-monitored
Transcript
Hi DIYers, this is Michael from Alarm Grid and today I'm going to be showing you how to set a custom word or phrase on your alphanumeric keypad or your alpha keypad for your Honeywell VISTA security system. So we have our alpha keypad here, our 6160RF, another example of an alpha keypad would be a 6160 or a 6160V, they're the ones that display the English text on here as opposed to a fixed English keypad like we have right here with the 6150 that doesn't give you as much. So if you go into programming on this one, it'll just say 20. You can't do deep level programming on that, you can't set a custom word or phrase. But we're not worried about that today, we're worried about the 6160RF or a different alpha keypad and where you can set a custom phrase. And we recently had the Easter holiday, so you see we have "Happy "Easter" on ours, but Easter is over now so we have to set a new thing, set a new message. So let's get into it. So the first thing we're going to do, we're going to get into programming. So get into programming with your installer code, which ours is at the default, and you should always keep yours at the default. 4112, and then we want 8-0-0, eight hundred, 8-0-0. And you see we get installer code 20, indicating that we are in programming. You see our fixed English keypad just has 20, so no-go on this one, but this one we can adjust the phrase. So what we want to do, we want to get into alpha programming, so we'll do *82, *82. And then it's going to ask us to program alpha, that is what we want to do. So we'll choose 1 for yes, and then we want custom words, and then we'll choose 1 for yes again. So now we're at this screen here, the custom screen. What we're actually doing, we're going to choose the partition where the keypad is assigned. So there's a different code for each one, a two-digit code for each partition. In our case, ours is on partition one. Your keypad might be on partition two, some people like to set it on a second partition, especially if you have multiple keypads. In which case, you would have to adjust the second partition one, or you might have it on the common lobby, but just to give you a run down, 11 is for partition one which is the one we're going to be adjusting, 12 is for partition two, and 13 is for that common lobby. So in our case, we're on partition one so we're going to do 11, 1-1, and you see we get our message, "Happy Easter." Now I'm going to go and clear it out one by one, we have to adjust the letters one by one. I'm actually going to go all the way to the end here, you by the way, you move to the right with six, and you move backwards left with four. And then you press # plus a two digit code to put in whatever character you want. You see there's even one for an exclamation mark. The letters start at 65 by the way, they run through 90. It's actually numbers 32-90 that you can be working with, but let's go all the way to the right here. We're just going to go all the way over, I'm pressing 6 over and over, and I went one too many times here, so I'll backtrack with four. And see the cursor is over the exclamation mark right now, so I can clear it out by pressing #32, and then I'm going to do that for all of them. So we'll press 4, #32. And it looks like that one didn't take so we'll try again, #32. There we go. 4. #32. And I'm just going to go through and clear all these. OK, so we have ours cleared out all the way now, and now we're going to put in our new custom word or phrase. We're just going to put in something generic today, we're just going to put in "Alarm Grid." So I actually have the numbers written down here because I couldn't memorize all of them. So I'm going to go through and do it. So like I said, you put in a # plus a two-digit number to enter in a character. And you do that one character at a time until you're all the way done, and then you press 8 to save, but I'll get to that at the end. You might have seen as we were speeding up going through it, I did #32 for a blank space, so the space also counts as a character. By the way, you're restricted to 16 characters maximum. So whatever word or phrase you want, make sure it can fit into 16 characters. So let's go ahead and get into this. So the first letter we want 65 for A. So we'll do #65 and then we have an A there. And then I press 6 to go to the next one. Don't forget to press 6 to move on to the next one. So you'll do #, the two-digit number, and then 6 to move on. So OK, we did A and then we're going to do 76, so #76 for the L. Let's keep going. So then we have 65 again, #65. And then I'm going to press pound there. So I'll press 65 again just so we stay there. I accidentally pressed #, but OK. Now we press 6 to go on. Make sure your cursor is in the right spot, that's what I was worried about there. OK and then we do #82 for the R, and it's 6 and then #82. That was the R again, I'm sorry. I'm looking at the wrong letter there. So all right, we'll do you #77, and that's an M. And now we're at the blank space here, so I just want to show you we could actually just press 6 to move on. But I do just want to show you if I press #32, that is the blank space. So I do have that on my code here. But we have it at a blank space, so we'll press 6 to go on. You could just skip the 32, but do what you will. And OK, so the next one, #71 for the G, and then press 6 again. And then #82 for the R. And then 6, and then #73 for the I, then 6 and #68. All right, we got it exactly how we wanted, "Alarm Grid," so that's good. So what we're going to do, we're going to save it by pressing 8. And we're back at the customer screen now, and what I'm going do, I'm just going to press 00 to exit, and then it's going to ask us again, program alpha. We're done programming so we're going to press a 0 and then it's going to ask us for our field. We're going to exit programming with *99. *99. And that's always how you want to exit programming so that way you don't get locked out of programming. So we have Alarm Grid ready to arm," so we set a custom word or phrase on our alphanumeric keypad for our Honeywell Vista system. This works with any P series system, make sure you're using a P series system. So if you have a 15P, a 20P, 21IP, 21IP LTE, all of those work great with this feature. And I just want to say one thing, when I was going through and chose the partition number, when I entered in 11, if you have a Vista 15P, that's only a single partition system. So you'll always enter in 11 at that screen. If you have a 20P or a 21IP, 21IP LTE, those like I said, they have the three partitions. So if your keypad's assigned to partition 2, then you would enter in 12 instead. Or if it's assigned to that common lobby, then you would enter 13. We have ours on partition one, so that's why we entered in 11. I just wanted to make that abundantly clear how we went and did it. So, that is how you set a custom word or phrase on your alphanumeric keypad for your Honeywell Vista P series security system, If you have any questions about the Vista P series systems, about alphanumeric keypads, or about alarm monitoring services, send an email to support@alarmgrid.com If you found this video helpful, make sure to give it a "thumbs up" below to like the video. And remember to subscribe to our channel for updates on future videos. We hope you enjoyed the video. Thank you.
- Uploaded


