IQ Panel 4: Adding a Zigbee Sensor
Related Products
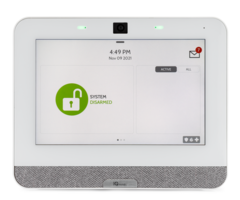
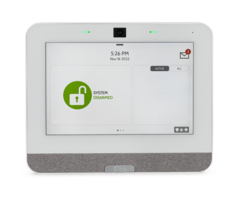
Description
In this video, Dylan from Alarm Grid shows you how to test the Zigbee daughter card through the Qolsys IQ Panel 4 test options.
Transcript
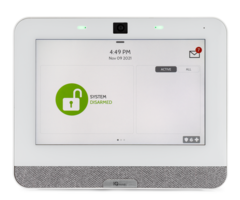
[AUDIO LOGO] Hey, DIYers. Dylan here with AlarmGrid. Today we're going to review how to pair a Zigbee sensor to your IQ4 panel. So just before we start, you will need the Zigbee daughter card installed into the IQ4 panel, or else this process will not work. The sensor will not learn in and it will not function. So just be sure you get that Zigbee daughter card installed first.
We do have another video that does review that card and how to install it into the panel, so be sure to check that out as well. OK. So we have our IQ4 panel and we have our Zigbee device. So this is the Xfinity XHS2-UE. It's a door contact sensor or a window contact sensor. And then we have our IQ4 panel here, which we've already installed the Zigbee daughter card into. If you want the model number for that card, it is the QC 0000E-840 And again, we have another video which reviews how to install that into the system.
Just real quick, I will go ahead and go into our Advanced Settings. Enter our installer code 1111. Go to System Tests, Daughter Cards Tests, and then we see Zigbee. So since it's not grayed out, that shows the panel knows it's already installed. We can run a quick test here. Pass. So we're good on that. Let's go back to home.
OK. All right. So we tested Zigbee card, it's working fine. Panel knows it's installed. We have our sensor here. Now, we can just go ahead and do the programming per usual. Program is fairly similarly to other normal contact sensors. Go into Installation, Add Device.
But since this is a Zigbee sensor, and in case you were using another alarm system first, just for safety purposes, make sure everything is going to work fine. We're going to default the sensor first. So go ahead and take the magnet away from the sensor. We're going to push up on the sensor. Remove it from its cover. We're going to remove the battery here. So you can do that by pressing down on the battery and then pressing up on the corner here. OK. Battery is removed. No power to the sensor.
Now, to default the sensor, we're going to use a wire. And we're going to hold one end to the negative, which is this bottom metal. And then one end to the positive, which is the metal further inside of the sensor. Go ahead and do that now here. And then you'll hold this for about 10s or so. All right. So one end touching the bottom. One end touching the inside. 1, 2, 3, 4, 5, 6, 7, 8, 9, 10. OK. Should be good.
All right. So we've held the wire to it. That's part of the default there. Now, the second part is to hold down the tamper switch right here. We're going to hold that down. And then while we're holding that down, we're going to reinsert the battery. The positive end is going to be facing upwards. So go ahead and slide the battery in there. Hold down the tamper for about four more seconds. Release.
We're going to get this blinking. It's going to do it three times every five seconds. That's indicating that the sensor has been defaulted. And then we can go ahead and remove the battery once again. Push down and pull out. OK. It's powered back off.
All right. So now we're going to go to the IQ4 panel. We're going to go to the top gray bar. Go to Settings, Advanced Settings. Since we're installing, we're going to use the installer code. Oops. 1111. Installation, Devices, Security Sensors, and Auto Learn Sensor. And simply for this, we're going to reinsert the battery. Give that a few seconds.
OK, if it doesn't pick it up right away, what we can do is we can tamper. All right. So we have the sensor learned in. I'm going to go ahead and put the cover back on the sensor here.
[INAUDIBLE] open.
All right. It recognizes it's already open. So I'm just going to go ahead and close that. OK. So we have the DL ID, which pulled in automatically. We have the Sensor Type door window. So it's going to be a door window sensor. We'll keep that as is. We can do Sensor Group-- exit delays, interior, instant. We'll say we're going to put this as a window. So I'm going to put that to Instant Perimeter D/W, Door/Window.
Sensor Name. We have the preselected ones here. But you can also do a custom one. So if you tap there, that'll bring up a keypad. And I'm going to put test and then window. OK. And then checkmark to save it. Chime Type. Have different selections here I'll put Sonar.
Voice Prompts. So when voice prompt is on, it's going to say the name that we've put. So in this case test window, and source is Zigbee. So we're going to keep that as is. We're going to Save. We're going to back out to the home screen. And we're going to test this.
All right. So we have the magnet next to the sensor. We're going to pull it away.
Test window open.
Perfect. We have it showing there. It did our chime. And it also said the name of the sensor. We're going to close that. And it disappears showing that it is now being seen as closed. And then we can also test this by tampering it. So I'm going to open it real quick. I'm going to tamper again.
Test window tampered.
We have our tamper signal there or a symbol. So while the sensor is tampered, it's not going to function. That's letting me know that the cover for the sensor is not secured. Simply to fix that, we're going to secure the cover.
Test window open.
It's back to open. Put the magnet back and it is gone. So the sensor is functioning properly, programmed in fine. It recognizes when it's open and closed. It does our chime, it does our voice, and it recognizes the tamper as well.
OK, so the functionality of the sensor is working just fine. Now, say that we've installed this to our final installation point. It's not too close to the alarm panel. So we can again test it by just-- so it's a window. We can open the window. It'll show on here. But with Zigbee, you can also see the sensor status, the battery indication, the signal strength.
So we're going to go back into Settings, Advanced Settings. 1111 installer. We will go into System Tests again. And instead of Daughter Cards Test, we're going to do Zigbee Test. All right. So we have strong there. Battery hasn't loaded in yet just because it's fairly new. We can look at more here that's going to give us more options of what's going on with the sensor. The signal strength, the average signal strength, the version of the sensor, the model number.
And we are good to go. So we know that this is good. We have a strong signal. Shows the name of the sensor there. So again, if you want to just triple check everything after you've installed the sensor, you can go to the System Test. Go to Zigbee Test. That's going to show you everything you need to know about the sensor.
OK, so that is how you pair your Zigbee Sensor to the IQ4 panel. We got it paired. We went over the possible sensor group, sensor types that you can set for it. We tested it, made sure everything is working properly. Fairly easy process. And again, just to make it very important, you do need the Zigbee daughter card. So make sure you have that as well.
If you did like this video, please like the video. Subscribe to our YouTube channel and hit the bell icon to be notified about any future videos we release. If you have any questions, feel free to contact us. Our support phone number is 888-818-7728. Our email address is support@alarmgrid.com. And if you come to our website, www.alarmgrid.com, we have live chat option on there as well. So feel free to use any of those to contact us.
Again, my name is Dylan from AlarmGrid, and thank you for watching.
- Uploaded
