IQ Panel 4: Clear Not Ready Status
Related Products
Description
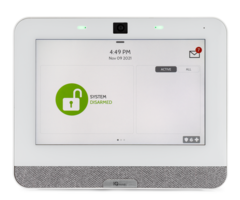
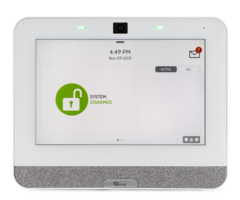
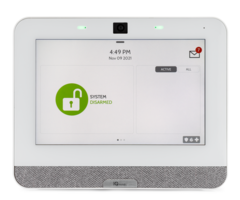
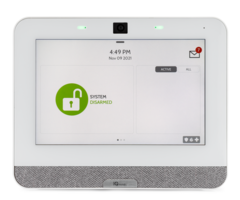
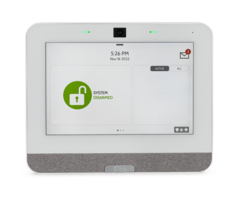
In today's video Dylan from Alarm Grid shows you the various ways to deal with open zones on the IQ Panel 4. There are a number of conditions that can cause a zone to be in a "Not Ready" state. A fault (door or window open, motion being sensed by a motion detector), a cover tamper condition, or a communication problem between the sensor and the panel are just a few. The FAQ linked at the bottom of this video covers this in more detail.
00:00 - Introduction
02:29 - Disable Auto-Bypass
03:50 - All Vs. Active Zone View
04:35 - Arming with Fault
04:43 - Open Sensor Message
05:07 - Press OK (Sensor Bypassed)
05:44 - Sensor Tampered
06:05 - Open Sensor Message Again
06:12 - Press Cancel (No Bypass, No Arm)
06:25 - Manual Bypass Zone
07:48 - Normal Arming, No Faults
08:07 - Outro
By default, a feature called "Auto-Bypass" is enabled in the IQ Panel 4. What this means is that if you attempt to arm the system, and a zone is not ready, the system will automatically bypass that zone and arm the rest of the system. This is a good thing if you prefer to arm without resolving any fault conditions, but a bypassed zone is basically unprotected. So, this is a convenient option, but not a very secure one. Dylan shows you how to disable this feature early in the video.
Another reason the Auto-Bypass feature is enabled by default is to make it easier when remote arming through Alarm.com if a zone is in a not-ready state. It is possible to manually bypass zones through Alarm.com, but having the Auto-Bypass feature enabled means you can remotely arm your system easily without giving it much thought. Again, though, bypassed zones are not protected. So, be careful when allowing zones that protect the perimeter to be bypassed.
https://www.alarmgrid.com/faq/why-is-my-qolsys-iq-panel-4-always-not-ready-to-arm
http://alrm.gd/get-monitored
Transcript
[AUDIO LOGO] Hey, DIYers. Dylan here with Alarm Grid. And today, we are reviewing why is my IQ4 showing not ready, not ready meaning not ready to arm, meaning that you have a sensor that's active. So we're going to do a little zoom in a little bit and show the screen closer. But on the right side of the screen, there is a list that will show any active sensors. And you can also view all the sensors that are paired with the alarm system. When your system is showing not ready to arm, majority of the time, that's going to mean that you have a sensor that's faulted, which is usually door sensors. So if you have a door open or if it's being seen as opened, so if the sensor and the magnet are not properly aligned, that's going to have the sensor show in the active state there. And then your system is going to be not ready to arm. Other things that can cause the not ready to arm state is a tamper, meaning that the cover of the sensor is not secured, and the tamper switch inside the sensor is not being pressed all the way. If you have a low battery error for a sensor, that can also cause the system to be not ready to arm. If you have wired sensors connected to a wired-to-wireless converter, if either of those sensors are not getting enough power, usually motion sensors, or if the wiring is not secured, that will have the wired-to-wireless converter see the sensor as active and send that over to the system saying it's active even if it's not. So those are some things to check for the wired sensors. Today, we're going to be testing our door sensor that we have programmed to our system. And we're also going to go into programming and show how to access the Auto Bypass feature. If that is enabled, even if you have active zones, you can still arm the system because it's going to bypass those zones automatically, meaning it's just not going to care about them when you arm the system. So if one of those doors is opened while it's bypassed, it doesn't send any signal to the panel. So we're going to show how to check that, because if you don't want them to be automatically bypassed, you want that feature disabled. So we'll go into this. We'll test that out. We'll show more of the active and the all list. We'll see our system say not ready to arm. We'll resolve that and then arm it. So we have our IQ4 panel here. Now, first thing that we're going to do is we're going to check that Auto Bypass feature to see if it's enabled or disabled for the system. So for that, we're going to go into Programming and go to Settings, Advanced Settings, and we're going to enter in our installer code, which is 1111. That's the default code. After we are there, we're going to go into Installation, Security and Arming. And then we're going to scroll down until we get to the Auto Bypass option, which is right here. So we have this checked, meaning it's enabled. So, again, Auto Bypass, if you have this enabled, it doesn't care if you have sensors that are active, you're still going to be able to arm the system. So for this, I'm going to disarm or disable that. We'll back out back to the home screen. So now we have Auto Bypass disabled, meaning that we have to either resolve the sensor error or manually bypass the sensors. So let me just grab our door sensor here. I'm going to fault the sensor. Front door open. All right. So if you have a door that's opened, you're going to see this little symbol here, the broken link. And now just real quick, I'm going to go ahead and close that so it's off the active list. But if you go to All, that's going to show it there with a closed link. So you can view all your sensors there, see the status of them. And again, on our FAQ and in the guide for the actual system, we have basically what each of these symbols will mean so you know what it's meaning. All right. So back again. Open my door. Door open. I'm going to try to arm the system. Front door open. Please bypass or close these sensors. And there you go. So this is essentially showing you all the reasons that you're going to be not ready to arm-- Open, tampered, trouble synchronizing, not networked, or failure state. So essentially, either it's active or there's an issue with it. [INAUDIBLE] front door bypass. All right. So I pressed, OK. That's going to bypass that sensor. We have a new symbol here. That's the bypass for that sensor itself. So this means if I open and close this door while the system is armed, because it's bypassed, nothing happens here. [BEEPING] So I'm going to disarm. System is now disarmed. OK. I'm going to show real quick. Let me just tamper the sensor where I'm taking the cover off of it. [Front Door Tampered] So I have the tamper. So that's meaning right there. We have a new symbol. That's our tamper signal or a symbol. Select arm system point. Again, we're going to go to arm. Please bypass our-- And it's showing us that message again, saying the sensor is open. The sensor is active. The sensor has an issue. Do you want a bypass? If not, you're going to press Cancel. If you do want a bypass, you're going to press. So we saw what happened when I press OK last time. So I'm going to press Cancel. And then you can also bypass from this screen here. Let me just show that again. So if you go to the arming-- Select arm system point. Oh, sorry about that. OK, so when you go to the arming, it doesn't really show as much here. But if you press this arrow, it's going to pull out and it's going to give us that same list that we had on just our regular screen there. So that's going to show us the active sensors. In this case, it's our front door tampered. So if I want to bypass this, you're going to press that and then you can bypass and it'll arm the system. If not, it's going to give us that error message again. [INAUDIBLE] So we just go back here. All right. So I want to arm my system without bypassing anything. So let me-- again, tamper is the sensor cover or the mounting plate not being secured. I'm going to secure that. And then just so the system can catch up here, I'm going to also close it. OK, perfect. And right before I did that, it did change to just showing front door open. Front door open. So when you have the tamper secured, you have that mounting plate secured, we don't have that tamper symbol anymore. We just have it being open. And I'm going to close the sensor. And then that is there. So we have nothing showing on active now. So when I go to arm-- Select arm system-- --we don't get that error message coming up telling us to resolve the sensor issue. We just go straight into the armed-- arm state in this case. [BEEPING] System is now disarmed. All right. And that is why your system was showing not ready to arm. So again, there were a few different causes for that. We went over some of that in the intro to the video, but we also have our FAQ, which has a more detailed, written-out list of all that and what to check for those. So fairly simple. You just have to resolve that sensor fault or that sensor error. That's going to have your system so good to go, ready to arm. And of course, we went over that Auto Bypass feature. So if you have that enabled, you're going to be able to arm no matter what. Not everyone really wants that because they do want every sensor protected properly. So we went into programming and showed how to disable that, if that's what you'd like to do. If you did like the video, please like the video, subscribe to our YouTube channel, and hit the bell icon to be notified about any future videos we release. If you have any questions for us, feel free to contact us. We have a support phone number, which is 888-818-7728. We have an email address, which is support@alarmgrid.com. And if you come to our website, which is www.alarmgrid.com, we have a live chat option on there as well. So feel free to reach out in any of those ways, and we'll be happy to assist you. Again, my name is Dylan from Alarm Grid. And thank you for watching.
- Uploaded


