Qolsys IQ Lock-PG: Setting Up on IQ4 Panel
Related Products
Description
In this video, Dylan from Alarm Grid shows you how to pair and use the Qolsys IQ Lock-PG with the Qolsys IQ Panel 4. Since this ...
Transcript
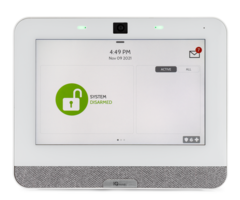
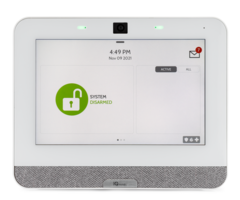
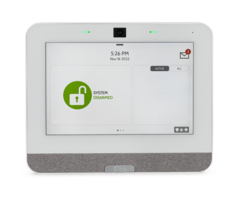
[MUSIC PLAYING] Hey DIYers, Dylan here with Alarm Grid. Today, we're going to review how to set up the IQ lock power G with the IQ panel four. So when you're setting up the lock obviously, the first thing you want to do is get the lock installed onto your door frame. We already have this installed onto our display here. So I won't be showing much of that process. But we do have an FAQ, which details this. And the actual lock will come with an installation guide that reviews that as well. So when you're getting that installed, just make sure you're following either our FAQ, or that guide to the tee, to get the installation process done properly. And then what we'll show in this video is more of how to pair this with your alarm panel and to control it through the alarm panel itself. OK. So we have our IQ panel 4 here. Again, so we have our lock installed already. Again, just to mention, check out the installation guide for that. And we also have a helpful FAQ on our website. That's going to review that installation process for you. When you get the lock, it's going to come with a bag of accessories. This is going to be the phase plates for your frame. It's going to be the phase plates for your frame. It's going to be screws. And it's going to have a reset key here as well. So again, the installation guide reviews more of that. But what we're going to focus on here in the video today is how to get it paired with our IQ panel four and how to get it working. So we're basically going to test that it's going to work from the panel and vice versa. So when you want to pair the lock, the first thing you want to do is check the firmware for your panel. So we're to check the firmware here. I'm going to press the top gray bar. We're going to go into Settings. We're going to go to Advanced Settings. We're going to press the installer code. Ours is it still the default one, one, one, one. We're going to go to about. And then we'll go to software. So right here, software version is showing as 4.4.1. For this lock to pair with your panel. You need to be on at least 4.4.0. So we are on the correct firmware. So we know we are good on that. If you need to update the firmware, we actually have another video an FAQ reviewing that update process. Normally that's going to require the panel is connected to Wi-Fi, but there is an option just in case you don't have that Wi-Fi available, which is the AP connection. So as long as you have the firmware up to date, again, to 4.4.0 or higher, you can get this lock paired to the panel. All right. So let's go back there. OK. So what we'll do is we're going to enter in the auto learn mode on the panel. So pretty much for everything top Grid bar, settings. We're going to enter advanced settings again. Again, we're going to use the installer code, one, one, one, one. We are going to go to installation. And then we are going to go to devices right here. We're going to go to automation. And then we will do auto learn devices. So since this is a power G lock, it's not going to program it as a z-wave option, because it's using that power G feature. So when we are in this setting here, what we're going to do is we're going to apply power to the lock itself. OK. So we have our lock. We have one battery that's out, just so this isn't powered on. We're going to turn this around. And we have our back option here where we're going to install the batteries. And get this powered on. So I'm going to put this last battery into place. Power the lock on. We heard the beep. We got the green there. OK. Now, on the panel, we have the sensor pulling up. So that shows that it has connected with the actual panel here. OK. So we have on here the auto learn power G sensor. That means that it had picked up the lock once we have that powered on. We're going to press OK. And then we have the settings option here for the log. So there are a few settings that we can see here. So we have the sensor ID that pulled in when we auto learn the lock. We have the door lock volume. That is going to adjust-- so it's on by default. So that first beep that we heard when we powered on the lock, we can turn that off if we want, if we don't want that lock to be audible. In this case, we're just keep it on, since it's the default option we want to hear the beeping from the lock. Sensor type pulls in as door lock. Because that's what it is. Relock timer, so what this does. So by default, it is set to disabled. If we press on this we're going to see the options available to us. We have 30 seconds, 60 seconds, 120 seconds. And 180 seconds. So what this does is if the lock is unlocked, this timer is going to tell the lock when to relock. So without us needing to do anything, without us needing to lock it manually at the lock, without us needing to lock it through the panel or if this is all set up with alarm.com you can set that through there as well. This is just an automated feature. So the lock will lock itself after the set amount of time that we have done there. Sensor name. So again, default is front door. But if we have this on a different area, we can select one of the pre-selected options. Or we can press custom name and type in the descriptor here to show a name. So for example, I'm just going to type in test. So I'm done. So the lock will be named test, but in this case, I'm going to have this installed on my front door. And we have the PIN code option here, which is optional. So this is mainly used-- again, it's optional. But it's mainly used if you have more than one lock that you're pairing with the system. And you just don't want to mix them up. On the back of the lock you'll see the option for the PIN code. It's going to be listed there. So you can enter that here. And that way you can just keep track of the locks a little bit easier. So if you enter in the wrong PIN code here, the lock will still learn in. But it's not going to function properly. So if that is the case, if you are using the PIN code option, and you enter it in, you go through the pairing process, but for some reason that lock is not working, double check the PIN code, double check its matching from the lock to the panel itself. In this case, we're going to leave that blank. So I'm going to go to pair. OK. So we have the lock showing here. It is paired. And what we will do now is I'm going to go back to home. I'm going to swipe. Turn the lock around here. OK. So we are going to press the Option, we're going to do lock off. OK. So press the Option there. It locked. We got the confirmation beep from the lock because we kept that volume option enabled. We see the lock status here. I'm going to tap on this again. Got the confirmation beep, we saw the deadbolt go in and out. And we see the status is unlocked. Now, you can also access this from alarm.com. But real quick, before we do that. So if you have any issues pairing the lock to the panel, a good thing to do is actually to reset the lock itself. So pretty simple, the lock is going to come with this little reset tool. And you'll see the reset button option there. You're going to hold this in there for about five seconds. The lock will beep to indicate the reset. And then you'll just go through that pairing process once again that we did. It will pull right into the panel just fine, and perform as we just saw there. All right. So now I'm going to pull up my alarm.com application. And we will show how to access this through that app. OK. So we have the alarm.com application pulled up here. I'm going to scroll down to the lock section. So we already have a z-wave lock paired, that's our Alarm Grid lock there. And then the new lock came in just showing lock. So we can access the lock from alarm.com. So if I tap on that, I'm going to press lock. It's going to ask us to confirm that lock command. Perfect. Got confirmation. I'm going to tap on that again, I'm going to send the unlock command. Excellent. So that is working properly. Now, something else that's pretty cool, is if we go to more and then users. I'm going to go to the master user here, we're going to Edit. And then as you see right now, it says locks, no access. So I'm going to press on that. It gives us the lock there. I'm going to press enable. I'm going to press Save. OK. I'm going to let that sync up with the panel. OK. So the sync has completed. And I can take a couple of minutes. So just be patient with that. Once that's completed, that synchronization sync option is going to disappear. So we know it's good. So essentially what I've just done is that I've set it so I can access that lock through this user on alarm.com. But what I've also done is I've set our code, one, two, three, four to the lock itself. So say I want to manually unlock the lock at the lock. OK. So let's go ahead and lock the lock. So I'm going to press and hold down this for a few seconds. OK. We have the red LED. And we have the deadbolt indicating that the lock is locked. So now, what I'm going to do is I'm going to use the one, two, three, four code, which is our master code for the alarm panel. And I'm going to use that to unlock the lock at the keypad. So we will do one, two, three, four. Hold down the lock button. Got the deadbolt, we got the green LED. So we have essentially programmed a user code from alarm.com to the lock itself. So now, that can really only be done through alarm.com when you want to program custom codes to the lock. So just go through that process that we showed here. Enable the lock feature for a user. And if you're setting up a new user, you will create the code, you'll set it to work with this lock. Let it sync, and then that's going to push directly to the lock itself. OK. So that is how you get the IQ lock power G paired to your IQ panel 4. We went through that pairing process, again, for the actual installation of that. Make sure you review the install guide that comes with the lock. And then we also have the helpful FAQ on our website www. alarmgrid.com. If you did like the video, please like the video, subscribe to our channel. And press the bell icon to be notified about any future videos we release. If you had any questions for us, feel free to contact us. We have a support phone number that phone number is 888 818 7728. We have an email address, which is support@alarmgrid.com. And then if you come to our website, again, that website is www.alarmgrid.com. We have a live chat option on there as well. So with any questions you have, feel free to contact us through any of those options. And we'll be happy to assist you. Again, my name is Dylan from Alarm Grid. And thank you for watching.
- Uploaded

