Qolsys IQ Panel 4: Arming From a Phone
Related Products
Description
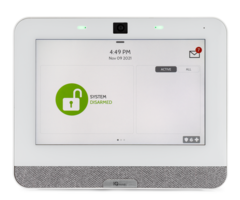
In this video, Dylan from Alarm Grid shows you how to arm the Qolsys IQ Panel 4 from a phone. The most important information to ...
Transcript
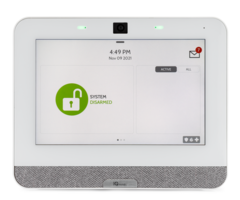
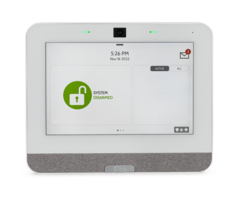
[AUDIO LOGO] Hey, DIY-ers. This is Dylan with Alarm Grid. Today, we're going to review how to arm your Qolsys IQ4 panel through the alarm.com application. So I'm going to show you very much the basic features of the application, how to arm the system. We'll show the system as well to confirm that the application is working and then just go over some general features of alarm.com as well. All right, so here we are logged in to the alarm.com app. You see at the top it says AlarmGrid. This is going to show the company name that you get signed up with. And then this is our general home screen. So to arm and disarm from the application, we have a few options here. As you see at the top of the screen, we have the scenes option. This is if you set up smart scenes to trigger and arm your system at certain days or times, or you can also have automation devices triggered as well. So if I say do arm away, I want my attached Z-Wave locks to lock. I want my lights to dim. And I want my temperature to be turned up on my thermostat. And then you can go in and set up more custom rules for these. But these are just the general ones that show up by default. And then we do have the Security System screen here as well. This is just the main Arm and Disarm option. As you see, our system is currently disarmed. We have the option for Arm Stay. That's going to be used if there are going to be people in the home but you want the system to stay armed. What will happen is that your doors and windows will be armed, glass break will be armed. Life safe devices, those are always active. But what this will ignore is the motion sensors. So this way, you're not walking around the home and tripping a motion sensor while you're still there, and then causing the alarm to sound. The Arm Away option is if there's going to be no one in the home and we just want everything armed, so everything I mentioned, including the motion sensors. So that way, if anyone comes in, they're going to trigger a motion if they don't trigger anything else first, and then they'll set off the alarm. We do have the option to Bypass Sensors here. We don't really have any sensors programmed at this time. But if we have, say, a door or window open and we want to keep that open, so, say, we're inside, it's a nice day outside, we want to keep the window open but still have the system armed, we can go to Bypass Sensors, select that zone, kitchen window, for example, and then bypass it, essentially having the system ignore that sensor but still arming all the other sensors we have connected. Smart arming. This is if we want to set up an automated arming and disarming for the system. So we can set it for certain times. We can set certain parameters that this must meet before the arming can be done. And that way, we don't really have to worry about, OK, did I forget to arm the system or not? It's just going to do it automatically, even though we can also set up arming reminder notifications as well. So let's go ahead and set the system to Arm Stay. So simple enough, you just press the Arm Stay option. And then we have a couple more options here. Silent Arming is there's going to be no exit delay beeping at the panel itself. No Entry Delay means that when the system is armed, any doors that are set up for an entry delay, this is what gives you time to come through the door, walk to the panel, and disarm before the alarm sounds. We can disable that. So if the door opens, even if we have it set to a delay, it's still going to trigger the alarm right away. And then Force Bypass. This is an automated bypass feature. So if we have this checked off, if any of our zones are active, this is just going to bypass them all without us needing to confirm. So we'll just keep it as normal for now. So we're going to do the Arm Stay command, send it. And system is armed. Now, since we set it to Arm Stay, we can actually walk over to the panel to confirm that and check that the system has been armed. And then we can disarm from here as well. Press Disarm. Send the command. OK, system is disarmed. And same idea if you're with the panel, you can walk over to the Panel Confirm. And then just to make sure that all three are working, let's do Arm Away. We'll do Silent Arming because that's going to give us a beep. We don't want to hear that right now. And the Silent Arming not only silences the beeping, but it's going to silence the annunciation of the system arming. So when you arm your system, it's going to say system arm stay, system arm away. With Silent Arming, that just eliminates that as well. So it's completely silent. And we see the command went through, so let's disarm. all right, and disarm went through as well. OK. So we're at the system. And we're just going to do that arming once again just to confirm it's doing it at the panel as well. So I have my alarm.com application open here . Let's do Arm Stay, send Remote arm stay. See, that's armed on the system. Let's disarm. Send. Remote disarm. Perfect. And let's do arm away. [PHONE BEEPING] And then we get a nice countdown beep there. We can also disarm. And then I'll show you the Silent Arming option as well. So send with Silent Arming. Same thing, we get the countdown. We don't have to listen to the beeping. And then we'll disarm. We don't really have to wait for that. Remote disarm. Perfect. All right. So that is the alarm.com application. We saw the arming feature. We made sure that was working at the panel. Went over some general info about the setup as well. So if this is something you're interested in or had any questions on, feel free to call us at 888-818-7728. You can also send us an email. Our email address is support at alarmgrid.com. And if you check out our website, you can view the plans on there. But we also have a live chat as well, so feel free to hop on and ask any questions through there. The website, of course, is www.alarmgrid.com. My name is Dylan from Alarm Grid. And I hope you guys have a great day.
- Uploaded
