Qolsys IQ Panel 4: Compatible Keypads
Related Products
Description
Dylan from Alarm Grid shows you which secondary keypads are compatible with the Qolsys IQ Panel 4, and how to connect each ...
Transcript
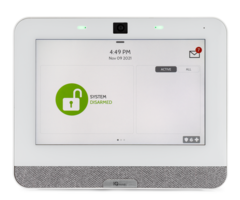
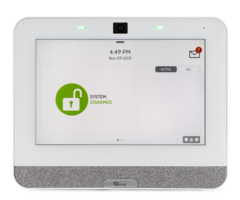
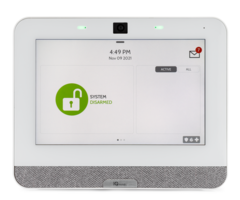
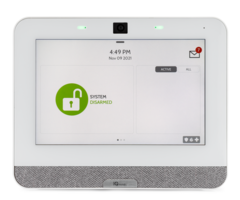
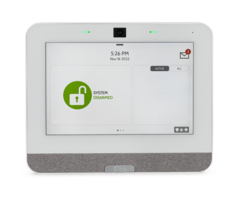
[AUDIO LOGO] Hey, DIYers, Dylan here with Alarm Grid. Today, we're going to go over which key pads work with the IQ Panel 4. So we have about three keypads that we're going to pair to the panel today. I'm going to show a quick installation. I'm going to show the pairing process for each. And then we're going to test each keypad with the system to make sure that the arming and disarming feature works properly, OK. So we have a few things on our table here. To start off, we have our IQ4 Panel. We have the IQ Remote PowerG. We have the DSC HS2LCD WF9N. This is our wireless keypad. And then we have the wired option right here. This is the DSC HS2LCDPN. And then we also have-- for this keypad, you're going to need a wired to wireless converter to connect it with the IQ4. So we have that over here. And this is the DSC PG9WLS HW8. So we are going to start off with our wired keypad. Now, I already have this wired up. But I'm going to show you the wiring real quick. So on the back, we already have the back plate removed, OK. So we have our wiring terminals on the back here. And they made it pretty simple for us with the R, B, Y, and G. That stands for red, black, yellow, and green. So you just need to match your wire colors to this. We don't have yellow, so we're just using white. So we have red, black, white, and green attached. Let me just put the back plate back on to this, OK. And then right over here on our wire to wireless converter, we attach that to the core bus terminals. And again, they made it pretty simple for us, red, black, yellow, green. So you're just going to match the wiring to this. And then the keypad is going to get its power directly from this converter as well. So the converter itself has its power supply connected. And that's all the power we need for this. So we're going to come over to the IQ4 and we're going to get that paired. So we're going to go to the top menu here. We're going to go into settings. We're going to go to advanced settings. We're going to enter in our installer code. Ours is still the default. So 1111. We're going to go to installation, devices, security sensors. And we're going to manually add this. So we're going to do add sensor. Our source is already set to PowerG, which is good. We're going to do the DL ID. And that's going to be located right over here on our converter. So 4603724. 4603724. And right away, it picks up that it's a keypad. And it knows it's wired to the core bus option. So for the sensor name, you can keep it as keypad or you can put a custom description where you type in your own or there's some pre-made ones right here. So say that this is going to be our downstairs keypad. So next thing you'll want to do is add the sensor ESN. And where that is going to be located is on the box here. So you see the SN, that's our serial number. So we're going to enter that in. 521205C and 2, OK. So that picked up. Everything else is looking good. Our source, PowerG. Sensor type is keypad. Sensor group is fixed intrusion. That means this is going to be a stationary keypad. And we're going to use it for our arming and disarming. You have the option to enable a tamper. I'm going to keep ours disabled. And then the backlight option is going to keep the backlight on the keypad, so it's nice and easy to read. So we're going to do add new. And right there, it went from keypad not paired to system is ready to arm. So we have this as a functioning keypad now. All right, so now we're going to pair the wireless keypad. And again, this is the DSC HS2LCD WF9N. So this has the option to be powered through a wired power connection. We have a barrel connector right there. But the cool thing about this is that it can also be wired by only battery power. So I left one of the batteries out here just so you can see that the keypad does have indicators on how the batteries are installed. So we're just going to put our final battery in place. Power up the keypad, it's going to show us the DL ID. This is if we want to do the manual enrollment, as we did for the wired keypad. But this also can be enrolled through the auto-enroll feature, which is what we're going to do since we did the manual for the other one. So back at the IQ4, top menu, settings, advanced settings. We're going to enter in the installer code, 1111. We're going to go to installation, devices, security sensors. And then again, we're going to do the auto-enrollment. So we're going to press autolearn. And now for this keypad, we're going to press a key on it just to wake it up. And as you see, it says hold one and star to auto-enroll. So that's exactly what we're going to do. We have the confirmation here, the sensor ID, which we can check on the back, 3780399. And that's what we have showing on the screen as well. We know it's the correct keypad. Press OK. And it's going to give us a similar screen that we got when we enrolled the wired keypad. So again, the sensor name, this is so we know where this is going to be. We had the wired keypad as our downstairs keypad. So I'm going to set this as our upstairs keypad. And again, it gives the same options as the last screen that we had. I'm going to keep this as a fixed intrusion. I'm going to keep the tamper disabled, backlight on. And we're going to add new, OK. Sensor added successfully. And let's just check on the keypad again. Now, you notice that the screen keeps turning off. That's going to happen while this is on battery power only. That's to conserve the battery life. If you have it plugged in, that screen is going to keep on a little bit longer. So the system is ready to arm, similar to how our wired keypad was. So that is two keypads we have programmed. Back out to the home screen there. And then finally, this is the IQ Remote PowerG. So this is wired for power. So it comes with a barrel connection. And this has a backup battery as well. Now, this has a few ways that you can actually pair it. You can do a Wi-Fi pairing where you're going to select your Wi-Fi name here. Ours is Alarm Grid. You'd enter in the password. We'll come back to that in just a moment. But you also have the PowerG pairing, which is a bit better because that PowerG has a further signal range. So if you have the option, connecting through PowerG is preferred, OK. So first, we're going to do the Wi-Fi pairing just to show how that goes. So again, you want to find your network. We're going to enter in the password here. All right, so we have our password. We're going to connect. I wait for the keypad. Perfect, it shows connected. Now, this must be on the same Wi-Fi network that you have the IQ4 connected to. So we're going to start the pairing process. Back into settings, advanced settings. Again, installer code, 1111. Installation, devices. And since we're doing the Wi-Fi pairing, we're going to do Wi-Fi devices. And then you see right here, IQ Remote. And then we're going to do pair. So this is going to put this into a pairing process. And while that's going, we're going to come back to the remote, press Wi-Fi pair, all right. And now one side is connected. This is going to automatically search online for any firmware updates. And then it downloads them automatically. So while this is downloading, you just want to keep that as is. Let it go through all the updates. As you see, we have quite a few. So we're going to let these download and we'll be right back, OK. And we're back. So we had the updates go through. The IQ Remote rebooted. Came back up to the main screen here, which is shown good. And then back out the IQ4, we see the status as active for the IQ Remote. So we know that the Wi-Fi pairing worked. Now, since this does have another option to pair through PowerG, I'm going to show you that as well. So I'm going to delete the keypad from the main panel. As you see, it brings us directly back to that first pairing screen. And then it deletes it from the panel itself. So back out to the home screen. So this compare pretty similarly to the main key-- to the main panel as the other two keypads did. It has the manual option and then has the auto-enroll option. So I'm just going to quickly show you the manual option. So back into the top menu settings, advanced settings, 1111, installation, devices, security sensors, add sensor, OK. So we have the option for the DL ID. Now, to locate that for the IQ Remote, you're going to press remote details. And then we have the sensor ID showing right there. So since-- again, we've already done the manual enrollment for one of the keypads. The process is exactly the same. So what I'm going to do for this is I'm going to do an auto-enrollment as well, as I did for that wireless keypad. So we're going to back out of there. Let's go from the main screen again, top menu, settings, advanced settings, 1111, installer code, installation, devices, security sensors. And again, since we're doing the auto-pair, auto-learn sensor. And then on the IQ Remote, we have the PowerG pair button right there right away. And that's the sensor DL ID that we saw before. So it's good to actually write that down just so you can confirm it. But we do know that this is correct. So I'm going to press OK. We have our options again here, same as the other screens that we've been seeing. I'm going to set this as our master bedroom keypad. Whoops! Master bedroom. We don't have the option for backlight because it's a touchscreen panel. And we're going to do add new, OK. Sensor added successfully. We're just going to wait for the keypad to show that as well. OK, initializing. And since we've already paired it through the Wi-Fi and it downloaded all the firmware updates, we shouldn't have that screen pop up again. So we're just going to wait here. Master bedroom keypad normal. Perfect. It's good indication. So it should change to the main screen at any moment now. And there we go, all right. System is now disarmed. OK, so now we have all three keypads paired to the IQ4. So now, we're just going to test each and make sure they're all working. So let's start with the IQ Remote, since that's what's in my hand. We're going to do. Select arm system type. Arm stay. Stay mode selected. IQ hardwire bypassed. Arm stay. We see it showing here as well indicating for both. And then you can see on our wired keypad, that showed armed. And then just real quick on the wireless, that shows armed as well. Perfect. So that's a good indication that all are paired properly. I'm going to disarm from the panel. Enter in our code. System is now disarmed. And on all three keypads and the IQ4, it shows disarmed now. Perfect. All right, we're going to move over to our wireless keypad. So I'm just going to press key on here to wake this up, all right. So we have the keypad awake. We're going to enter in our code 1234. We have the arming. Hardwire bypassed. On all three keypads and the IQ4. Disarm, enter the same code, 1234. System is now disarmed. Disarm on all three keypads and the main panel. Perfect. We're going to move over to our wired keypad now. And it's the same process as the wireless. We're going to enter in our code, 1234. We got arming on all keypads and the main panel. 1234 to disarm. System is now disarmed. And disarmed showing on all keypads, OK. And we're going to arm from the main panel itself, so arm stay. IQ hardwire bypass. Arm stay. OK, armed on all three. And let's disarm, 1234. System is now disarmed. Perfect, all right. OK, so that is all the keypads programmed, tested. All are functioning. All show the same arming status. And looks like we're good to go, OK. So we have our keypads paired to the IQ4. We went through the pairing process of each of the three keypads. We tested the arming and disarming and all worked properly as expected. If you had any questions for us, feel free to reach out. We have a support email. The email address is support@alarmgrid.com. We have a support phone number. The phone number is 888-818-7728. And if you go to our website, which is www.alarmgrid.com, we have a live chat option on there as well. So feel free to reach out through any one of those options. If you did like the video, please like the video. Hit the subscribe option. And then press the bell icon to be notified about any future videos we release. And again, my name is Dylan from Alarm Grid. And thank you for watching.
- Uploaded
