Qolsys IQ Panel 4: Connecting an iPhone
Related Products
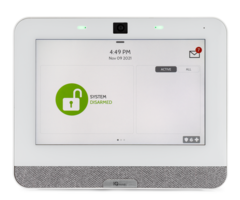
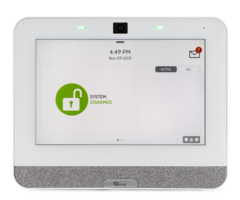
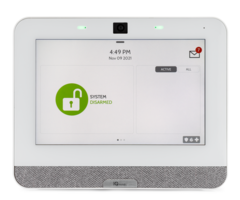
Description
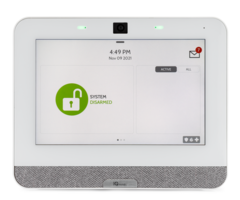
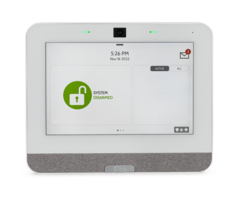
In this video, Dylan from Alarm Grid support shows you how to connect your Qolsys IQ Panel 4 to your iPhone. In order to do this, ...
Transcript
Hey, DIYers. Dylan here with Alarm Grid. Today, we're going to review how do I connect my iPhone to my IQ Panel 4? So this is going to be done through the Alarm.com service. You're going to need to go through an alarm company such as ourselves to get that service connected. It is not a free service, and can only be set up through an alarm company. So we're going to show you how to get the information from the panel that is needed for your alarm company to connect that with Alarm.com. We will have the account set up. We're going to load the Alarm.com application onto the iPhone, connect through there, and then just go over some basic features from Alarm.com. OK. So when you're getting Alarm.com set up for your IQ Panel 4, first, you'll want to get in contact with an alarm company. Again, we do offer this service as well. If you are signing up with us, if you check out our website alarmgrid.com, you'll see the monitoring plan page there. And it's going to be the Gold, Self Gold, Platinum, or Self Platinum plans which allow that Alarm.com service. The platinum options are if you want to add video service for this as well. And the gold plans are the basic options that get you Alarm.com and a majority of the features with that service. So when you get in contact with an alarm company and you're ready to get this set up, they're going to require the IMEI number from the system. There's a couple of ways to get this. You can get it through programming, which I'll show in just a moment here. But you can also get it on the back of the panel. It's listed right there at the bottom. So let's show how to get this through the actual programming screen, say if you already have the panel installed on your wall and you don't want to go through the process of taking it down. So first things first, we will press the gray bar at the top. We're going to go to settings, we'll go to advanced settings. And to access this, it is best to use the installer code. Ours is still set at the default of 1111. And then right here in the middle, you see the about option, we're going to press that. And then since the IMEI is linked to the cellular communicator in the panel, we're going to press cellular. And then you'll notice the IMEI is listed right there. So you're going to want to write this down and provide this to your alarm company as this is what they're going to use to get the system connected with Alarm.com. OK. So as you see, I already have the Alarm.com app installed, but I'm going to show, pretty quickly, how to get this onto your phone. So since it is an app, we are going to go to the App Store. We're going to press on search. And we're going to type in Alarm.com, and then search. So there is our Alarm.com option here. If you do not already have this download, instead of open, it's going to show get. So you can-- basically after it is download, you can open it straight from the App Store, or you can go back to your home page and select on the app from there as well. So I'm just going to press open. And this is going to bring us to the login page. So now this information is what your Alarm.com-- I'm sorry, what your alarm company is going to set up for you. So after you have the panel connected with your alarm company and they have the Alarm.com service activated, they will send you an email with how to log in to that service. We do have other videos showing more detail on what that email looks like, but it's pretty basic. It's going to show you the username, and then you'll create a password from the email itself. And when you do that, you're going to do that first on a computer. You cannot initially set up Alarm.com through the app. The app is more secondary after you have it set up through a computer. So we have our Alarm.com service activated. So we're going to log in. Our username, and we're going to enter in our password. And now we're going to log in. All right. So when you first log in, it's going to show your company name at the top. Since we have this set up with our company, it's going to show Alarm Grid. And then any new features that come up with Alarm.com, it will show you here. So we're just going to press done. I'm not going to save the password for now. And then also when you first log in, it's going to show you a basic walkthrough of the application. It's going to show you features from Alarm.com. It's going to review what you can do. But the service is pretty simple enough to kind of go through. So the main feature with Alarm.com is that you can arm and disarm the system. That's right here, the security system option. You can create scenes. That's essentially going to be a somewhat automated feature. So you can set up times for certain actions to take place. If you have any Z-Wave or automation devices connected with your system, you can create scenes for those as well. So say if I arm the system to arm (away), I want my connected door locks to lock, I want my lights to turn off. And if I have this connected to a thermostat as well, it can adjust the temperature while this is armed. And then you'll create a second scene for disarming, which will essentially do the reverse of those. It will unlock that lock, it'll turn the lights back on, and it'll adjust that temperature. There are a few other options that you can set up with the automation feature. And then if you also have cameras, you can add these as well through the video option down here. Now when you are pairing the cameras, you actually do pair them through the application. You'll see the add device option there. And then it's going to walk you through that connection process. So you'll see a bunch of Alarm.com-compatible cameras. You'll select which one you have, you'll press on it, and then the application will give you a step-by-step walkthrough on how to get those connected. We do also have another video reviewing how to connect those cameras, so feel free to check that out. You have the activity option here. This is going to be what is going on with Alarm.com and what is going on with the panel that is connected to this. So when we scroll down here, we'll see a bunch of actions that we've taken with our panel, arming, disarming, trouble notifications, when the panic options are pressed, so on and so forth. OK. So what we'll do here is we will go ahead and just test the arming feature. So you'll see again, security system. When you press on that, it's going to give you different types of arming options, arm (stay), arm (away). And then you can adjust how the panel arms as well. So force bypass, if we have any doors or windows that are open, any sensors that are active, since we're arming remotely, we have the option to just bypass those automatically while we're arming. Unless you know that it's certain doors or windows or certain sensors you don't really care about being monitored, it's not really suggested to do this too often. But again, if you know that those zones are active and you're fine with it, force bypass is fine. You can do bypass specific sensors. So that will let us choose which sensors to bypass remotely. No entry delay. So if we arm this and the system is armed and say our front door is open, usually, that will give us a set time of a delay to get back to the panel to disarm it before the alarm goes off. If you have no entry delay selected, that is essentially going to bypass that delay. And if that front door is opened, even if it's programmed to have a delay, it will not have a delay and that is going to trigger the alarm right away. Silent arming. So if we're doing arm (away), there's usually going to be an audible countdown that is associated with that that's going to let people inside know, hey, the alarm system is going to arm in this amount of time. You can leave during this countdown delay without triggering the alarm. But if we don't want that sound to go off, we can select the silent arming option. So I do have a trouble sensor on our panel here, so I'm just going to do force bypass. I'm going to do arm (stay). It's going to show system is arming. And then as we see on the panel, we do have system arm (stay). And then we have a confirmation on the application as well. And then when we press that, it's going to show us the arm (stay) so we know it's armed. And say we're coming back home or if someone needs to get in the home and we're out, we're going to press disarm. System disarming. And then on the panel, we have the system disarmed. And then we'll do this again for the arm (away) feature. OK. And then we have the audible countdown. We have the countdown showing on the screen itself. And then even while that's in the countdown feature, we can disarm. [ALARM BEEPING] System disarmed. And then we'll do that again with the silent arming. So again, we have the countdown but we don't hear those audible beeps. So we're still going to get the delay. We're just not going to have that beeping. And again, you can disarm even while it is arming. All right. So with scenes, we can go into here, you can create a scene. So you can add an icon. They have pre-selected icons here. You can adjust the colors for them. We'll just select-- if we were-- it looks like the two wineglasses. Why not? And I'll set the color to purple. You'll add a scene name. And then you'll select devices. So this is going to show you all the devices that are paired with the system, and then you also see the security system option there as well. Panel. You can set it to an arming feature. And then you can select one of those options that we just saw earlier as well. And now say if we were going to adjust a Z-Wave lock we have set up, we can do that as well. So I'm going to set that to lock. And I'm also going to have it arm (stay). No entry delay. Say that we're inside and we want to be alerted right away. We don't even want that delay going off. And then will also force bypass. And then, again, you can add more devices as well. So when you have more devices paired with your system and Alarm.com, you can add more of these to the scene. So we're going to save. Shows us there in our list of scenes. We're going to select it. We're going to press run. OK. So we ran the scene. We don't have our lock on camera, but the lock is still paired. I heard it arming. Well, I heard it locking. And you can see right there too. Locks locked. We have the system armed stay, our scene ran. And now we can just disarm from the panel. Or I'm sorry, we can disarm from the security system option here. And now since we do not have another scene to disarm-- actually we do. We have the home option. So this is default. So when you're creating a scene to arm the panel, you'll want to create another scene, as I mentioned, to disarm the panel and undo any of those Z-Wave options there. So what we'll do is we will just disarm from here. As you see, the lock is still locked since we don't have a scene. So I'm going to unlock that. [LOCK BUZZING] OK. I heard my lock. And then it shows unlocked here. And then what we'll do is we will create another scene real quick, just to show that we are home and we are ready for everything to be disarmed. We'll name it, we'll add devices, panel, disarm. That device, the locks. We want that unlocked. We'll save it. OK. So now let's do that again. So I'm going to run the first scene I created. We have the armed on the panel. We have the lock locked. OK. We're good with that. And now instead of going through each of these individually, I'm going to run the new scene we created that's going to disarm the panel and unlock the lock. OK. Panel is disarmed. [LOCK BUZZING] And the lock is unlocked. OK. Another cool feature is weather. So when you're setting this up with Alarm.com, if you request through your alarm company that they activate the weather service, you can view live weather stats, and they'll also show on the panel as well. Some other options here is users. This is going to show any users that you have set up here. You can also add a user. New User. You can set a code. We're going to give it security panel access. So I have the New User there. It's showing that it's synchronizing devices. So that is essentially getting that information sent to our alarm panel. And now if you want someone else to have Alarm.com, you can actually set up information for them to receive this. So you can either enter a phone number there, you can enter an email address, can select the language options, time, so at all times, restricted schedule, or temporary access, so if we want this to expire at some point. Restricted schedule is obviously, you select which days in which times that this is going to work. Then again, you can change what this has the options to do. So we'll come back to that while it syncs. You can set up notifications as well, so if I want to be notified. So now my phone is going to get notifications from activity with the panel. And then critical alerts. That's enabled even if the phone is on do not disturb. That's going to override that and still send in any alerts. And then here are some options for notifications that you can set up. So pretty basic ones here. Alarm events, action by any user. So this is going to show when we disarm, arm stay, arm away, you can adjust these. You can change the filtering options, so you're not getting spammed with notifications. And then you can change who's going to receive the actual notifications. So if you have more users on here, you can add their information, you can add more email addresses, you can add phone numbers. So we'll leave there. And we will test that out. All right, there we go. So we have a notification coming up. "Alarm.com, Test Panel was Armed Stay." OK. Let's acknowledge that. And I'm going to disarm. [ALARM BEEPING] And then we have our notification popping up again. "Alarm.com was disarmed." OK. So there are a lot more features that can be set up with Alarm.com. Some other Z-Wave automation options are irrigation control. You can actually hook up Sonos audio equipment to this, view them from the application. If you have Liftmaster and myQ, that's going to be a garage door opener, you can get that paired with Alarm.com as well and control it through the app. And many more other options there. OK. So we have our iPhone connected with our IQ Panel 4 through the Alarm.com service. We made sure it's functioning, and we went over some basic features of the Alarm.com application as well. If you did like this video, please like the video, subscribe to our channel, and hit the bell icon to be notified about any future videos we release. If you had any questions for us, feel free to contact us. We have a phone number. The phone number is 888-818-7728. We have a support email which is support@alarmgrid.com. And if you go to our website, www.alarmgrid.com, we have a live support chat option on there as well. So feel free to use any of those options to contact us and we'll be happy to help you. Again, my name is Dylan from Alarm Grid, and thank you for watching.
- Uploaded
