Qolsys IQ Panel 4: Wiring and Programming a Zooz ZEN16 MultiRelay
Related Products
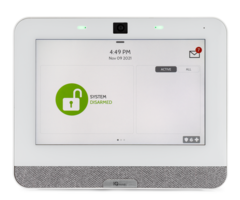
Description
In today's video, Dylan will show you how to wire, include (Z-Wave), and program a Zooz ZEN16 MultiRelay with a Qolsys IQ ...
Transcript
[AUDIO LOGO] Hey DIYers. Dylan here with AlarmGrid. Today, we're going to review what do I use instead of the MIMOlite Relay device. So the MIMOlite has been discontinued, unfortunately, but there is another option. It is the ZEN16 Relay. I'm going to show how it's wired.
I'm going to show how to get it working with our IQ Panel 4 System. And we're going to hook up a strobe light, test it from the panel, and then also show how to test it from alarm.com and set up a smart scene for it as well.
All right. So we're going to do our wiring first, and then we'll pair all this to our alarm system. And then we'll test it just make sure everything's working properly. So instead of a siren, we're going to be using a strobe light. Here we have the Zeus ZEN16. We have the AD 12612 power supply. And we have our 1361 transformer.
And now there are battery connectors as well. But just for this, we're not going to connect the battery. But that's good if you want to have that backup battery option. In case the power goes out, you can keep this live and active. So first, we are going to get our wiring done on the Zeus relay.
So for this, you're going to want to first connect-- well, the order doesn't really matter but as long as you have everything wired properly. But first thing I'm going to do is I'm connect to our little jumper wire here to the positive red output, and then the R1 terminal that's closest to the left here.
Connect those. And I'm not going to tighten the terminals just yet because we're going to be doing some more wiring for those. I'm going to connect our red wire from our siren or in this case our strobe. Oh, I just realized I put that in the wrong relay one terminal.
So one all the way to the left here. And then for this one, I'm going to connect our red from the siren or the strobe. And then we're not going to connect anything else to this. I'm just going to close that right now. OK, nice and secure. We're going to connect some wiring from the relay to our power supply. I'll grab my wire for that.
So from the black negative terminal I'm going to put our black wire. We have nothing else connecting to that, so I'm going to tighten that now. And then we're going to connect the red to the red. Let me just reloosen that.
OK. Reattach our jumper. Let's tighten these up. OK, nice and secured. OK, nice tug. Everything is nice and secured there. And that's going to be essentially all the wiring we'll do for the relay.
So now we're going to move over to our power supply here. So from the wire, we have connected to the red and black terminals on the relay. We're going to connect these to our power supply. Black will go to the DC negative terminal, and red will go to the plus output. Loosen these.
OK, nice and secured. Well, actually, let me loosen this negative minus DC, because that's also where we're going to put the black wire from our siren. So let me reconnect that and tighten. OK, nice tug. Make sure everything's secure OK.
So we have the relay in the power supply. So now we're going to wire the power supply to our transformer. And since this is AC, there's no polarity. So there's no negative or positive as you can see here. And then for the 1361 or similar transformers really we don't have to connect anything to the ground, so we're just going to connect AC to AC, AC to AC.
So we'll wire up the transformer first. And again no polarity so it doesn't really matter which colors go to which. Make sure the wiring is nice and snug in there. And then the wiring over here. OK. Let me just get that back.
All right. Nice and secure. Now, the other end of the wire, again, there's no polarity, so doesn't matter. We don't have to follow the colors. I just want to get the two AC wires connected. These into place. Make sure they're secure.
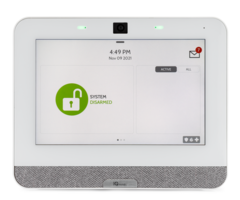
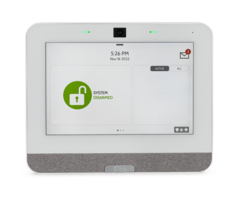
All right. And a nice tug. Everything is secured. Jumper secured. Sound secured. Transform secured. OK, so now let me grab our panel here. We're going to go into the panel. We're going to press the top gray bar. We'll go into Settings. We'll go to Advanced Settings.
1111, the installer code. Installation. We're going to go to devices. And the relay is a Z-Wave device, so we'll press Z-Wave devices here. Now when you want to do pairing, you want to exclude a device first, even if it's not already been paired to a system. This just helps make sure that you're not going to get any issues with this connecting.
So for that on the IQ 4 that's the Clear Device option. And I'm going to plug in our transformer. OK, well that's plugged in. If it doesn't automatically learn in there there's a little button on the back of this, on the back of the relay. You'll notice by the blue LED right above it. We're going to press that three times.
[CLANKING]
[CHIMING]
Light received from the network successfully.
Perfect. So that shows me that the relay is communicating because it sent that once I pressed that button three times. So we have this excluded. Now we're going to do that same process but just through the Add Device. Press Include. And again, 123.
All right. That's learned in there. Press OK. And now, since this is a Z-Wave plus or S2 device, it does have a QR code here. It helps you pair it more securely with the panel. So what you want to do is you want to grab the QR code, line it up with the camera. This can take a bit, so you just want to be patient with it. Let the camera capture the QR code.
There we go. So I was holding it a little bit too close. So the camera's having trouble focusing. So just pulling it back a little picked it up. Perfect. Now, with the Zeus Relay, it's always going to learn in as a light type. That cannot be changed, so you just want to keep that as is.
So we are technically using a light today. But instead of this learning it as a switch or anything else, it's just going to learn it as a light. That's just common with this. But what you can do is you can change the name. So you can do a predetermined name or you can do custom.
It's Predetermined. Scroll up and down. Custom Name. And then we'll give that custom description option. I'll pull up a keypad. I'm going to put in siren. OK, and then add.
Siren is added to network successfully.
Perfect. OK. So we're going to back out to the home screen. Now since this is a Z-Wave device, we're going to be able to access it from the main screen on the IQ4. And as you see here, it's pulled in three times so there's three relay options for the Zeus, 1, 2, 3.
All three learn in automatically. So even though I'm just using one even if I had jumper cables on these, it doesn't really matter. It's always going to learn it in the three. So since we did number 1, I'm going to press 1 and do on. We heard the click on the relay. We have the light going. And then press that, off. Click on the relay. Light turns off.
So this shows you that our wiring was correct. Everything is secured. The pairing process went through fine. It's pulled in there. And again, just to show we can access this remotely. So this is good. Some of our customers want to have the option of triggering a siren without actually triggering the alarm system.
People would like to use that as say a warning. So if you want something like that, this is a good way to go because you can trigger this remotely, and as you can see, the panel is not in alarm state or anything like that. It's just seeing that we have a relay connected, and we can turn it on and off.
And now, since this is also a Z-Wave device, you can go into alarm.com and set up a smart scene for this. So you're actually going to want to do that majority of the time because when your system siren triggers, unless you set up that scene, it's not going to send a signal to the relay to activate that siren.
So if you're testing this, you have it paired, you can turn it off and on from here. But when your alarm system goes into an actual alarm, if this isn't triggering, it's because you didn't set up that scene. So we're going to go over to alarm.com. I'm going to show you how to set that scene up. We'll come back to the panel, and we'll test it.
OK, so we are on alarm.com here. Now we're going to create the rule for the siren or our strobe to activate. So to do that, we're going to Automation. We're going to click Add New Rule, New Rules Builder. We're going to Select for the when option. We will do Alarm, and we will do Any Intrusion Sensor. Done.
Then select LightSwitch and turn on. And then done. We will keep this at indefinitely, and we will keep this at run at all times. And we'll click Save. We'll name this Siren and press OK. So now we're also going to create a second rule to turn off the siren.
So we will again click Add New Rule, New Rules Builder. Select for when. Click Security Panel. Click Disarmed. Done. Select for then. Click Light. Click Turn Off. Done. Again, we'll keep it at indefinitely and run it all times. Click Save. Name this Disarm and then click OK.
All right. So we have the rule to activate the light. Again the light is our relay. The relay automatically learns as a light, so alarm.com recognizes it as what it learned in as at the panel. So we'll turn on the light when the siren occurs, and then we will turn off the light when the panel is disarmed. So we will test this now. I'll go ahead and arm from alarm.com. We will click STAY.
[INAUDIBLE]
All right. Our system is armed. I'm going to go ahead and open our front door sensor.
Front door open.
[SIREN]
[INAUDIBLE]
OK, so we saw that when the siren was triggered after I opened the front door sensor, our strobe turned on. If you had a siren connected, the siren would blare. And then after we disarm the system, then that turned the light off, so it disabled the relay.
OK, so that is how you set up the ZEN or ZEN16 relay device. We used the IQ Panel 4, and we showed how to set that up through the panel, how to get it working through the panel, as well as how to get it working through alarm.com, and how to set up a smart scene for it.
If you did have any questions for us, feel free to reach out. You can give us a call. Our phone number is 888-818-7728. We have a support email address, which is support@alarmgrid.com. And if you come to our website, www.alarmgrid.com, we have a live chat option on there as well. So feel free to use any of those to reach out to us.
If you did like the video, please like the video. Subscribe to our channel and hit the bell icon to be notified about any future videos we release. Hope you enjoyed. And again, my name is Dylan from AlarmGrid. And thank you for watching.
- Uploaded
