Sensor Groups on the IQ Panel 2 - Overview
Related Products

Description
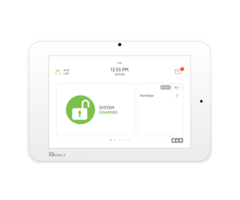
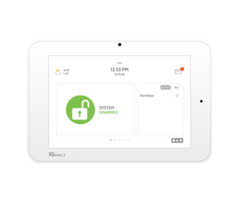
In this video, Joe discusses the Sensor Groups available on a Qolsys IQ Panel 2 Alarm System. The Sensor Group assigned to a system zone determines how the system responds when the associated sensor is activated. The setting is very similar to the Response Type option found on most Honeywell Panels.
In order for a sensor to work with an IQ Panel 2, it must first be programmed. Part of this programming process involves assigning a Sensor Group. Based on this setting, the system will respond a unique manner when the sensor is activated. For example, if the Sensor Group is set to Instant Perimeter, then an immediate alarm will occur if the sensor is faulted while the system is Armed Away or Armed Stay. It is crucial that the Sensor Group option for each zone is configured correctly, or else the system will not work properly.
It is important to note that not all Sensor Group options will be available for each device type. For instance, a Sensor Group designed for with a security key fob will most likely be unavailable for a zone used with a door and window contact or a glass break sensor. When programming a new sensor, you should set the Sensor Type to see which Sensor Group options are available. You will also use programming to set the Sensor Name, Chime Type, Voice Annunciation and the signal source. You must remember to save the changes for any new sensor that is added.
After you add a new sensor, it is always a good idea to test it. This will allow you to make sure that the system responds the way it should. You may have to put the system into its test mode with the central monitoring station when doing this. Placing your system in test mode can help prevent any false alarms from occurring.
http://alrm.gd/get-monitored
Transcript
Hi, DIYers. Joe here from Alarm Grid. And today we're going to talk about sensor groups on the Qolsys IQ2 panel. Now, sensor groups basically tell the panel how the sensor is going to act. If you've ever worked with a Honeywell panel, the sensor response type will be the same thing. So might bring up some memories.
On the panel today, we actually have two different sensors that we're going to add to the panel. And we're going to show you the different sensor group options that you see. One thing to know on the Qolsys IQ2 is that the sensor groups that you have available, they may only show certain ones, depending on what kind of sensor you do actually enroll into the system. So depending on the sensor type, that's going to change what sensor groups you have available.
Also, different sensor groups are available depending on which firmware you have loaded onto your IQ2. So a good thing to do first is to upgrade it to the latest firmware to make sure that you have all the available sensor groups for whatever sensor you're going to learn in. The first one that we're going to learn in today is a regular internal logics contact. This guy right here works on the 319.5 frequency, which is compatible with our IQ2.
The other sensor that we're going to learn in is actually a key fob, and this key fob works on the Power G frequency. That is an option you can actually have on the IQ2. It's a daughter card that installs in the system. And one of the good benefits, one of the major touted points of the Power G is how far its communication ranges from the system.
If you do you have any questions about Power G, though, feel free to reach out to us, and we'll be more than happy to explain all the different features that you get with this technology. Now, as we have a key fob, and we have a contact, when we learn the [INAUDIBLE], we're going to see two different sensor types which are going to give us different sensor groups-- as a good example.
So on our system, first we have to go into our sensor enrollment screen. So I'm going to slide down from the top, click on Settings, Advanced Settings. I'll do my default dealer code, 2222. I'm going to do Installation, Devices, and then Security Sensors.
From here, I'm going to do auto learn sensor. And first I'll do the inner logic sensor. And as you can see, because I moved the magnet away from it and faulted it, it showed up in the system. Just to make sure that this is the sensor, though, I'm going to do that one more time.
And as you can see, we're getting the same number for the serial. We definitely know that this sensor is learning into the system. So I'm going to click on OK.
And as you can see, the sensor type comes in as door and window, and the sensor group comes in as number 10, Entry Exit, Normal Delay. This would be useful if you're installing this on the front door, or any door where that you're going to go in and out of the house. Now, if you click on sensor group, you'll see that we have a whole bunch of other sensor groups available for this particular sensor type that we're learning in. If we change the sensor type to, let's say, A Motion, you'll see that our sensor group does change two different options.
So if you're getting creative with your sensor installation, and you needed to do a different thing based on an arming setting, or something else with the system, checking out the different sensor types can possibly allow you to install the sensor in whatever situation you're trying to install it in.
You're just going to want to make sure that you know exactly what the sensor is doing when you do program it in as such. So let's go back. I'm going to set this to a regular door and window sensor. Entry Exit is fine. Front door is good. We'll leave it as that.
So I click Add New, and now the sensor is programmed into the system. Now, with Power G sensors, you actually have to hold down the main button or the learn button. It's going to flash. It's going to turn off, and then the LED is going to flash again, or illuminate, and that's going to be when you release the button to learn in to the system.
The key fob, we're going to use the panic button right here, as this doesn't have a learn button on the back of it. Again, if you have any questions about [INAUDIBLE] a Power G to the system, feel free to reach out to us. We'd be more than happy to help.
So I'm going to go ahead and press and hold the button. We've got one light. And now I'm going to let go when the light turns back on and stays on. So I let go now, and there we go. We see the system did pick it up.
So if I click OK here, we'll see that our source says Power G, which is what we want, as this is working on the Power G frequency. And you'll also see that the sensor type is an auxiliary pendant. And our sensor group is different from our contact that we enrolled in. Right now it's mobile auxiliary.
And if we click that, you'll see that you have a whole bunch of different sensor groups that will work best with the panic key fob that we have here. But we're just going to leave that as this and click Add New. It's going to add in the sensor. And then we go. There's our two sensors with the sensor groups that we want for these particular devices.
I'm going to go ahead and click the Home button. They're both programmed in and ready to go. If you have any questions about the IQ2 sensor groups on the system, enrolling in sensors or Power G, feel free to reach out to us. Head over to our website, www.alarmgrid.com, give us a call at 888-818-7728, or send us an email to support@alarmgrid.com.
Enjoy the video, feel free to subscribe, and if you want to be notified when we post future videos, hit the notification button below, and we'll send you an update when we do so. Thanks for watching and have a great day.
- Uploaded
