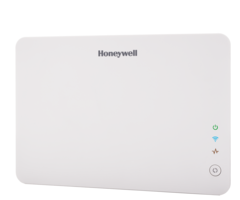
Can the Honeywell VAM Send Texts?
Yes, the Honeywell VAM can send texts. The device has the capability of sending email alerts. Since an email message can be sent to a phone in the form of an SMS message, the VAM can technically send text alerts to the user. The user can choose which events they will receive alerts for.

Complete the following steps to have your Honeywell VAM Z-Wave Controller send you text alerts:
1. Connect to WIFI. Before your Honeywell VAM can send email or text alerts, it must be connected to a WIFI network. This process is outlined in this FAQ. Make sure that you take note of the IP address assigned to the VAM.
2. Access Email Notifications. To access the Email Systems Events Notifications Page for the Honeywell VAM, you must use the web browser on a device that is connected to the same WIFI network as the VAM. From this device's web browser, enter in the IP address for the VAM. You will be taken to the home screen for the VAM.
From there, choose "Setup", followed by "Email". This will take you to the Email Systems Events Notifications Page for the Honeywell VAM.
3. Configure the sending email. Select the "User SMTP" option to choose the email address where the text notifications will be sent from. For this purpose, any valid email address will work.
Choose the appropriate email server and the account information for the desired email address. This will include the email ID (the address) and the account password. Once the information has been entered, press the picture of the floppy disk (the save icon) at the bottom of the screen to save your changes. Then press the green checkmark icon to confirm. Remember, the email provided will be used to send SMS text alerts to your phone whenever a specified system event occurs.

4. Choose the trigger events. At this point, you will choose the recipient of the email/SMS alerts. You will also select the specific system events that will trigger an alert to be sent out from the email address designated in step 3. You can choose system event types related to Security, Zones, Z-Wave Thermostat activity, Z-Wave Door Lock activity, Garage Door activity and Water Valve activity. Select the corresponding checkboxes next to the events that you want to be associated with the alert that is sent out. To look at specific events for each event type, simply click on the event type to highlight it. The corresponding system events will be displayed so that you can select/unselect the checkbox next to them.
5. Provide the recipient addresses. Once you have configured the system events that will trigger an alert, you can then choose the email/phone numbers that will receive these alerts. To do this, click on the white rectangular box underneath "E-Mail Address". This will take you to a screen where you can configure the recipients.
Up to four addresses can be assigned per alert. Make sure that the box is checked next to any address that is being used with the alert.
Since the goal here is to send the alerts as an SMS message you must enter in the email addressed that is associated with the 10-digit phone number. The formula for this is as follows:
10digitnumber@carrier.com
For example, if the phone number was 123-456-7890, then it would potentially be entered as one of the addresses below, depending on the cellular provider:
- AT&T: 123457890@txt.att.net
- Verizon: 1234567890@vtext.com
Of course, the portion of the address after the "@" will change depending on the cellular provider. We suggest looking up the correct format for the cellular service provider that is being used.
Once you have finished entering the recipient(s), press the "OK" button. Then press the floppy disk (save icon) at the bottom of the screen. When the message "Notification Save Success!" is displayed, press the green checkmark icon to confirm.

6. Repeat for each alert. Repeat the process outlined above for the other alerts that you wish to set up. Up to four unique alerts can be programmed for this purpose. Each alert can be triggered by different system events, and they can be sent out to different recipients.
These alerts are differentiated by the "Events 1-4" buttons on the left side of the screen. Go through each different Event, and set them up as needed. Make sure that each Event is assigned the correct system event(s) and the correct recipient(s). Also make sure to save each alert as you go through them.
7. Return to the home screen. Once you have finished configuring each alert, press the picture of the house in the upper-left corner of the panel to return to the home screen.
The video below provides more information on the process for setting up notifications for a Honeywell VAM:
Did you find this answer useful?
We offer alarm monitoring as low as $10 / month
Click Here to Learn MoreRelated Products

Related Videos
Related Categories
- Answered

