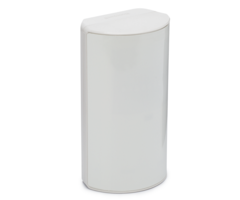
Can the Lyric's SiXPIR Motion Be Used to Trigger HomeKit Scenes?
Yes, the Lyric's SiXPIR Motion can be used to trigger HomeKit scenes. Once the Lyric Controller has been paired with Apple HomeKit, the app will recognize any security sensors that have been set up with the Lyric. This includes any motions. The SiXPIR can then be used to trigger scenes.

The SiXPIR sensor is a motion detector that is designed to work exclusively with the Lyric Controller. After the Lyric system has been paired with HomeKit, the Apple Home App will acknowledge any SiXPIR sensors that have been paired with the Lyric. The user can then use the Home App to create and manage home automation scenes. These scenes will automatically activate Z-Wave devices around their home. Once the scene has been set up, the user can then set the automation for that scene to activate when a security sensor detects something. By setting the automation for that scene to be based around the SiXPIR sensor, the user can have the scene trigger when the SiXPIR is activated.
Completing this process is quite simple. First, the SiXPIR sensor must be paired with the Lyric Controller. Next, the Lyric Controller must be synced with Apple HomeKit. Once the integration process is complete, the scene will be managed through the Apple Home App. From the app, click on the plus (+) icon in the top corner of the screen. Then select "Add Scene". The user can then choose between suggested scenes and custom scenes. Next, the user will name the scene and choose an icon for the scene.
At this point, the user will choose the Accessories for the scene. The term "Accessories" refers to the the devices that will be controller during the scene. This does not include the SiXPIR motion that will be used to activate the scene. Choose all the necessary devices and then click "Done" in the upper-right corner of the screen. Please note that only devices that have been added to HomeKit will be able to be added to the scene.
The Accessories that were chosen will then be displayed on the screen. The Accessories for the scene can be changed by selecting "Add Accessories". Long-pressing any Accessory will allow you to adjust the way it activates in the scene. For example, a Z-Wave thermostat can be set to a specific temperature, or a Z-Wave light can be set to turn off instead of powering on. The "Test This Scene" button will have the scene run with its current settings. This is good for making sure that everything has been set up correctly. After adjusting any settings for the devices, click "Done" in the upper-right corner of the screen.
Now that the scene has been established, it must be set to trigger with the SiXPIR Motion Sensor. From the main screen of the Home App, click the "Automation" tab in the bottom-right corner of the screen. Then select "Create New Automation. The app will ask when the automation should occur. Choose the option "A Sensor Detects Something". Then choose the SiXPIR sensor that will be used to activate the scene. Next, choose the scene that was set up earlier. Finally, click "Next" and follow the instructions on the screen to complete the process.
Did you find this answer useful?
We offer alarm monitoring as low as $10 / month
Click Here to Learn MoreRelated Products

Related Categories
- Answered
