Can The Qolsys IQ Panel 4 Operate As A Z Wave Controller Without Monitoring?
Yes, the Qolsys IQ Panel 4 has a built-in Z-Wave Plus controller. Use it with or without monitoring. Enroll compatible Z-Wave devices using the touchscreen interface. Control devices on the panel or any remote keypads connected. There is no remote access option without a monitoring plan.
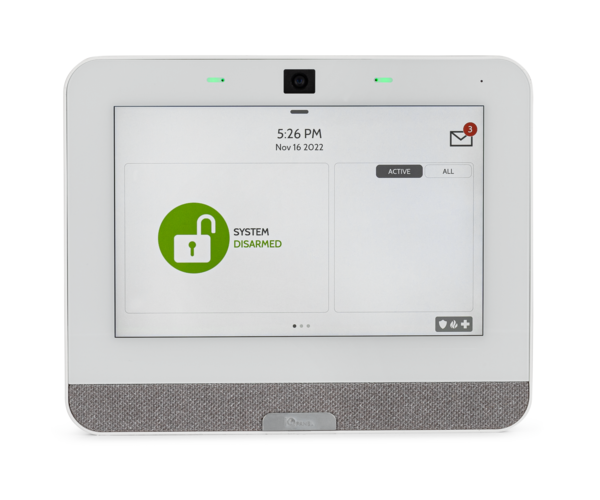
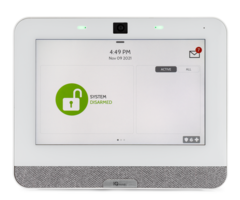
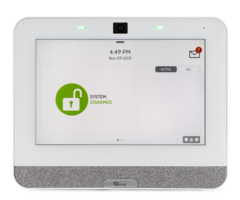
The IQ Panel 4 is a sleek All-in-One (AiO) alarm system from Qolsys. The Qolsys IQ Panel 4 is an innovative panel that features an 8-core Qualcomm SnapDragon Processor. It offers a 7" capacitive multi-touch touchscreen and supports 128 zones and 242 users. The IQ Panel 4 also has a built-in panel camera that can take snapshots during disarming. It has many modern features that seamlessly integrate with Z-Wave smart home devices, by way of its built-in Z-Wave Plus V2 controller. The IQ Panel 4 is available in two (2) colors, black or white. It comes with either a Verizon or AT&T LTE communicator built in.
The IQ Panel 4 is also available in many varieties or "flavors". These flavors provide support for older wireless sensors that were installed with a previous system and still work. These include the 319.5 MHz (Qolsys/GE/Interlogix) flavor, the 345 MHz (Honeywell/2gig) flavor, and the 433 MHz (Legacy DSC) flavor. All of these panel flavors that offer legacy RF support also work with the 915 MHz PowerG frequency sensors. There is also a PowerG-only IQ Panel 4 version that does not offer legacy receiver support and comes in either a Verizon LTE or AT&T LTE version. The panel in this kit is only available in white.
The IQ Panel 4 is compatible with Alarm.com interactive remote services. Alarm.com requires that the monitored panel have an activated cellular communicator. In order to use alarm.com, a compatible service plan with an alarm dealer is required. Alarm.com requires, at a minimum, a cellular-capable plan to activate the service. For Alarm Grid customers, this is a Gold Plan (Self or Full) or higher. The IQ Panel 4 comes with a cellular communicator built in. To unlock the full potential of the panel, including the ability to remotely control the system and its Z-Wave devices, some type of monitoring plan is almost a must.
Using the IQ Panel 4 as a standalone Z-Wave controller still provides all the local control you need.
To learn a Z-Wave device into the IQ Panel 4, follow the steps below.
1. Enter the Programming Menu. Start by pressing the small grey bar at the top of the screen. Then choose Settings > Advanced Settings > Installer or Dealer Code (default is 1111/2222) > Installation > Devices > Z-Wave Devices.
2. Clear the Device. Z-Wave devices can only talk to one (1) controller at a time. New devices that were tested at the factory and old devices that were a part of a different Z-Wave network may need to be cleared. For this reason, we always recommend clearing the device before attempting enrollment. Select "Clear Device". The panel goes into exclusion mode.
To clear the Z-Wave device, activate the device's inclusion function while the panel is in its exclusion mode. Many Z-Wave devices have a button for this purpose. Other devices may require you to follow a different procedure for exclusion. Check the manual for the Z-Wave device for more information. At times, you may need to bring the Z-Wave device close to the panel in order for an inclusion or exclusion to go through successfully. If the Z-Wave device was associated with another controller before, and this information is cleared during the exclusion process, the panel will display a message letting you know the device has been successfully cleared. Click "OK" to continue.
Some newer Z-Wave devices will only perform an exclusion if they have been paired with another controller. If you have this type of device, and it hasn't been paired/included with a Z-Wave network, then attempting an exclusion won't do anything. The panel will just continue to show that it is ready to exclude devices. In this case, you can just hit cancel on the panel touchscreen and move forward with inclusion.
3. Enroll the Device. To begin the inclusion mode, select "Add Device," then press "Include." This will put the panel into its inclusion mode. Next, activate the inclusion function on the Z-Wave device. Again, the Z-Wave device may need to be close to the panel while being included. The panel will display a message once it has recognized the device.
4. Configure the Settings. Once enrolled, the IQ Panel 4 will allow you to name the device. We strongly recommend naming it based on its location. This will allow the future you to recall what and where the device is. You can also add it to an existing local automation by selecting "Automation" and selecting from one of the pre-named scenes. Then select "Add" to complete the setup.

5. Test the device. Hit the home button to return to the main menu. Then swipe your finger to the left on the home screen to reveal enrolled Z-Wave devices. Locate the specific device you named earlier. Control the device from the touchscreen, and make sure that it responds correctly.
Did you find this answer useful?
We offer alarm monitoring as low as $10 / month
Click Here to Learn MoreRelated Products
- Answered
- Answered By
- Fred Daniels
