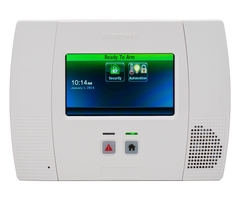
How Do I Activate a Honeywell 5800PIR-RES for Lyric or Lynx Panels
To activate a Honeywell 5800PIR-RES motion detector, you must program it into your Honeywell security system. After the motion detector has been integrated with your security panel, you should then test the sensor in its final location to ensure that the device is functioning properly.
The video below explains how to add a 5800PIR-RES to a Lyric panel:
Complete the following steps to activate your 5800PIR-RES:
1. Power the sensor. Remove the back cover of the 5800PIR-RES and insert a battery into the device. A red light will indicate that the sensor has powered on and entered its walk test mode. In this mode, a red light will be displayed whenever the sensor detects motion. The sensor will remain in this mode for 10 minutes. You can reenter this mode by taking out the battery and then reinserting it.
The video below explains more about conducting a walk test:
2. Access programming mode. From the home screen on your panel, choose Security > More (Lynx Panels only) > Tools > Enter Installer Code (default is 4112) > Program. You will now be in programming mode.
3. Access serial number settings. Once in programming mode, select "Zones". Choose an available zone to highlight it, and select "Edit" at the bottom of the screen. Then select "Serial Number". You will now be able to enter the sensor's serial number.
4. Learn-in the sensor. You can learn-in the detector in two ways. The easier method is to fault the detector three times to have it automatically recognized. You can fault the motion detector by moving it, or waving your hand in front of it. Each fault will be verified by a beep. If done correctly, the 7-digit serial number will be displayed on the panel.
You can also manually enter the sensor's serial number. The 7-digit serial number can be found on a sticker on the back of the device near the battery. Click "Done" once the serial number is entered.
5. Set the device as a motion sensor. Once you are back on the zone edit screen, select "Device Type", then choose "Motion Sensor". After doing this, you will be taken back to the zone edit screen, and "Motion Sensor" will be displayed under "Device Type".
6. Select the response type. Click "Response Type", and choose the response type for the sensor. This is usually either "Interior Follower" or "Interior With Delay". Choosing an Interior zone type automatically bypasses the detector when the panel is armed in the Stay mode. This allows the user to move freely within the interior of the house, while the perimeter is armed.
Interior follower allows the motion to follow the delay of another zone, if the other zone is activated first, but if the motion is triggered first, it will cause an instant alarm. Interior with delay will always provide the same amount of delay time as Entry Delay 1, even if the motion is the first zone activated. Both zone types always provide an Exit Delay.
7. Name the sensor. From the zone screen, choose "Zone Descriptor 1", and enter the desired name for the sensor. You can also program "Zone Descriptor 2" if required. Also, set the alarm report option, and be sure "Supervised" is selected, if desired. Make sure to select "Save" in the bottom right corner of the zone screen to save all of your changes.
8. Install the detector. Install the sensor in the desired location, and then test the device. The video below covers the installation process:
Did you find this answer useful?
We offer alarm monitoring as low as $10 / month
Click Here to Learn MoreRelated Products


Related Videos
Related Categories
- Wireless Alarm Control Panels
- DIY Wireless Security Systems
- Transmitters
- Wireless Motion Detecting Sensors
- Answered


