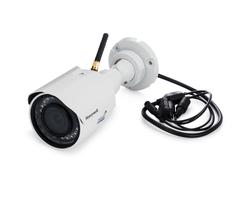
How Do I Add a IPCAM-WOC1 to Total Connect?
You can add an IPCAM-WOC1 to Total Connect by using the Total Connect Mobile App on a smart device. Your smart device will produce a QR code for the camera to scan. The smart device will need to have its BlueTooth enabled and be connected to the same WIFI network that the camera will use.

Complete the following steps to add an IPCAM-WOC1 to Total Connect:
1. Prepare the camera. Mount the camera in the desired location. Make sure that its antenna is securely attached. However, DO NOT connect the power supply to the camera yet. This FAQ will show you how to install the camera.
2. Connect to WIFI and enable BlueTooth. On your smart device, connect to the WIFI network that you want the IPCAM-WOC1 Camera to use. Also make sure that the BlueTooth on your smart device is enabled and not currently connected with another BlueTooth device (e.g. headphones, speakers, etc.)
3. Open Total Connect and login. Open up the Total Connect 2.0 App on your smart device. If you do not have the Total Connect 2.0 Mobile App, you can download it from the Apple App Store or the Google Play Store. Then login to your Total Connect Account. If you do not have a Total Connect Account, you must set one up with your alarm monitoring company.
4. Start adding the camera. After you have logged in to your Total Connect Account, press the Cameras button. This will be at the top of the screen on an Android device, or at the bottom of the screen on an iOS device, assuming that the navigational order has not been adjusted.
Next, press either the Plus (+) button (Android) or the "Add Camera" button (iOS). You will then be prompted to choose the type of camera to install. Choose "IPCAM-WOC1".
You will then provide a name for the camera. We recommend choosing something easy to remember, such as "Backyard Camera" or "Front Door Camera". Then press next.
5. Connect the power supply. At this point, you should connect the camera's power supply. Then wait for the LED light on the camera to flash only blue. It may take a few minutes for this to occur.
6. Generate the QR Code. From the mobile app on your smart device, press the "Generate QR Code" button. The code will soon appear on your smart device.
7. Finish adding the camera. Bring your smart device to the camera. Hold the smart device about 3 to 8 inches away from the camera, with the QR Code directly facing the camera's lens. Once the code has been confirmed, your smart device will make an audible alert. A confirmation message will be also be displayed on the screen.
You will then be prompted to choose a WIFI network for the camera. Make the selection. You will then need to enter in the password for the network. Enter in the password, and press Next.
The camera will then attempt to connect to the network. The LED light will change from blue to purple to green. Once a steady green light has appeared, the smart device will display the message "Setup Successful". Hit done when you are finished. You can then view a live feed of the camera from Total Connect.
Did you find this answer useful?
We offer alarm monitoring as low as $10 / month
Click Here to Learn MoreRelated Products

Related Categories
- Answered
