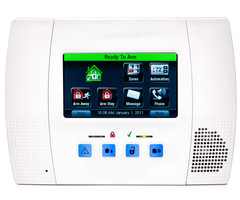
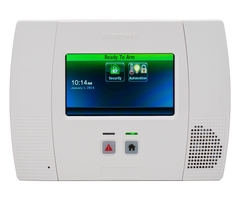
How Do I Add a Wired Siren to a Honeywell LYNX Touch Using the LYNX-WEXT Kit?
You can add a wired siren to a Honeywell LYNX Touch using the LYNX-WEXT Kit by powering down the LYNX Touch System and making all the connections. The LYNX-WEXT includes everything you need, except for a wired siren. The kit was specifically designed with a Honeywell LYNX Touch in mind.

Many users will want to add an external sounder to their Honeywell LYNX Touch System. While there are some wireless options available, like the Honeywell 5800WAVE, users who require a louder sound will need to go the hardwired route. To do this, a relay is required. Also since the trigger output on a LYNX Touch System is only 3 mA, a separate power supply will usually be required as well.
The LYNX-WEXT Kit provides an UltraTech 1240 Backup Battery, a Honeywell 1361-GT Transformer, a Honeywell AD12612 Power Supply, an Altronix RBSNTTL Relay and a metal enclosure to house it all. This is everything a user needs to add a wired siren to their LYNX Touch. Alarm Grid also offers the LYNX-EXT which uses a wireless relay instead of the RBSNTTL
Complete the following steps to add a wired siren to a Honeywell LYNX Touch Using the LYNX-WEXT Kit:
1. Power down the system. Before attempting to connect a wired siren, you should power down the system. This is necessary for avoiding damage to the panel. First open up the panel by pressing in the two upper tabs and separating the front from the back plate. Then disconnect the backup battery, and unplug the AC transformer to power the system down. The screen should be completely blank.
2. Wire the connections. You can use 18-gauge, 2-conductor wire to complete the connections. Similar gauge wire, like 20-gauge or even 22 gauge, will also work just fine. A good rule of thumb is, the longer the wire run, the heavier the wire gauge should be. Just make sure the connections are nice and secure and configured properly. Make the following connections:
- Connect TRIG on the LYNX Touch to TRIG - (negative) on the RBSNTTL Relay.
- Connect Pos + (positive) on the RBSNTTL Relay to DC + (Positive) on the AD12612 Power Supply.
- Connect a jumper wire from Pos + (positive) to C on one side of the RBSNTTL Relay.
- Connect the corresponding NO (Normally Open) terminal on the RBSNTTL to the positive (+) siren terminal.
- Connect the Neg - terminal on the RBSNTTL to the the DC - (negative) terminal on the AD12612
- Connect a jumper wire from Trig + (positive) on the RBSNTTL to Pos + (positive) on the RBSNTTL.
- Connect the DC - (negative) terminal on the AD12612 to the Negative (-) siren terminal.
- Connect the Negative (-) terminal on the 1240 Battery to the Black (negative) battery lead on the AD12612.
- Connect the Positive (+) terminal on the 1240 Battery to the Red (positive) battery lead on the AD12612.
- Connect one terminal (either) of the 1361-GT Transformer to one AC input terminal (either) of the AD12612.
- Connect the other terminal (either) of the 1361-GT Transformer to the other AC input terminal (either) of the AD12612.
- Connect the GND terminal on the LYNX Touch used with the plug-in transformer to the negative (-) terminal on the siren.

3. Power on the system. Plug the transformer for the LYNX Touch back in to power the system back on. You can reconnect the backup battery and close the panel.
4. Create a rule. You must create a rule that tells the siren to activate during an alarm. Complete the following steps:
- Start from the main screen of the LYNX Touch.
- Choose Security > More > Tools > Installer Code (default 4112) > Rules > Add New.
- Choose a good name for the Rule, such as "External Siren".
- For Type, choose "Trigger Output".
- For Action, choose "Permanent On".
- For Start System Operation, choose "Any Burglary Alarm" or "Any Fire Alarm". You must create two separate rules if you want the siren to activate for both alarm types.
- For Stop System Operation, choose "Bell Timeout".
- Press Save in the bottom-right corner.
- Back out to the main screen using the return arrow in the upper-right corner. Press "Yes" when asked if you want to allow the installer to re-enter programming.
5. Test the siren. Put your system on test mode with the central station. This is very important for avoiding false alarms. Then activate an audible alarm on the system. Make sure the siren activates. Clear the alarm by disarming twice with your Master Code. If the siren activates, then it was wired correctly. You can take your system off of test mode after completing the test.
Note: If you use the Honeywell 5800RL with a siren on a compatible Honeywell Panel, then the device will also trigger a connected siren whenever a 24-Hour Auxiliary Zone is faulted. This Response Type would not normally trigger a siren. Keep this in mind if you plan on using a Honeywell 5800RL on a system with one or more 24-Hour Auxiliary Zones set up.
Did you find this answer useful?
We offer alarm monitoring as low as $10 / month
Click Here to Learn MoreRelated Products


Related Videos
Related Categories
- Answered

