How Do I Add a Wired Siren to a Honeywell Lyric Alarm System?
You can add a wired siren to a Honeywell Lyric Alarm System by adding an external power supply, a programmable relay output and a hardwired external sounder to the existing system. Once everything has been properly wired and configured, you will have a wired siren for your Lyric Controller.

Before you decide that adding a hardwired siren is absolutely necessary, you should consider all your possible options. The Lyric Controller already has a built-in 85 dB siren, which is sufficient for many applications. If you need another 85 dB siren in a separate area, the easiest option is to add a Honeywell SiXSIREN. This external wireless siren was designed specifically with the Lyric in mind. If you require a louder siren, there is also the Qolsys IQ Siren. This wireless Z-Wave siren can very easily integrate with the Lyric. It produces sounds of up to 105 dB. The only real reason to add a wired siren is for those rare industrial applications where a siren in excess of 110 dB is needed.
The MIMOlite is no longer available. Check out this FAQ, which shows how to wire a ZooZ Zen16 Relay with a high-current siren, instead of the MIMOlite. The alternate FAQ covers wiring, and programming through Alarm.com. Programming information through Total Connect 2.0 is coming soon.
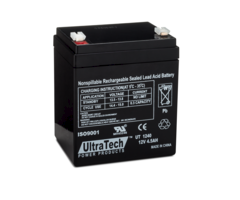
If you do decide that a hardwired siren is the best solution, you should start considering everything you will need. Obviously, you will need a wired siren and a properly functioning Honeywell Lyric Alarm System. For wiring, 18-gauge, 2-conductor wire works best. But many people have used 16-gauge or 22-gauge wire without major issue. It doesn't really matter as long as you can secure the connections. Just keep in mind the recommended wire runs based on the gauge you are using. The longer the wire run, the heavier the wire gauge should be. You will also need a power supply, including a backup battery and plug-in transformer. If you want to obtain these parts from Alarm Grid, we recommend the Honeywell AD12612 Power Supply, the Ultratech 1240 Battery and the Honeywell 1361-GT Transformer.
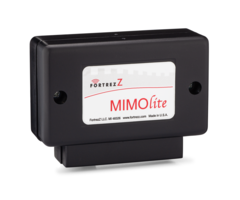
But the real star of the show here is the programmable relay. For DIYers, we strongly recommend using the FortrezZ MIMOlite Relay Interface Module. This accessory makes it as easy as possible to add an external hardwired siren to the Honeywell Lyric Controller. It basically allows a non-Z-Wave device, like a hardwired siren, to activate through a quick and simple Z-Wave scene. While this is not a traditional way to trigger a wired siren, it truly makes things more straightforward for a DIY installation. We actually already have an FAQ covering the process for installing a hardwired siren with a Lyric Controller using the MIMOlite. The remainder of this FAQ will cover much of the same process.
Complete the following steps to install a wired siren with a Honeywell Lyric Controller using a MIMOlite:
1. Prepare the accessories. It is possible to bring over an existing wired siren from an older wired system. If you are doing this, you should install the power supply and MIMOlite in the previous location of the wired panel. You can mount the power supply inside the panel's metal enclosure if you want. However, the MIMOlite must be installed outside the metal enclosure so that it can send Z-Wave communication signals to the Honeywell Lyric Controller. The typical wiring configuration can be seen below:
 The power supply will need a transformer and backup battery. If you are upgrading from an older hardwired system, you might be able to use the old AC wires and the existing transformer to complete these connections. Simply unplug the existing transformer from the wall, and move the AC wires from the old panel to the correct power supply terminals. Do not plug-in the transformer at this time. You can reuse the battery if it is a 4-amp hour, 12-volt, lead-acid battery with a suitable charge. If you don't have such a battery then an UltraTech 1240 is the one to use.
If you do not have a suitable existing transformer, then you must add a new one. You might still be able to use existing AC wires from an old panel. Remove the wires from the old panel, and connect them with the AC terminals of the power supply. Connect the wires from the old transformer to the new one. Again, do not plug-in the transformer just yet.
Next, turn your attention to the MIMOlite. This device comes with its own 13.5VDC transformer that is rated at 400mA. Some MIMOlite Modules come with the transformer already connected, but others do not. If you need to connect the transformer, make sure to observe correct polarity. The red wire should go to positive (+), and the black wire should go to negative (-). However, the MIMOlite does not come with a backup battery. If you want to keep it running in the event of power loss, an uninterrupted power source (UPS) is a suitable option. For best results, install the MIMOlite near the power source, but outside any metal enclosures. You may want to pair it with the Lyric System and test its range before permanently mounting.
It may also be possible for you to power the MIMOlite using the same power supply that is being used for the wired siren. If you intend to do this, keep in mind that the MIMOlite draws 60 mA of power. Remember to consider this when performing a calculation of the total power draw. This may influence your decision when selecting a suitable power supply. This setup can be seen in the following diagram:

2. Pair to the Lyric. The FortrezZ MIMOlite is a Z-Wave device. As a result, you will follow the typical steps of Z-Wave enrollment to integrate the module with the Lyric System. Make sure the MIMOlite is powered on when completing this step.
You will start by clearing the MIMOlite from the network. This is a necessary step, even if the MIMOlite is brand-new and fresh out of the box. Start from the home screen of the Lyric. Choose Automation > Down Arrow > Tools > Exclude Devices. The Lyric will enter into its exclusion mode. Press the learn button on the MIMOlite to exclude it from the network. Press the return arrow in the upper-right corner once the Lyric shows that a device has been excluded.
Next, you will include the MIMOlite into the Z-Wave network. Choose Include Devices. Then press the learn button on the MIMOlite to enroll it with the Lyric. Press the blue Done button when prompted. Then press the return arrow in the upper-right corner of the screen. This will pair the MIMOlite with the Lyric. Please note that the MIMOlite will show-up in the "Switches" Menu of Automation. If you want to give the MIMOlite a recognizable name, you can do so from that menu. This can be helpful when you go to create a Smart Scene for the MIMOlite later.
3. Finish wiring. From here, you can complete the wiring for the MIMOlite Make the following connections:
- Connect the Positive Terminal on the Wired Siren to the DC Positive Terminal on the Power Supply
- Connect the Negative Terminal on the Wired Siren to the Normally Open Relay Terminal on the MIMOlite
- Connect the DC Negative Terminal on the Power Supply to the Common Relay Terminal on the MIMOlite
- Also make sure that the AC terminals from the power supply transformer are properly connected with the AC terminals on the actual power supply. Also connect a backup battery for the power supply.
Remember that the recommended power supply for this application is the Honeywell AD12612. This power supply will require a transformer rated at 16.5VAC 40VA. A suitable transformer for this power supply is the Honeywell 1361-GT.
4. Establish scenes. Assuming that the Lyric is set up with Total Connect 2.0, the smart scenes must be created through the TC2 platform. Otherwise, you can use the "Smart Scenes" option on the Lyric home screen. These instructions will assume that the Lyric is being used with Total Connect 2.0.
From your Total Connect 2.0 account, check Events to see that an Automation Sync was completed after pairing the MIMOlite. If not, navigate to the Locations Menu and Sync the Panel. Then go to Scenes, and press "Add Scene":

First choose a name for the scene, perhaps "Siren". Then press Continue. Choose Others when asked to select a device. Then select the MIMOlite. If you gave it a name earlier in Step 2, it may be easier for you to locate. Press the Continue button twice. When asked "When would you like the scene to run?", select "Triggered by another device". Then select "Security System", followed by "Burglar Alarm", then "Continue". When asked to "Select the status of your Switch", choose "On", followed by "Continue". Make sure the programming is correct, and press "Save".


It is also recommended that you create a separate scene that will deactivate the MIMOlite and get the siren to stop sounding after it has been activated. To do this, go to Scenes > Add Scene. Provide a name for the scene, maybe "Siren Off". When searching for a device, choose from Others, then select the MIMOlite. Press Continue. When asked "When would you like this scene to run?", choose "Triggered by another device". Then choose "Security System", followed by "Disarmed", then "Continue". Verify everything is correct, and press "Save".

Did you find this answer useful?
We offer alarm monitoring as low as $10 / month
Click Here to Learn MoreRelated Products


Related Categories
- Home Security Systems
- Home Security Systems
- Business Security Systems
- Business Security Systems
- Monitored Home Security Systems
- Small Business Security Systems
- DIY Wireless Security Systems
- Answered
- Answered By
- Julia Ross


