How Do I Add Additional Keypads On a 2GIG Go!Control?
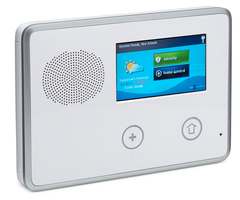
You can add additional keypads on a 2GIG Go!Control by navigating through Question 4 of system programming. This is the programming section dedicated to enrolling and configuring keypads. The system can support up to four keypads. Both 2GIG PAD1-345 Keypads and 2GIG TS1 Keypads can be used.

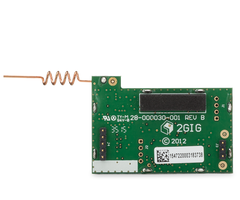
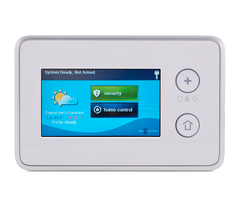
Note: The 2GIG TS1 Wireless Touch Screen Keypad is a bi-directional communication device that requires a 2GIG XCVR2-345 Transceiver Module to be installed inside the system. The system must also be running firmware version 1.10 or higher. More information on updating the firmware is available here. The PAD1-345 Push-Button Keypad is a uni-directional communication device that requires no additional add-ons for full functionality.
The steps below assuming that either the PAD1-345 or TS1 Keypad is powered on and communicating properly. Complete the following steps to add a keypad to a 2GIG Go!Control GC2:
1. Access Question 4. Start from the main screen of the GC2 System. Press the 2GIG Logo in the lower-right corner. Enter the Installer Code, which is 1561 by default. Choose System Configuration. Then press the Go To button, which is near the right side of the screen in the center. Enter "04". This will take your Question 4, which is used to enrolling and editing keypads.
2. Start configuring the settings. You will now go through and configure all the settings. First choose which keypad you want to use with the system. There are four keypad slots you can choose from. You can use the left and right arrows to scroll between keypad slots. Press the down arrow to move on once you have made your selection.
Next, set the keypad to (1) Enabled. Make the selection using the left or right arrow. Then press down to continue to the next option.
Use the left and right arrows to set the Equipment Code. You will choose either (0867) PAD1-345 Wireless Keypad or (1059) 2GIG-TS1 Wireless Touchscreen Keypad depending on the type of keypad you are using. Press the down arrow to continue after you make your selection.
3. Enroll the keypad. The next step is to learn-in the keypad. This process will vary depending on which keypad model you are trying to enroll.
If you are enrolling a PAD1-345, press Shift at the bottom on the GC2, followed by Learn on the left. This will put the GC2 System into its wireless enrollment mode. Then press and hold on of the panic buttons (fire or police) on the PAD1-345. The GC2 System should recognize the signal and display the Serial Number on the screen. Press OK. You can then press the down arrow to continue.
If you are enrolling a TS1 Keypad, press the Learn button on the left on the GC2. Then press the Pair with Panel button on the TS1. The GC2 System should recognize the signal from the TS1 and announce that enrollment was successful. Press OK in the bottom-right corner of the GC2. Then press the down arrow to continue.
4. Finish configuring the settings. For Equipment Age choose New or Existing. This selection will not affect keypad performance. Press the down arrow to continue.
Set the Emergency Keys to disabled or enabled. We recommend setting them to (1) Enabled. Press the down arrow to continue.
Then create a Voice Descriptor for the keypad. We recommend choosing something easy to remember that will help you recognize the keypad. A list of Voice Descriptor codes is found on pages 38 and 39 of the 2GIG GC2 Programming Guide. Press the down arrow to continue.
5. Save your changes. Press the Edit Next button at the bottom. Then press End in the bottom-right corner. Make sure the box "Save Changes" is marked. Then press Exit in the bottom-right corner. The panel will reboot to apply the changes. The new keypad should function properly after the reboot.
Did you find this answer useful?
We offer alarm monitoring as low as $10 / month
Click Here to Learn MoreRelated Products


- Answered

