How Do I Add Additional Keypads to a 2GIG GC3?
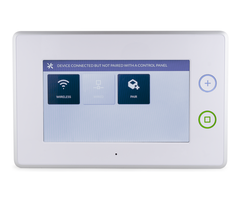
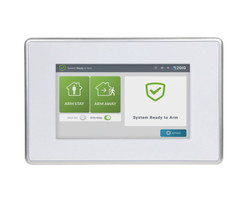
You can add additional keypads to a 2GIG GC3 by accessing the Keypads Menu of the GC3 System. From there, you can enable one of the eight available keypad slots and pair a keypad with the system. The available keypad options for the 2GIG GC3 System include the SP1, SP2 and PAD1-345 Keypads.
 Please note there are some firmware requirements to use the SP1 and SP2 touchscreen keypads. To use the SP1, a firmware version of 3.1.0.5572 or higher is needed. To use the SP2, a firmware version of 3.0.2 is needed, but a firmware version of 3.1 or higher being strongly recommended for this purpose. The PAD1-345 does not require any particular firmware version, but a user might still want to upgrade their GC3 system anyway for optimal performance. Please check this page for more information on upgrading the system's firmware version.
Users should also be aware that the SP1 and SP2 Keypads primarily pair with a GC3 System across a WIFI network. But if the local WIFI network is not very strong, a user can pair one of these keypads with the system through a local Access Point (AP). But by doing this, the system will no longer be able to utilize a WIFI connection. As a result, using an Access Point should only be done if absolutely necessary. More information on connecting a keypad to the system using AP Mode can be found here. If you are pairing an SP1 or SP2 Keypad through conventional WIFI, make sure the GC3 System is connected to a local WIFI network before trying to pair a keypad. This FAQ can help you connect your GC3 System to a local WIFI network.
Assuming the GC3 System is running the proper firmware, and you aren't using AP mode to pair the keypad, complete the following steps to pair a keypad with a 2GIG GC3 System:
1. Open the Keypads Menu. Begin from the home screen of the 2GIG GC3. Press the 2GIG logo in the upper-right corner. Provide the system's Installer Code (the default is 1561). Then choose System Configuration, and then Keypads. You will enter the Keypads Menu.
2. Enable the keypad. The 2GIG GC3 has eight available keypad slots. You will need to use one of these slots for the keypad you want to add. Select a slot, and press the blue "Edit Keypad" button at the bottom of the screen. For Keypad Used, select "Enabled". Then choose the appropriate Equipment Code for the type of keypad you are using. This will be one of the following: "1060 - 2GIG SP1 Keypad", "1074 - 2GIG SP2 Keypad", or "0867 - PAD1-345 Wireless Keypad". This will enable the keypad slot for the system.
3. Pair the keypad. The process for pairing the keypad will depend on the type of keypad that is being used.
For the 2GIG PAD1-345, the keypad is paired using traditional wireless radio frequencies. The system identifies the keypad through a unique Serial Number. Click on the Serial Number tab. Then press the "Learn" button. Then press and hold one of the panic buttons on the 2GIG PAD1-345 Keypad. The Serial Number for the keypad should appear on the GC3 Screen. Press the "Accept" button once the Serial Number appears. From there, proceed to configure the remaining settings.
For the 2GIG SP1 or SP2, press the "Pair" button on the GC3. This will put the system into a mode for learning-in a new keypad. Then power up the SP1 or SP2 Keypad. Connect the Keypad to the same local WIFI network that is being used with the 2GIG GC3. Then press the pair button on the screen. The keypad should pair with the system. You can then proceed to configure the remaining settings on the GC3 System.
4. Finish programming. The remaining settings for the keypad will include naming the keypad, setting emergency buttons to enabled or disabled. Make sure that all of the settings have been properly configured as needed. When you have finished, press the "Back to Keypads" button. Then press "Return to System Configuration" in the upper-right corner. Then press the blue return arrow on the left side of the screen. Finally, press the green "Save" button to save the changes. Any changes that were made will be saved, and the GC3 System will return to its home screen.
Did you find this answer useful?
We offer alarm monitoring as low as $10 / month
Click Here to Learn MoreRelated Products


- Answered

