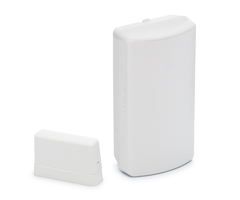
How Do I Batch Enroll SiX Series Sensors on a Honeywell Lyric Controller?
You can batch enroll SiX Series Sensors on a Honeywell Lyric Controller by putting the Lyric into its batch enrollment mode and then powering on the SiX Series Sensor. The Lyric should recognize the sensor and learn it in to the next available zone. The zone settings can then be adjusted.
 The Honeywell SiX Series Sensors are designed exclusively for use with the Honeywell Lyric Controller. They feature an operation range of up to 300 feet away from the Lyric, and they are fully protected by 128-bit AES encryption. Thanks to the batch enrollment feature of the Lyric Controller, the SiX Series Sensors are very easy to learn in.
Please note that batch enrollment is only possible with the SiX Series Sensors. The older Honeywell 5800 Series Sensors cannot be learned in through batch enrollment on the Lyric Controller, but they will still work with the system.
Complete the following steps to batch enroll a SiX Series Sensor on a Honeywell Lyric Controller:
1. Access zone programming. Start from the home screen of the Honeywell Lyric Controller. Choose "Security". Then choose "Tools". Then enter in the system Installer Code. This code is set to 4112 by default. Then choose "Programming", followed by zones. You will now be inside of zone programming.
2. Activate batch enrollment mode. On the right side of the screen, there will be a button labeled "SiX Batch Start". Press this button. The button should then read "SiX Batch Stop". This indicates that batch enrollment mode on the Lyric Controller is active.
3. Power on the sensor. Take the SiX Series Sensor, and power it on. This can be done by removing the cover for the sensor and inserting the appropriate battery for the device. If it is a new sensor, you may need to remove the battery tab first. Once the sensor powers on, a rapidly flashing green LED light on the device will indicate that it is trying to pair with the system. It may take a few moments for the process to complete. The Lyric will assign the sensor to the first available wireless zone once it has learned-in.
4. Adjust the settings. Click on the zone to highlight it, and then press the "Edit" button at the bottom of the screen to enter the settings for that zone. Configure the settings as needed. Make sure to hit the "Save" button in the bottom-right corner of the screen to save any changes and to return to zone programming. You can then return to the home screen by repeatedly pressing the return arrow in the upper-right corner of the screen.
The following video will assist you with batch enrollment:
Did you find this answer useful?
We offer alarm monitoring as low as $10 / month
Click Here to Learn MoreRelated Products


Related Videos
Related Categories
- Answered


