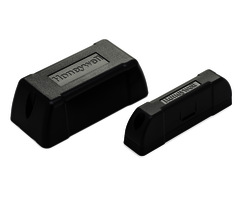
How Do I Change the Battery on a 5816OD?
You can change the battery on a 5816OD by first dismounting the sensor. Then use a screwdriver to remove the device's set screw. Then carefully pry off the protective cover using the same screwdriver in order to access the batteries. You can then remove and replace the two AA batteries.
 The Honeywell 5816OD is an outdoor door alarm sensor that is perfect for use with fences, sheds, patio doors and more. It is prepared to withstand nearly any harsh environmental condition that would damage regular contacts. The device operates at 345 MHz, and it has a wireless signal range of 200 nominal feet. A Honeywell 5800RP Wireless Repeater can be used to extend this range and increase its performance. The sensor is powered using two AA lithium batteries, and it has an average battery life of three to five years.
Complete the following steps to change the batteries for a Honeywell 5816 Outdoor Door Alarm Sensor:
1. Dismount the sensor. You will want to dismount the sensor so that you can work with it as easily as possible. This may require a screwdriver. Please note that you will be remounting the sensor after completing this process, so feel free to leave any external mounting hardware in place.
2. Remove the set screw. Lay the sensor flat on a table, and locate the set screw that holds the cover in place. Use a Phillips head screwdriver to remove the set screw. You can see the set screw in the picture below:

3. Remove the protective cover. Flip the sensor over. There should be two covers that are present. The first one will fall out on its own. To remove the second one, you can gently pry it out with the same screwdriver used in Step 2. Simply locate the arrows, insert the screwdriver into the empty space, and gently lift upward. The internal cover should be easily removed. You can see this in the picture below:

4. Replace the batteries. Carefully remove the old batteries, and insert two fresh lithium AA batteries. Make sure to follow proper polarity with the batteries, with the positive (+) and negative (-) ends both facing the proper direction.

5. Clean up. Reapply both covers, being very careful to ensure that they are both facing the correct direction and that they are aligned properly. Then apply the set screw in the same manner as before, and use the Phillips head screwdriver to tighten the screw. Finally, remount the sensor in its original position. Perform a quick test to make sure that the sensor is working and is recognized by the system.
Did you find this answer useful?
We offer alarm monitoring as low as $10 / month
Click Here to Learn MoreRelated Products

- Answered
