How Do I Clear a Latched Alarm Using a Honeywell Home Tuxedo?
You can clear a latched alarm using a Honeywell Home Tuxedo by first disarming the Honeywell VISTA System with a valid user code or the Master Code. Then clear the fault from the zone list to get the alarm message to disappear. Clearing the zone fault will also require a valid code entry.

A latched alarm on a Honeywell VISTA System is when the security system remains "stuck" in an alarmed state. While the VISTA System has a bell timeout setting to prevent the siren from sounding indefinitely, the system will remain latched, or stuck, in alarm mode until the alarm is properly cleared. This is due to the system's Alarm Memory feature. In order to clear the alarm, you must disarm the system and clear the zone fault.
The purpose of Alarm Memory is to ensure that the user is made aware of any alarm that has occurred on their system. This feature is what prevents an alarm from clearing by simply disarming the system. Disarming the system is often the very first thing a person will do when they return to their home or business. If a single disarm cleared the alarm, then it would be very likely that a user might never even know that an alarm occurred while they were away. By requiring the user to clear the alarm memory, the user is almost certain to know that an alarm event took place.
Once an alarm event is triggered, the user will get an indication on the Tuxedo Keypad. The user will be prompted to provide a code. The alarm can be silenced with the system's Master Code or any valid user code, other than the Installer Code. However, the alarm will remain in the system's memory. The user will need to clear the zone fault before the alarm will clear and the system will return to a Ready to Arm state. This process can be accomplished without needing to use the keypad's Console Mode.
One important note is that you must restore the faulted zone before you will be able to fully clear the alarm. This process will vary depending on the type of sensor that triggered the alarm. For example, if the alarm was caused by a door and window contact sensor, then you must close the door or window and have the magnet in close enough proximity to the sensor so that the sensor's internal reed switch remains closed. Or if you have a smoke detector, then you must have all the smoke clear from the detection chamber. The system will not be able to show that an alarm has fully cleared until you resolve the source of the alarm itself.
It is also important to consider that the process for clearing a latched alarm can vary slightly between an intrusion alarm and a life-safety alarm. The steps are very similar, so the general process will apply to all alarm types. Just be aware that there may be very slight differences depending on the type of alarm you are clearing.
Complete the following steps to clear a latched alarm using a Tuxedo Keypad:
1. Silence the alarm. During most alarm events, the Tuxedo and any added system sirens will begin sounding to let building occupants know about the situation. A user will typically want to silence these sounds as soon as everyone in the building has been alerted and the situation is properly under control.
For a burglary/intrusion alarm, a numeric keypad may be immediately displayed on the screen. Enter in the Master Code (default 1234, but usually changed) or a valid user code to silence. For a life-safety alarm, such as a fire or a CO outbreak, there will be a "Touch Here to Silence" button that you can press to silence the alarm.
After silencing the alarm, an Alarm Cancelled message may appear if the disarm occurred before the VISTA System sent out an alert through AlarmNet and the "Cancel Verify" option is enabled within system settings. If you get the Alarm Cancelled message, then just choose the "Clear" option, and enter in a valid code. This process stops the alarm from sounding, but you will still need to complete the remaining steps to clear the alarm.
2. Restore the faulted sensor. An alarm cannot be cleared from the system until the faulted zone has been properly addressed. How you do this will depend on the sensor that triggered the alarm. For example, a door/window contact must be restored to its closed position with the magnet in close proximity to the sensor to secure the sensor's internal reed switch. For a smoke detector, you must wait for all the smoke to exit the detection chamber. Other sensors, like motion sensors, should just be left alone with no one moving within the detection area. In any case, make sure the sensor is restored before continuing.
3. Clear the zone fault. You should notice at this point that although the alarm is silenced, the top of the Tuxedo still reads" Not Ready Alarm" or some other variant. The keypad will continue to display this message until the alarm has been cleared. This will involve clearing the zone fault on the system Please note that you will not be able to do this until the faulted sensor has been restored.
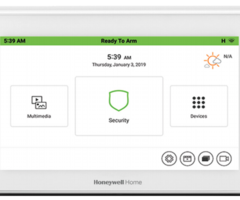
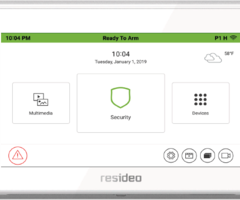
At the main screen of the Tuxedo, click the Security icon. Then click the circle with the red exclamation mark (!) in the bottom-right corner. This will display a list of faulted zones. Click the Clear button in the bottom-right corner. Then provide a valid code to clear the alarm. You can use the Master Code or a valid user code, but not the Installer Code.
Please note that you may need to perform this step twice and clear the zone fault a second time before the alarm will clear from the system. This is often the case for life-safety alarms. After you clear the zone fault a second time, the bar at the top should change back to its usual green color with the system in a Ready to Arm state, provided that there are no other faults or troubles on the system.


4. Confirm alarm clear. Upon entering a valid code, the bar at the top of the screen should change to green and display "Ready to Arm". This indicates that the alarm has been cleared. Please note that the bar may change to yellow if there is a fault on the system unrelated to the arm. If the bar remains red, then make sure you have restored the faulted sensor as described in Step 2. You might also try repeating Step 3 to verify that the system knows the fault has been acknowledged. Needing to repeat Step 3 is a normal part of the process for life-safety alarms. Once the bar is green with "Ready to Arm", you can press the picture of the house in the upper-right corner to return home.
Did you find this answer useful?
We offer alarm monitoring as low as $10 / month
Click Here to Learn MoreRelated Products


Related Categories
- Answered
