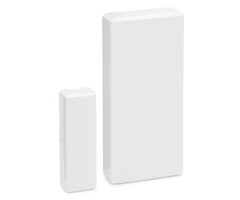
How Do I Enroll a DSC PG9303 to a Qolsys IQ Panel 2 Plus?
You can enroll a DSC PG9303 to a Qolsys IQ Panel 2 Plus by putting the panel in its auto-enrollment mode and then powering on the sensor to send a wireless enrollment signal to the panel. Alternatively, you can manually enroll by entering the device Serial Number and tampering the sensor.

The DSC PG9303 is a PowerG Door and Window Sensor that can be used with any version of the Qolsys IQ Panel 2 Plus. The sensor utilizes military-grade 128-bit AES Encryption, and it offers a wireless range of up to 2,000 feet away from the IQ2+ in an open air environment. Auto-enrolling the sensor is recommended, but it can also be manually enrolled if auto-enrollment is not working. Please note that the sensor uses a single lithium CR2450 battery for power.
Complete the following steps to auto-enroll the DSC PG9303 with the Qolsys IQ Panel 2 Plus:
1. Access auto-enrollment mode. Put the IQ2+ in its auto-enrollment mode by clicking the small grey bar at the top of the main screen and selecting Settings > Advanced Settings > enter the Installer Code (default 1111) > Installation > Devices > Security Sensors > Auto Learn Sensor.
2. Activate auto-enrollment. If the sensor is being used for the first time, simply remove the side battery tabs to power on the sensor and transmit a signal to the panel. If the sensor has been powered on before, then open up the sensor by twisting at the slide slots with a flat head screwdriver. You should be able to release both tabs and open up the sensor. Then pry out the CR2450 coin battery with the same screwdriver, and then re-insert the battery. The sensor should transmit a signal to the panel for auto-enrollment.
3. Configure the zone settings. Go through an configure the zone settings. Make sure to set an appropriate Sensor Group based on how you want the system to respond when the sensor is faulted. Click Add New when finished to add the sensor to the system. You can then return home by clicking on the house at the bottom of the screen.
4. Test the sensor. Fault and restore the sensor using its included magnet. Remember to properly align the magnet with the tabs on the side of the sensor when doing this. Make sure that the faults and restores properly display on the Qolsys IQ Panel 2 Plus.
If you are having trouble with auto-enrollment, you can manually enroll. Complete the following steps to do this:
1. Access manual enrollment. From the main screen of the Qolsys IQ Panel 2 Plus, click the small grey bar at the top of the screen. Then choose Settings > Advanced Settings > enter the Installer Code (default 1111) > Devices > Security Sensors > Add Sensor. This will put the system into its manual enrollment mode.
2. Manually add the sensor. Set the Source for the sensor to PowerG. Then enter in the seven (7) digit Sensor DL ID, which is also known as the Serial Number. The Sensor DL ID can be found on a white sticker on the back of the sensor in the format XXX-XXXX. Then configure the rest of the zone as desired. Press Add New when finished. Then press the picture of the house at the bottom of the screen to return to the home screen.
3. Tamper the sensor. You should notice that the new sensor displays a tamper trouble condition. Take the PG9303, and open it up by twisting at the two side tabs with a flat head screwdriver. Both tabs should be released, and the sensor can be opened. Then close the sensor, and align it with its included magnet using the indicators on the side. After a brief moment, the tamper trouble condition should clear.
4. Test the sensor. Separate the included magnet from the sensor to fault. The fault should be displayed on the IQ2+. Then restore the sensor by repositioning the magnet. The sensor is enrolled properly if the system is displaying faults and restores.
Did you find this answer useful?
We offer alarm monitoring as low as $10 / month
Click Here to Learn MoreRelated Products
Related Videos
Related Categories
- Answered


