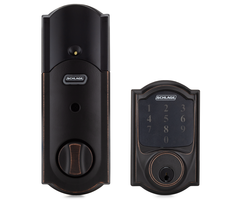
How Do I Include My Schlage Z-Wave Lock?
You can include your Schlage Z-Wave Lock by putting your Z-Wave controller into its Z-Wave inclusion mode and then initiating the enrollment function on the lock. Each Schlage Z-Wave lock has a programming code that is used for clearing and pairing. You will use this code during enrollment.

Please note that each Schlage Z-Wave Door Lock has a unique Programming Code that is used for device enrollment and exclusion. We strongly recommend that you write this code down and keep it somewhere safe. You can also save a picture of the code to your phone or tablet. You will need this code to complete the pairing process.
Complete the following steps to include your Schlage Z-Wave Lock:
1. Enter exclusion mode. Before you attempt to pair your Schlage Lock, you should clear it from the network first. Even if the lock is brand-new, it may have been paired with a different Z-Wave network for factory testing purposes. Clearing the lock from the network will help you ensure that it can be paired successfully.
The first step is to put the Z-Wave hub or controller into its exclusion mode. Many panels have an automation menu for doing this. Check the installation manual for your respective panel or Z-Wave hub to determine how you can put the device into its exclusion mode. Continue once your panel or hub is in its exclusion mode for clearing Z-Wave devices.
2. Clear the lock. Next you will activate the learn function on your Schlage Lock. This is done by entering the Programming Code for the lock, followed by the [0] key. Each Schlage Z-Wave Lock should have a white sticker underneath its main cover that lists the Programming Code and two default User Codes. You should write this Programming Code down, as you will need it whenever you include or exclude the lock.
You can see an example of the sticker in the following picture:

With the Z-Wave hub in its exclusion mode, activate your lock's keypad, and enter in the Programming Code shown on the sticker. You will see an orange circular light appear next to the [0] on the keypad. Press the [0] key to have the lock transmit a signal. The Z-Wave hub or controller should recognize the signal and clear the lock from the network. Please note that you may need to have the lock in close proximity to the Z-Wave hub or controller for the command to go through successfully.
3. Pair the lock. Next you will pair the lock with the Z-Wave network. Put the Z-Wave hub or controller into its Z-Wave inclusion mode. Again, you should check the manual for the device for information on how to do this. Once the system is in its pairing mode, activate the enrollment function on the Schlage Lock. This is the same process you completed in Step 2. Activate the lock's keypad, and enter the unique Programming Code. Then press the [0] key when the orange light appears. The lock will transmit a signal, and the hub or controller will pair it with the network. Remember, you may need to have the lock in close proximity to the hub or controller for the command to go through.
4. Test the lock. Try using your Z-Wave hub or controller to lock or unlock the Schlage Lock. If you can control the lock from your hub or controller, then it has been paired successfully. Remember, some Z-Wave controllers and hubs may require you to use a third-party app, such as Alarm.com or Total Connect 2.0 to do this.
Did you find this answer useful?
We offer alarm monitoring as low as $10 / month
Click Here to Learn MoreRelated Products

Related Videos
Related Categories
- Answered

