How Do I Install a SkyBell Doorbell Security Camera?
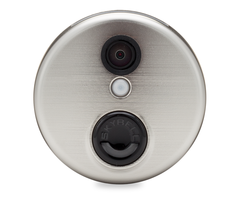
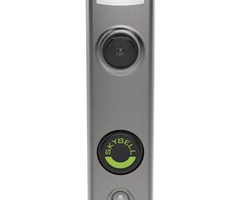
You can install a SkyBell Doorbell Security Camera by first removing your existing doorbell. You will then install the SkyBell mounting plate and screw in the existing wires. The SkyBell can then be snapped into place on the plate to power it on. It can then be set up with the SkyBell app.

Before installing the SkyBell, you will want to make sure that the chime and the power supply in your house is compatible. The SkyBell connects with a wired, mechanical doorbell chime and a low-voltage transformer. The power supply for the doorbell will need to be 10 to 36 VAC, 10VA or 12 VDC. The Skybell will connect with one transformer wire and one doorbell chime wire. An example of a compatible transformer is the MG Electronics ST-12500. Please note that this transformer does not come with a wire for connecting it with the SkyBell. You will need a wire to complete the installation.
If the SkyBell will be installed in a location with no pre-existing doorbell, and no mechanical chime will be used, then a 10 ohm/10 watt resistor (not included) must be installed in series between the SkyBell and the power supply. This means that one wire will go straight from the AC or DC power supply to one of the screw terminals on the SkyBell mounting plate. One end of the 10 ohm/10 watt resistor should connect to the other screw terminal on the SkyBell's mounting plate. The other end of the resistor will connect to the opposite side of the power supply. When AC or DC power is used for the SkyBell, polarity is not important. The power terminals for the SkyBell are not marked for polarity. Failure to include this resistor will cause damage to the SkyBell.
Once you have made sure that your setup is compatible, you will be ready to install the SkyBell Doorbell Camera. Please note, before installing the SkyBell Doorbell, you will want to shut off the power to your doorbell to prevent any electrical problems or injuries.
Complete the following steps to install a SkyBell DBCAM HD Video Doorbell:
1. Remove the existing doorbell. Unscrew the old doorbell from the wall and detach its two wires to remove it. Make sure that you can still access the wires, as you will need them for the SkyBell installation.
2. Install the mounting plate. Slide the wires through the SkyBell mounting plate and use the included screws to install the mounting plate into the wall. You may need a drill bit for drilling into brick, masonry or stone. You will use this drill bit to create the holes and then insert the yellow wall anchors into the holes. The mounting plate can then be tightly screwed in using the included screws.
If you are installing the mounting plate into wood, then you will want to make pilot holes that are slightly smaller than the included screws. You will then screw in the mounting plate using the included screws. Make sure that the mounting plate is nice and secure before continuing.
3. Wire to the mounting plate. On the left side of the mounting plate, you will see two adjacent terminals where wires can be screwed in. This is where you will wire power to the device. Strip your existing doorbell wires so that they can be installed. Then, loosen the wire terminals on the mounting plate. Finally, wrap the copper portion of one of the wires around one of the terminals and screw it into place. Then do the same for the other wire. Make sure that the wires are not touching. For this device, whether using AC or DC power, polarity is not important.

4. Apply the SkyBell. You can then apply the SkyBell itself over the mounting plate. Start by loosening the set screw at the bottom of the mounting plate. Then, take the SkyBell, line it up at the top, then swing the bottom into place. The device should easily slide in and snap into place. Tighten the set screw at the bottom to ensure that the SkyBell remains nice and secure. Once the SkyBell has been added, you can return power to the doorbell. The device should power on once power has been restored.
5. Set up the device. Now that the SkyBell has been installed, you can set it up with the SkyBell app. Download the app for free from the App Store or the Play Store, and create a SkyBell account. Then follow the instructions on the screen to integrate your SkyBell device with your smartphone. You can also set the device up directly from the Total Connect 2.0 app.
NOTE: If you purchased the Alarm.com version of the SkyBell HD, do NOT set it up using the SkyBell App. Doing so will initiate a Firmware update that will render the SkyBell incompatible with Alarm.com. Only use the Alarm.com App to set up these devices.
Did you find this answer useful?
We offer alarm monitoring as low as $10 / month
Click Here to Learn MoreRelated Products


Related Categories
- Answered

