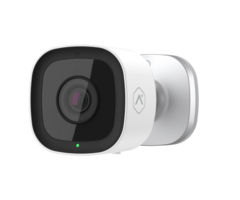
How Do I Install the Micro SD Card in an ADC-V723?
You can install the Micro SD card in an ADC-V723 by choosing a compatible card, accessing the SD card slot, inserting the card into the slot, and closing the slot cover. A small Phillips head screwdriver is needed to do this. Create an Onboard Recording Schedule on Alarm.com when finished.

You only need to install a Micro SD card inside the ADC-V723 Outdoor Camera if you are using the camera's onboard recording feature. This feature requires a compatible Micro SD card with a capacity no smaller than 32GB and no larger than 512GB. Once enabled, the camera will store captured video footage on the card. The user can access and review the footage from the Alarm.com website or mobile app. You can learn more about using the onboard recording feature in this FAQ.
One note about using the ADC-V723 for onboard recording is that the camera needs to be on Firmware Version 0.6.1.151 or higher. Once you install the SD card and create an Onboard Recording Schedule on the Alarm.com website, Alarm.com will actually push down a firmware update to the ADC-V723 so that it is capable of supporting the feature. Remember that your monitoring company must enable Onboard Recording on your Alarm.com account before you will be able to do this.
Please note that it is strongly advised that you perform this process before the camera is mounted. Trying to install the Micro SD card while the camera is already mounted could result in you dropping the card and causing it to break. Complete the following steps to install a Micro SD card for an ADC-V723 and create an Onboard Recording Schedule:
1. Select a Micro SD card. Make sure that the Micro SD card you are using is compatible. It must have a capacity of 256GB or less, and it should be an approved Alarm.com brand. The following brands and models are compatible:
- Micron Industrial Memory Cards
- SanDisk High Endurance
- WD Purple Micro SD Cards
2. Access Micro SD card slot. Find the two (2) slot door screws on the bottom of the camera. They should be next to the QR Code and MAC Address. Use a small Phillips head screwdriver to loosen the screws. The screws are only designed to be loosened from the slot cover door, not removed all the way. You should then be able to lift and rotate the slot door open to gain access to the Micro SD card slot. Try not to pull too hard on the door, as it could become damaged.
3. Insert the Micro SD card. Align the Micro SD card with the card slot as shown in the image below. Push the card into the slot. It should click into place. You have successfully inserted the SD card.

4. Close everything. Replace the door for the SD card slot. Reapply the screws. Make sure everything is nice and secure. If the camera was mounted and you took it down, you can return it to its usual mounting position at this time.
5. Create Onboard Recording Schedule. Access your Alarm.com account through the website. Select Video on the left-hand side after logging in. Click Recording Rules, and then Local Recordings, followed by +Add New Schedule. Pick the ADC-V723 Camera with the newly installed SD card. Adjust the desired Quality with the slider. Higher quality recordings will use more space on the SD card, so keep that in mind. You can opt for a continuous, 24/7 recording schedule (at all times), or you can choose a more restrictive schedule (only during the following times). You can also set a limit to the number of days that the SD card will retain any given recording. Click the Save button once finished.
Did you find this answer useful?
We offer alarm monitoring as low as $10 / month
Click Here to Learn MoreRelated Products

Related Categories
- Answered
