How Do I Pair a Z-Wave Device to the 2GIG GC3e?
You can pair a Z-Wave device to the 2GIG GC3e by clearing the device, and then pairing it to the network. The inclusion process involves putting the panel into its Z-Wave inclusion mode and then activating the inclusion function on the Z-Wave device. This will add the device to the network.

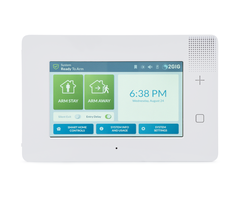
The built-in Z-Wave Plus controller is useful feature for the GC3e. Thanks to this module, you can pair both classic Z-Wave and Z-Wave Plus devices with the system. This includes devices like lights, door locks, thermostats, and more. Any paired Z-Wave device can be controlled locally at the panel. You can also control devices remotely though Alarm.com, provided that the system is monitored and set up with the service. Alarm.com will also allow you to create smart scenes to have Z-Wave devices activate automatically based on a set schedule and/or with system events.
Complete the following steps to pair a Z-Wave device with the 2GIG GC3e:
1. Enter panel exclusion mode. Most Z-Wave devices should be cleared from the network before inclusion. This wipes out any of the panel's residual Z-Wave data, and it makes inclusion more likely to go through successfully.
From the main screen of the GC3e, click the 2GIG logo in the upper-right corner. Enter the system's Installer Code (default 1561). Then choose Smart Home Settings, followed by Remove Devices. The GC3e will begin listening for Z-Wave signals to clear devices from the network.
2. Clear the device. Activate the exclusion function for the Z-Wave device. This is often the same function used for inclusion, and it may be referred to as the inclusion/exclusion function. Many Z-Wave devices use a button for inclusion/exclusion, but the process can vary depending on the device being used. For example, many Z-Wave locks require you to enter a specific code for inclusion/exclusion. Refer to the device's instruction manual for more info.
Once you activate the exclusion function on the Z-Wave device, the GC3e will provide a message stating that a device has been removed. If you are having trouble getting this message to appear, try bringing the Z-Wave device closer to the panel. You can click the return arrow on the left side of the screen once the panel displays the node.
3. Pair the device. Click Add Devices. This will put the GC3e into its Z-Wave inclusion mode. Then activate the inclusion function on the Z-Wave device. Again, this may be the same function you used for device exclusion. It may take a few moments for the pairing process to complete. Once it has been added, click OK. You can then click the Rename button to provide a name for the newly added device.
4. Return home. Repeatedly press the return arrow on the left side of the screen until you are back at the main GC3e menu.
Did you find this answer useful?
We offer alarm monitoring as low as $10 / month
Click Here to Learn MoreRelated Products


Related Videos
Related Categories
- Answered

