How Do I Power On the 2GIG GC2e?
You can power on the 2GIG GC2e by connecting wires to the appropriate ports on the back of the panel, connecting wires to the transformer, and plugging the transformer into the wall outlet. A thin Phillips head screwdriver is recommended. You can use a Honeywell LT-Cable for the connection.
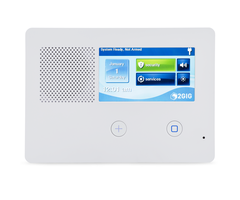
You will need to open up the 2GIG GC2e to power it on. A 14VDC, 1.7A transformer comes included with the panel. However, no wiring is included. You can use 18-gauge or 22-gauge wire if you have some around. Another option is to use a Honeywell LT-Cable, as this will prevent you from needing to strip or prepare any wiring. Make sure to observe polarity when connecting the wire to the panel and the transformer.
In order to ensure proper operation of the 2GIG GC2e, be sure to adhere to the AC wire specifications provided by the manufacturer. This information is provided in a helpful chart below. In order to be certain adequate wire gauge and length has been used, you can meter voltage at the rear of the alarm panel. This voltage should read no less than 11 Volts DC. Anything lower will result in nuisance AC Loss alerts and reports. See the chart below:

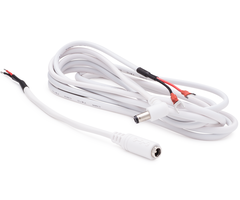
Note: The steps below show the process for connecting a wire to the traditional power terminals on the back of the 2GIG GC2e. If you are using a Honeywell LT-Cable, then you can connect the barrel connector on the longer portion of the cable to a port on the GC2e. You will need to remove the back plate to access this port. This serves as an alternative to the traditional connection explained in the steps below. This connection can be seen in the picture below.

Complete the following steps to power on a 2GIG GC2e:
1. Locate the power terminals. On the back of the 2GIG GC2e, you should notice the green port where various wired connections are made. For power, you use the terminals on the far right labeled V- (negative) and V+ (positive). You do not need to open up the panel to access these terminals. The space is large enough that you can properly slide a wire through without removing the back plate. You can see the terminals in the picture below.

2. Secure the wires. Strip and prepare your wires, if necessary. Use a thin Phillips head screwdriver to completely open up the terminals, assuming that they're not already opened. Traditionally, a black wire is used for negative (V-), and a red wire is used for positive (V+). But as long as you match colors at the other end of the wire on the transformer, everything will work fine. Insert the wires into the appropriate ports, and tighten the terminals.
In our example, we used a Honeywell LT-Cable, and we matched Black to negative (V-) and Red to positive (V+). Since we used a Honeywell LT-Cable, no wire stripping was necessary. The LT-Cable comes with the wires pre-stripped.

3. Connect to transformer. At the opposite end of the wire, connect to the transformer. Again, red is traditionally for positive (+), and black is traditionally for negative (-). But it really doesn't matter, as long as the wire used for V+ runs to positive on both ends, and the wire used for V- runs to negative on both ends.
In our example, we followed traditional color-coded polarity. And since we used a Honeywell LT-Cable, no wire-stripping or other preparation was necessary. The LT-Cable comes with spade lugs already attached at the transformer end.
4. Power on the system. If using a Honeywell LT-Cable, remember to connect the male-female barrel connector between the transformer end of the wire and the panel end.

Some panels may come from the factory with the battery already connected to the control panel. Always be sure to check and make sure that the battery is connected before plugging in the AC transformer. In order to verify the battery connection, you will need to open the panel by separating the front from the back.
Plug the transformer into the wall outlet. The GC2e System should power on. It will take a few moments for the system to fully boot up.

Did you find this answer useful?
We offer alarm monitoring as low as $10 / month
Click Here to Learn MoreRelated Products
Related Videos
Related Categories
- Answered


