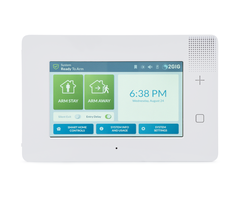
How Do I Power On the 2GIG GC3e?
You can power on the 2GIG GC3e by connecting the wires to the appropriate ports on its back side. The GC3e has a barrel connector, as well as conventional positive (+) and negative (-) terminals. Either can be used. The transformer is rated 14VDC, 1.7A. The GC3e also uses a backup battery.
 Although it is possible to power on the 2GIG GC3e without removing the panel from its back plate, it is much easier to do so if you have it opened up. Otherwise, you might have trouble making the tight connections, especially if you have larger hands. The panel comes with a 14VDC, 1.7A transformer, but no wiring is included. You must supply your own. We recommend using a Honeywell LT-Cable, though standard 18-gauge or 22-gauge wiring can be used.
2GIG lists AC wire specifications to ensure that the panel receives sufficient power. You cannot have too long of a wire run, or else the panel will not receive enough power. If that happens, you may encounter an AC loss condition, even though the panel is plugged in. At least 11-Volts DC must be supplied to the panel. You can review the maximum allowed wire runs in the chart below.

If you have a Honeywell LT-Cable, then you can simply plug in the barrel connector found at the end of the longer portion of the cable. Alternatively, you can connect traditional wires to the corresponding positive (+) and negative (-) terminals. In our example, we will only be showing pictures of the panel set up with a Honeywell LT-Cable using the panel's barrel connector. However, we will still be showing the locations of the traditional power terminals, just in case you are powering the system using that method.
Complete the following steps to power on a 2GIG GC3e:
1. Remove the back plate. Remove the back plate from the 2GIG GC3e so that you have full access to the back of the panel. The back plate should pop right off. Just stick your finger into an opening and carefully pop it off. This is easiest to do before the panel is mounted.

2. Connect the backup battery. 2GIG recommends connecting the backup battery before providing transformer power. You can see the blue and yellow backup battery back in the picture above. Its plug-in connector and port are seen connected directly below it. Connect the battery to its port before continuing.
3. Connect at the panel. Make sure to first run your wire through the back plate so that you can properly close the panel later on. This is done regardless of which type of wire you are using.
If you are using a Honeywell LT-Cable, simply connect the barrel connector to the port. This can be see in the following picture.

If you are using traditional wires, then you will connect them to the terminals labeled PWR- and PWR+. This is on the block with eight (8) terminals. Do NOT connect power wires to the block with six (6) terminals. Traditionally, black goes to negative (PWR-), and red goes to positive (PWR+). But it really doesn't matter, as long as you match at the transformer later. Use a screwdriver to loosen the screw terminals, insert the wires, and tighten the screw terminals. You can see the power terminals in the picture below.

4. Connect at the transformer. At the other end of the wire, connect the wire to the transformer terminals. If you are using a Honeywell LT-Cable with a barrel connector, then black should go to negative (-), and red should go to positive (+). If you are using traditional cabling, then match negative and positive based on the wires connected at the panel terminals. Again, this is usually black to negative (-) and red to positive (+).

5. Close the panel. Check and make sure that you have run the wire through the panel back plate. Secure the back plate to the back of the panel to close it. When closing the panel, it is easiest to secure the top portion first, then click the bottom portion into place.
Did you find this answer useful?
We offer alarm monitoring as low as $10 / month
Click Here to Learn MoreRelated Products


Related Videos
Related Categories
- Wireless Alarm Control Panels
- Wireless Alarm Control Panels
- Alarm Control Panels
- Alarm Control Panels
- Answered

