How Do I Program a Key Fob Into a 2GIG GC3e?
You can program a key fob into a 2GIG GC3e by accessing the Key Fobs Menu for the system and then configuring the new key fob device. A maximum of 32 key fob devices can be enrolled with the 2GIG GC3e System. We strongly recommend auto-enrolling the Serial Number for any new key fob.

The 2GIG GC3e supports most 345 MHz key fobs. Compatible key fobs for the system include the 2GIG KEY2e, the 2GIG KEY2-345, and the Honeywell 5834-4*, among others. Certain functions for a key fob can be enabled or disabled based on its key fob zone settings. A key fob will not take up one of the wireless zones on the GC3e.
Complete the following steps to program a key fob into a 2GIG GC3e:
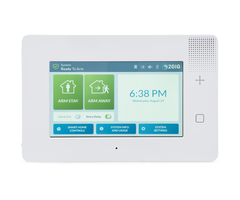
1. Access Key Fobs Menu. Start from the main screen of the 2GIG GC3e. Click the 2GIG logo in the upper-right corner. Enter the system's Installer Code (default 1561). Choose System Configuration, then Key Fobs. You will enter the Key Fobs Menu.
2. Select key fob slot. On the left-hand side of the screen, choose one of the 32 key fob slots. Any slot that is bold is already taken. You can scroll between slots using the touchscreen. Click on a key fob slot so that you can begin editing the key fob zone information.

3. Configure key fob zone. On the right-hand side of the screen, you can begin editing the key fob zone information. After configuring an option, you can press the down arrow to move to the next available option within this key fob. The following fields are available:
- Fob Used: Set to Enabled, unless you want the key fob to be disabled and not work with the system.
- Equipment Code: Find the model of the key fob you are using. If you cannot find the corresponding model, just choose 0577 Existing Key Fob Remote. The eSeries Key Fob uses Equipment Code 2866. See page 68 - 69 in the Install Guide for all Equipment Codes.
- Serial Number: This is where you will auto-enroll the unique Serial Number for the key fob to the panel. After selecting this field, click the Learn button in the bottom-right. Then activate one of the inputs for the key fob. Make sure the key fob has a battery inserted and that it is within range of the GC3e. The Serial Number for the key fob should appear on the screen. Choose Accept.
- Smart Areas Assignment: This determines which Smart Area Partition the key fob can control. If you are not using partitions, just choose S1. Otherwise, select the partition you want the key fob to control.
- Equipment Age: This has no effect on the performance of the key fob. Choose New or Existing.
- Emergency Key: This determines how the panic function for the key fob will work. Normally, a panic input is made by pressing the two (2) top keys on the key fob, which are the Arm Away and Disarm buttons. This is only available if you are using a 2GIG Key Fob device, and it will not work for Honeywell Key Fobs programmed with the GC3e. For more information on using a Honeywell Key Fob with a 2GIG Panel, please see this FAQ. Choose Disabled if you don't want to program the panic function for the key fob. Choose Auxiliary for an auxiliary medical panic (make sure to notify your central station to the purpose of the panic input). Choose Audible for an audible intrusion alarm. Choose Silent Panic for a silent intrusion alarm. Choose Fire for a fire alarm.
- Fob Can Disarm: Choose Enabled, unless you don't want the key fob to be able to disarm the system.
- Voice Descriptor: This is what the panel will announce when the key fob is used. It also serves as a name for the key fob. Click on Edit Voice Descriptor to begin setting the voice descriptor. This field is optional, and you do not need to set a voice descriptor for these devices.
- Arm With No Entry Delay: This is normally Disabled. If Enabled, then when the system is armed using the key fob, no Entry Delay will be provided when an Entry/Exit Zone is faulted upon returning home. This means that faulting an Entry/Exit Zone when the system is armed using the key fob will cause an immediate system alarm. The idea here is that you want the system to be disarmed using the key fob or remotely using Alarm.com, and for an immediate alarm to occur if the system is not disarmed prior to entry.
- Fob Output: This is normally Disabled. You can set a Toggle Output or Momentary Output if you want to use the key fob for triggering a relay device connected to the Open Collector Output #1 on the panel. Toggle Output is typically for turning a device ON or OFF, while Momentary Output is typically for controlling a third party device, such as a garage door controller. The function will normally be performed using the auxiliary button for the key fob. The auxiliary button is normally the star (*) button.
4. Return home. Once you have finished configuring the key fob, click the Return to System Configuration button in the upper-right. Then press the return arrow on the left-hand side of the screen. Click the green Save button to save your changes. The key fob will then be enrolled with the system.
*The Resideo 5834-4 comes from the factory set for "High Security Mode". This is indicated by the LED at the top of the fob lighting Red when the fob transmits, after a button is pressed. High Security Mode is not supported on any of the 2GIG panels, so you must change the 5834-4 to Low Security Mode. This is indicated by the key fob's LED lighting up Green when it transmits. This FAQ explains how to enter either High or Low Security Mode.
Did you find this answer useful?
We offer alarm monitoring as low as $10 / month
Click Here to Learn MoreRelated Products


Related Videos
Related Categories
- Answered


