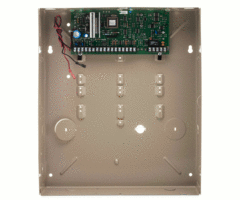
How Do I Program My Honeywell VISTA 15P?
To program your Honeywell VISTA 15P, start by accessing system programming. Then enter in the number for the programming field you want to edit. Enter in the needed information for that field to change its settings. After you have finished, you will exit programming to save your changes.

When programming a VISTA 15P, we strongly recommend using the Programming Guide as a reference. This guide will provide you with a full list of all the programming fields and the possible entries for those fields. It also includes a complete guide for zone programming using the *56 command.
Complete the following steps to program a VISTA 15P:
1. Access programming. To access programming on a VISTA 15P, enter in [Installer Code] + [8] + [00]. The default Installer Code on a VISTA 15P is 4112. The message "Installer Code 20" will be displayed if you have an alphanumeric keypad, while the message "20" will be displayed if you have a fixed English keypad. This will confirm that you have accessed the programming menu.
We recommend that users leave their Installer Codes at their default setting so that they do not get locked out of programming later. If you do lose your installer code and become locked out of programming, you will need to use the backdoor method to get in.
2. Select a programming field. Every programming field on a VISTA 15P is represented by a 2-digit or 3-digit number. The programming guide lists every programming field for the system. Enter in [*], followed by the programming field number. For instance, if you want to access programming field 35 for entry delay, you will press [*35] on the keypad. You will then be able to change the settings for that programming field.
3. Change the settings. Enter in the appropriate command to change the settings for the programming field. Each programming field has a different set of possible programming entries. For example, when programming entry delay, you can enter in [00] through [96] to set how many seconds your entry delay will be set to. So if you enter in [08], your entry delay would be set to 8 seconds. You can also enter in [97] to set the entry delay to 120 seconds, [98] to set it to 180 seconds or [99] to set it to 240 seconds. Consult the programming guide for the possible entries for each programming field.
Once you have made an appropriate entry, the keypad will beep three times to confirm your changes, and if the field has been filled, it will automatically move on to the next programming field in sequence. Some fields may not be completely filled, such as the Account Number [*43]. In this case, after entry of the final digit, press [*] to let the system know you've completed your data entry for that field. You will then hear the system beep three times for confirmation.
4. Exit programming and save your changes. After you have finished making programming changes, press [*99]. This will exit out of system programming, and your changes will be automatically saved.
Did you find this answer useful?
We offer alarm monitoring as low as $10 / month
Click Here to Learn MoreRelated Products
Related Categories
- Answered


