How Do I Program the 2GIG SMKT3-345 to the 2GIG GC2?
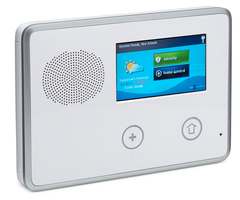
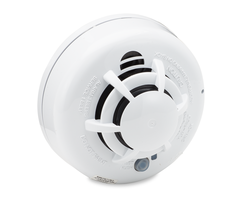
You can program the 2GIG SMKT3-345 to the 2GIG GC2 by accessing programming on the GC2 System and then making the necessary adjustments in settings. This will involve putting the GC2 into its wireless enrollment mode and then activating the tamper cover on the SMKT3-345 to auto-enroll.

The 2GIG SMKT3-345 is a combination life-safety sensor that offers smoke, heat and freeze detection. The device will need three system zones for full functionality. One zone will be used for smoke detection. The second will be used for heat detection. The third will be used for low-temperature. All zones must be configured individually.
Complete the following steps to program the 2GIG SMKT3-345 to the 2GIG GC2:
1. Open System Configuration. Start from the main screen of the 2GIG GC2. Press the 2GIG icon in the lower-right. Enter the Installer Code, which is 1561 by default. Choose System Configuration. You will enter the System Configuration Menu.
2. Adjust the settings. Use the right and left arrows to select which RF zone you want to use. The possible slots are 1 thru 48 and 63 thru 74. You can also use the Go To button to enter a zone number. Press down after making your selection.
Then go through and configure all the settings. Remember, you will need to do this on a separate zone for each function (smoke, heat and freeze). You can use the right and left arrows to scroll between options and the down arrow to move the next selection. If you make a mistake, you can return to the previous selection by pressing up.
- Sensor Type: Choose "(09) 24-Hour Fire" or "(16) 24-Hour Fire Verification" for smoke and heat. Choose "(08) 24-Hour Auxiliary Alarm" for low-temperature detection. When programming for low-temperature, you should let the central station know that the auxiliary alarm is for a temperature sensor.
- Equipment Code: Choose "(1058) 2GIG Smoke Detector".
- Serial Number: Press the Shift button at the bottom. Then press Learn on the left. Then activate the device's tamper cover to auto-enroll. You can separate the device from its back plate with the batteries installed to trigger the tamper switch. The GC2 should recognize the transmission and display the Serial Number on the screen. Press OK to confirm.
- Equipment Age: Set to New or Existing. This will not affect device operation.
- Loop Number: Choose 1 for smoke, 2 for heat, or 3 for freeze.
- Voice Descriptor: Provide a name that will allow you to identify the zone. More information can be found on pages 38 and 39 of the GC2 Programming Guide.
- Sensor Reports and Sensor Supervision: Set both to Enabled.
- Sensor Chime: You can Disable Chime, since an alarm will occur when the sensor is activated.
3. Save your changes. After configuring the settings, you will be taken to a summary screen. Press Edit Next at the bottom. Then press End in the lower-right corner. Make sure the box for Save Changes is marked. Then press Exit in the bottom-right. The system will reboot to save the changes. The sensor will be enrolled after the system reboots.
Did you find this answer useful?
We offer alarm monitoring as low as $10 / month
Click Here to Learn MoreRelated Products


Related Videos
- Answered

