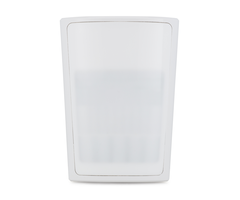
How Do I Remove a PG9914 From the Mounting Bracket?
You can remove a PG9914 from the mounting bracket by opening up the sensor, taking out its battery, and using a flat head screwdriver to release the tab securing the bracket to the back. This will allow you to remove the motion from the mounting bracket so that it can be moved or replaced.

The DSC PG9914 is a wireless motion sensor that is compatible with systems that support PowerG devices. The sensor can be mounted by using double-sided foam tape or by using wall anchors and screws. Many users prefer using double-sided foam tape, as it prevents them from needing to create holes in the wall. But if a user wants to hard-mount using wall anchors and screws, then the hardware for doing so is provided.

The mounting brackets are provided so that you can easily mount the motion, using either the double-sided tape, or the screws and anchors. Once the bracket being used has been mounted, then the PG9914 can be attached to the bracket. This makes installing and leveling the motion very easy. However, if you decide to remove the PG9914, either to relocate it, or to replace it, doing so can be tricky.
This image shows the DSC PG9914 mounted using the Flat Mounting Bracket. Notice how the top of the bracket lines up with top, back of the motion detector:

Follow the steps below to remove the PG9914 from its mounting bracket:
1. Open the sensor. Start by removing the set screw from the bottom of the sensor, if necessary. Many PG9914 Sensors do not have the set screw installed. This is not uncommon. Next, use your fingernail or a thin flat head screwdriver to push in the bottom tab that is right next to the location of the set screw. You should be able to pull the front cover right off the PG9914 Motion Sensor.
Bottom of the PG9914 Shown with no set screw installed, the spot where you push in with your fingernail or a screwdriver is right next to the half-moon shape, on the seam between the front and back:


2. Remove from mounting bracket. Once the cover has been removed, take out the CR123A battery from the sensor. Then note the small square hole outlined in red in the image below. You can just see a white arrow pointing upward. This is the arrow located on the mounting bracket which indicates which side of the bracket should be pointed upward. Take a small solid object, such as a flat head screwdriver, and press straight inward on this arrow. At the same time, press down on the top of the PG9914 to dislodge it from the mounting bracket.

3. Move or replace. Once the PG9914 has popped free of the mounting bracket, the top of the bracket will no longer line up with the back portion of the motion detector. At this point, pull the motion straight forward to completely remove it from the bracket. You can now replace the PG9914, if necessary, or you can completely remove the mounting bracket from this location and move to a different location.

PG9914 Flat Mounting Bracket with PG9914 removed.

Did you find this answer useful?
We offer alarm monitoring as low as $10 / month
Click Here to Learn MoreRelated Products
Related Videos
Related Categories
- Answered
- Answered By
- Julia Ross


