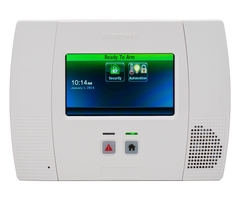
How Do I Replace the Battery in a Honeywell L5200 Wireless Alarm System?
You can replace the battery in a Honeywell L5200 Wireless Alarm System by opening up the panel, disconnecting the old battery, removing the battery cover, securing the new battery, reapplying the battery cover and closing the panel. The old battery should then be safely discarded.

The L5200 uses a backup battery to remain running when AC power is lost. The system has two possible battery connector ports located right next to each other on the system board. The smaller port is for either the standard capacity battery or the high capacity battery. The larger port is for the super high capacity battery only. The super high capacity battery will keep the system running for the longest period of time during an electrical outage. Even though there are two battery ports, only one backup battery should be used with the system at any given time. Failing to follow this rule could result in damage to the system.
A backup battery stores a charge so that it can keep the L5200 System running as soon as AC power is lost. But over time, the battery will gradually lose its ability to store a charge. The battery will need to be replaced when this occurs. This normally happens after three to five years. An end user will know that they need to replace the battery because there will be a low-battery warning that will not clear. If a low-battery warning does not clear after 24 hours of the system running on continuous AC power and the battery is three to five years old, then it is most likely in need of replacing.
Complete the following steps to replace the battery in a Honeywell L5200 Wireless Alarm System:
1. Open the panel. Use a screwdriver to other thin sturdy object to press in the two tabs on the top of the panel. Then separate the front from the back plate to open up the panel and gain access to the inside.
2. Disconnect the battery. Locate the two connector ports for the backup battery. These ports are found on the main board. Only one port should be used. The smaller port is for a standard capacity or high capacity battery. The larger port is for a super high capacity battery. Disconnect the battery from whichever port it is using. In the picture below, you can see that the smaller port currently has a battery connected, while the larger port does not have a battery.

3. Remove the battery cover. On the other part of the panel, locate the battery cover. This is a thin, white, rectangular piece of plastic that keeps the battery from falling out. Use a Phillips head screwdriver to release the screw and remove it. You can then take out the old battery.

4. Apply the new battery. Take your new battery, and connect it to appropriate connector port on the panel. Remember, standard capacity and high capacity batteries will use the smaller port, while super high capacity batteries will use the larger port. Do not attempt to use multiple batteries by connecting batteries with both ports at the same time. Rest the new battery in the previous location of the old one. Then reapply the battery cover to keep the new battery nice and secure. Make sure the screw is secure without being overly tight.
5. Close the panel. Reattach the front of the panel to the back plate. Make sure the tabs on the top lock into place. If there is a tamper trouble condition on the panel, you should be able to clear it using the system's Master Code.
Did you find this answer useful?
We offer alarm monitoring as low as $10 / month
Click Here to Learn MoreRelated Products


- Answered


