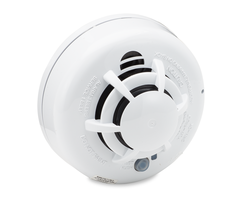
How Do I Set Up Low-Temp & Freeze Detection on a 2GIG SMKT3-345?
You can set up low-temp and freeze detection on a 2GIG SMKT3-345 by learning in the sensor and selecting Loop Number 3 in programming. This Loop Number of the 2GIG SMKT3-345 is specifically designed for low temperature and freeze detection. Make sure to save your changes when finished.

There are three programmable loop settings for the 2GIG SMKT3-345. Loop Number 1 is for smoke detection. Loop Number 2 is for heat detection. Loop Number 3 is for low-temp and freeze detection. In order to use each of these functions simultaneously, the sensor must be programmed with the panel three times, using three separate wireless zones. The sensor can be used with the 2GIG GC3 and the 2GIG GC2 Alarm Systems.
When the loop for freeze detection is programmed, if the ambient temperature drops below 40 degrees Fahrenheit (4.4 degrees Celsius), the system will respond based on the sensor type programmed. Complete the following steps to set up low-temp and freeze detection on 2GIG SMKT3-345:
1. Activate learn mode. To learn in a wireless sensor like the SMKT3-345, you must first activate learn mode on the alarm system. This process is slightly different for the the GC3 and GC2 Systems. Please review the respective processes for the GC3 and for the GC2 on how to put these systems into their enrollment modes.
2. Learn in the sensor. Remove the back cover from the SMKT3-345 to activate its tamper switch. The panel will recognize the sensor and learn it in with the system. You can replace the back cover once it has been recognized.
3. Choose Loop Number 3. The settings for the sensor can then be adjusted. Follow the respective process for the system that is being used. When prompted to choose a Loop Number, choose Loop Number 3. This is the Loop Number that is used by the SMKT3-345 for low-temp and freeze detection. Then continue configuring the sensor as normal.
Recommended sensor types include 24-Hour Auxiliary (08), or No Response Type (23). With the latter, a notification can be enabled through Alarm.com without causing any type of display or sound at the system itself.
4. Save the changes. Once you have finished configuring the sensor, make sure to save any changes that were made. The system will reboot to learn in the sensor.
Did you find this answer useful?
We offer alarm monitoring as low as $10 / month
Click Here to Learn MoreRelated Products

Related Categories
- Answered
