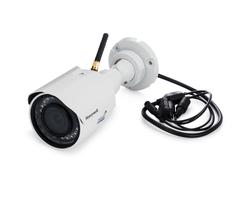
How Do I Setup a Honeywell IPCAM-WOC1?
You can setup a Honeywell IPCAM-WOC1 by mounting the camera, powering it on and following the steps to pair it with a Total Connect 2.0 account. When pairing the camera with the Total Connect account, the TC2 Mobile App on an Android or iOS device is needed, and a QR code must be scanned.
 The Honeywell IPCAM-WOC1 is also sometimes referred to as the Lyric OC1. Setting up a Honeywell IPCAM-WOC1 involves installing the camera and pairing it with TC2. Please note that you will need an alarm monitoring plan that includes video surveillance to use the IPCAM-WOC1 with TC2. The two FAQs below outline these processes:
Complete the following steps to setup a Honeywell IPCAM-WOC1:
1. Prepare the IPCAM-WOC1. Start by mounting the camera in the desired location. Its included antenna should be properly attached. But do not connect the camera's power supply at this time.
2. Prepare the smart device. To pair the the WOC1 with Total Connect 2.0, a smart device with the Total Connect 2.0 Mobile App is needed. This could be an Android Phone, an iPhone, an iPad or a compatible Tablet. The smart device must be connected with the local WIFI network that you want to use with the iPCAM-WOC1 Camera, and its Bluetooth functionality must be enabled. There must also be no Bluetooth devices paired with the smart device. This includes any speakers or headphones. Make sure the smart device is ready before continuing.
3. Access Total Connect 2.0. On the smart device, open up TC2, and login to your account. The TC2 app can be downloaded from the Apple App Store or the Google Play Store for free if needed. Once you have opened the app, login to your Total Connect 2.0 account. Your alarm monitoring company should have helped you create a TC2 account when you activated your monitoring service. You can identify the Total Connect 2.0 Mobile App with the following logo:

4. Begin pairing the camera. Press the "Cameras" tab on TC2. The location of this tab will depend on the type of device you are using. This is where you will make all adjustments to the cameras used with your TC2 account.
After accessing the Cameras section, press either the (+) button on Android devices or the "Add Camera" button on iOS devices. You must then choose the type of IPCAM you are adding. In this case, you will choose "IPCAM-WOC1". Then provide a name for the camera. We recommend choosing a name that is easy to remember and will help you properly identify the camera. Then press the Next button to continue.
5. Connect the power. You should now begin connecting the power supply to the camera. Its LED light will illuminate and begin flashing different colors. Wait until it its only flashing blue before continuing to the next step.
6. Create the QR code. On your smart device, press the "Generate QR Code" button. The QR code should appear on the device so that the pairing process can be finished.
7. Complete the pairing process. Bring your smart device with the generated QR code to the camera. Hold the smart device about 3 to 8 inches away from the IPCAM-WOC1. The QR code should be facing directly at the lens of the IPCAM-WOC1. The smart device should produce an audible alert once the QR has been recognized, and a confirmation message will be displayed on the screen.
To finish, you must select a WIFI network for the camera. This should be the same WIFI network used by the smart device. Once pairing is complete, the camera will continue to work even if the smart device is taken off the WIFI network. You will need to provide the password for the smart device during this time. The camera will show a steady green LED light after it has been successfully paired. The smart device will display a message stating the setup was successful. Press the "Done" button to finish. You will then be able to view the live feed for the camera from Total Connect 2.0.
Did you find this answer useful?
We offer alarm monitoring as low as $10 / month
Click Here to Learn MoreRelated Products

- Answered
