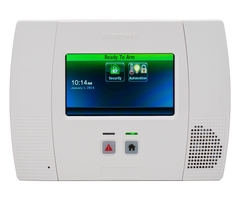
How Do I Setup the Slideshow on My Honeywell LYNX Touch?
You can setup the slideshow on your Honeywell LYNX Touch through Master-level programming. From there, you can adjust the settings for the slideshow feature and choose the images that will be shown on the screen. The settings will go into effect automatically after you save your changes.
The slideshow feature acts as a screensaver for a LYNX Touch panel. If the panel is left undisturbed for a predetermined period of time, a series of images will appear on the screen. A user can set how long the system must be left idle before the slideshow will go into effect. It is also possible to adjust how long each image will be displayed on the screen before transitioning to the next one.
In order to use the slideshow feature, the user must have at least one image uploaded to their LYNX Touch system. This was previously done through the Total Connect service. However, Honeywell removed this feature from Total Connect, and there is currently no way to upload new images to a LYNX Touch. As a result, if you do not have any images uploaded to your LYNX Touch, then using the slideshow feature will be impossible. However, if you do have some previous images uploaded to your LYNX Touch then you will be able to set up the slideshow function.
Complete the following steps to set up a slideshow on your LYNX Touch:
1. Access slideshow settings. From the home screen of your LYNX Touch, go to Security > More > Tools > enter Master Code (the default is 1234) > Slideshow. You will now be in slideshow settings.
2. Select the images. Choose the images that you want to be displayed in the slideshow. By clicking on an image, an outline will appear around it, indicating that it will be used in the slideshow. If you want to remove an image from the slideshow, click on it again to remove the outline. A picture with no outline indicates that it will not be featured in the slideshow. You can use the arrows on the right side of the screen to scroll through the available images.
3. Set the Slide Interval. The Slide Interval option determines how long an image will be displayed before moving on to the next one. Clicking on this field will change the duration. There are options for 5, 10, 15 and 20 seconds. Set the field to the length of time that you desire.
4. Set the Slide After. The Slide After option determines how long the system must be left idle before the slideshow will go into effect. Clicking on this field will change the duration. There are options for 30 seconds, 2 minutes, 10 minutes and 30 minutes. You can also set the field to "Disabled" to disable the slideshow feature. Set the field to the setting that you desire.
5. Save your changes. Click on the "Save" button in the bottom-right corner of the screen to save your changes. The slideshow settings will automatically go into effect.
Did you find this answer useful?
We offer alarm monitoring as low as $10 / month
Click Here to Learn MoreRelated Products

Related Categories
- Answered
