How Do I Upgrade My 2GIG GC2 to an LTE Communicator?
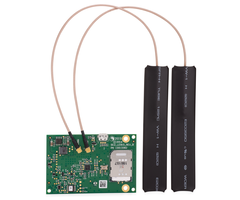
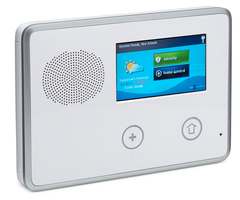
In order to upgrade the 2GIG GC2 to an LTE Communicator, the panel must be on a firmware version that supports the communicator. Open the panel, and power the system completely down. Remove the old communicator. Install the new LTE communicator making sure to install all antennas. Then re-apply power.

There are a number of reasons to install a new LTE communicator in an existing 2GIG GC2 panel. Better signal strength and faster signaling are just a couple of reasons. In addition, the cellular carriers are beginning to wind down support for the older 3G and CDMA networks, so an update to LTE will soon be required. When swapping the module in an existing panel, make sure to coordinate with the alarm monitoring company. This will prevent any panel information or configuration settings from being lost.
The panel firmware version required to support the LTE communicator will depend on which communicator is chosen. The table below shows each LTE communicator and which panel firmware version is required in order to support it. Any Alarm Grid monitored customer who still has an older 3G or CDMA communicator installed, but isn't on version 1.19.3.1 as of February 2021 will receive an over-the-air (OTA) firmware update so that their panel can easily be upgraded with an LTE communicator. If your panel requires a firmware update and you're not an Alarm Grid customer, be sure to check with your monitoring company before you remove the existing cellular module. If you have the 2GIG Easy Updater Tool, or the Firmware Update Cable and wish to update the firmware yourself, you can find the firmware files here.
Here's a breakdown of the 2GIG GC2 Firmware requirements for LTE support:
| Cellular Module Type | Panel Firmware Required |
|---|---|
| Verizon LTE or VoLTE (2GIG-LTEV-A-GC2)
Note: This communicator is no longer available |
1.17+ |
| Verizon LTE CAT1 (2GIG LTEV1-A-GC2)
Note: This module is available only to United States Customers |
1.19+ |
| AT&T LTE (2GIG-LTEA-A-GC2) | 1.19.3+ |
Important Note: LTEV1-A-GC2 and LTEA-A-GC2 communicators manufactured in late 2022 or early 2023 require the 2GIG GC2 to have firmware 1.19.4+ and the 2GIG GC2e to have firmware 1.24+. See this article for more information. The packaging for affected communicators should show the firmware version required.
As you are planning the upgrade, make a note of the serial number of the new LTE communicator. The monitoring company will need the serial number from the new module. It is a good idea to take a picture of all the stickers on the module prior to installing it into the alarm panel. The monitoring company will tell you when it's time to physically install the new module. When they do, follow these steps:
1. Power down the system. Unplug the panel's transformer. Remove the small screw from the top of the 2GIG GC2 panel. Make sure to put it in a safe place so that it is not lost. Pull the front of the panel away from the back mounting plate. Use the "third hand" to suspend the main panel from the back plate. Unplug the battery, and verify that the system has powered completely down. The screen should be dark, and it should not respond when you touch either of the buttons below the touchscreen.

2. Remove the existing radio. Carefully disconnect any existing antennas (shown in the image as number one). Remove the two screws that are holding the existing radio in place (shown in the image as number two). Carefully pull the existing radio straight up from the main panel (shown in the image as number three). Make sure you avoid bending any pins on the connector.

3. Install the new radio. With the system still powered down, line the new LTE communicator up with the radio connector and the existing screw holes. After making sure that the device is lined up properly, gently press the LTE communicator board onto the connector. Use the two screws and the locking washers provided to secure the communicator in place.

4. Install the antennas. The LTE communicator comes with two antennas. Both must be used to achieve satisfactory signaling. The antenna connected to port A should be routed outside the alarm panel. Make sure you do not route the antenna wire across the top of the LTE communicator. Instead, route the wiring for the antenna as shown in the image below. The antenna connected to port B should be routed inside the alarm panel, where it will remain. There is a small removable flap on the left side of the panel where this antenna can be placed. Route the external antenna out through the hole in the backplate, as far away from the alarm panel as possible. Avoid mounting it near metal objects, as they may disrupt the signal.

5. Re-apply power and re-mount. Plugin the backup battery. Place the main panel on the backplate. Line up the top first, and then swing the bottom of the panel down. Then snap it into place. Make sure all wires are properly tucked into place and that none are being pinched. Re-install the locking screw in the top of the panel, and tighten it down. Plug the transformer for the panel back into the outlet. The panel will begin powering up. The alarm monitoring company will walk you through the rest of the registration process.
Did you find this answer useful?
We offer alarm monitoring as low as $10 / month
Click Here to Learn MoreRelated Products


Related Videos
Related Categories
- Answered
- Answered By
- Julia Ross

