How Do I Use a Honeywell Tuxedo Touch to Add/Delete Zones?
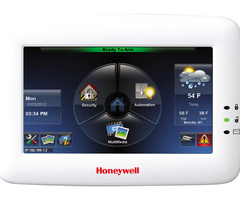
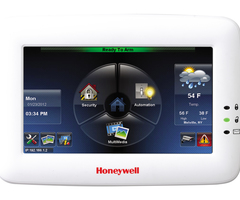
You can use a Honeywell Tuxedo Touch to add and delete zones by accessing the console mode for the device. This allows the Tuxedo Touch to be used in the same way as an alphanumeric keypad. By accessing console mode, you can use your Tuxedo Touch to add and delete zones on your VISTA Panel.

Once you have accessed console mode on a Tuxedo Touch, you will be presented with a graphic representation of an alpha keypad. This keypad can be operated in the same manner as any alphanumeric keypad that is being used with a VISTA System. This means that you can access *56 Zone Programming to add and delete zones on the system as needed.
Please note that a major limitation of the console mode on the Tuxedo Touch is that it cannot be used to backdoor into programming like a standard keypad. For that reason we do not recommend using a Tuxedo Touch Keypad as the only keypad for a Honeywell VISTA Panel. Instead, it should serve as a Z-Wave controller and/or as a secondary access point for the system. That said, many users still use the Tuxedo Touch as their main device for adding and deleting zones because they prefer working with the device's pleasant and easy to use touchscreen display.
Complete the following steps to add and delete zones using a Tuxedo Touch Keypad:
1. Access Console Mode. From the home screen of the Tuxedo Touch, go to Security > More Choices > Console Mode. You will now be in the system's console mode. A touchscreen keypad will be displayed.
2. Access Zone Programming. For the remainder of the steps, the Tuxedo Touch can be operated in the same manner as a standard alphanumeric keypad on a Honeywell VISTA Panel. To add and delete zones, you must access zone programming. This can be done by first entering the following command:
[Installer Code] + [8] + [00]
Remember, the default Installer Code for a Honeywell VISTA Panel is 4112.
The message "Installer Code 20" will indicate that you have entered programming. Then enter the following command to access Zone Programming:
[*] + [56]
You will then be prompted, "Set to Confirm 0=No, 1=Yes". Pressing "1" will require you to confirm sensor serial numbers after they have been entered, while pressing "0" will skip this step.
3. Configure zones. Select a zone by entering in its 2-digit zone number. For example, if you want to work on Zone 9, you would key in [09]. Then press the [*] key to continue.
If you are "deleting the zone", set its Zone Type to [00] for Not Used. Otherwise, set the appropriate Zone Type for the sensor that is being used. The list of Zone Types and their definitions can be found on page 36 of the VISTA Programming Guide.
For more information on programming zones, please see this FAQ or the VISTA Programming Guide.
4. Exit Programming. Once you have finished configuring the zones, at the "Enter Zone Number" prompt, press [00], then press [*] + [99] to exit programming. Then, click the picture of the house in the upper-left corner of the Tuxedo Touch screen to return to the home screen.
Did you find this answer useful?
We offer alarm monitoring as low as $10 / month
Click Here to Learn MoreRelated Products


Related Categories
- Answered
