How Do I Wire and Program a DSC PowerSeries NEO for 2-Wire Smokes?
To set up 2-wire smokes on a DSC PowerSeries NEO, connect panel Auxiliary Power Positive to the first smoke's Positive-In terminal. Connect PGM2 to its Negative terminal. Program PGM2 as a 2-Wire Smoke. Wire additional smokes in a similar manner with a 2.2k resistor across the last smoke.
Before you begin, be sure that the panel is powered completely down by unplugging its transformer and its backup battery. Also, make sure that the 2-wire smokes you choose to use are compatible with the NEO panel. Not all 2-wire smokes are compatible with all 2-wire smoke zones. Some manufacturers have addressable 2-wire smokes that are proprietary, such as the Honeywell 5193SDT or the DSC FSB-210B. When it comes to conventional 2-wire smoke compatibility, it is the smoke detector manufacturer who will list compatibility, not the panel manufacturer. The panel may have certain smoke detectors listed that are known to be compatible, but this is usually by no means an exhaustive list.
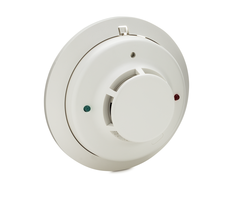
For this FAQ, we're going to use the 2WT-B Smoke Detector from System Sensor in our example. It is a 2-wire smoke with a heat detector built in, with no built-in sounder.

Each 2WT-B smoke has a positive IN and a positive OUT along with a negative IN/OUT. This is so that you don't have to connect too many positive wires under a single terminal. The RA+ and RA- terminals are for remote annunciators. These are add-on sounders (RA100Z). These will change the current draw for each 2-wire smoke you use them on, so be cautious when adding them. The DSC PowerSeries NEO can support up to 18 compatible 2-wire smokes.
Make the following wire connections:
- Connect the NEO panel AUX + to + IN (Terminal 1) on the first smoke detector in the loop.
- Connect the NEO panel PGM2 to - IN/OUT (Terminal 3) on the first smoke detector in the loop.
- Connect the + OUT (Terminal 2) from the first smoke in the loop to + IN (Terminal 1) on the 2nd smoke detector in the loop.
- Connect another wire from - IN/OUT (Terminal 3) on the first smoke to - IN/OUT (Terminal 3) on the 2nd smoke.
- If you have additional 2-wire smoke detectors, continue wiring in this way until all compatible smokes have been connected to the circuit. When you get to the last smoke detector in line, install a 2.2k resistor (Red, Red, Red, Gold) across + OUT (Terminal 2) and - IN/OUT (Terminal 3). This puts the resistor in parallel to the circuit, which is how it should be installed.
Once all wiring has been completed, it's safe to power up the system. Connect the battery, and power up the system by plugging in the transformer. Be sure at least one keypad is connected and enrolled in the system so that you can complete programming for PGM2.
To program PGM2, follow these steps:
- Enter programming. Press [*] [8] [Installer Code] the default installer code is 5555. Then enter PGM Definition [009]
- Go to PGM2. Press the right arrow [>] until you see PGM2, then press [*]
- Select 2-Wire Smoke. Press the right arrow [>] until you see 2-Wire Smoke (it will be entry 104 in this location). Press [*]. This will take you to PGM3 if your panel offers it.
- Exit Programming. Press [#] repeatedly to back out of programming one screen at a time. When you return to a system status screen, you have successfully exited.
- Manually reset smokes. On the keypad, press [*] [72]. The keypad will display "Output Deactivated". From here, once the reset has completed, the LED on the smoke detectors should return to normal. For the 2WT-B, the Green LED should blink once every five (5) seconds to indicate normal operation.
Did you find this answer useful?
We offer alarm monitoring as low as $10 / month
Click Here to Learn MoreRelated Products

Related Categories
- Answered
- Answered By
- Julia Ross


