How Do You Wire A 2GIG GC3 Alarm Control Panel?
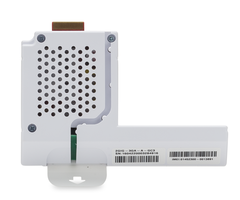
After the location to mount the 2GIG GC3 control panel is chosen, install the cellular communicator and exterior siren (if using).
2GIG GC3 supports 2 hardwired zones. The hardwired zones are for door / window contacts, the hardwired zones do not support smoke detectors, hardwired motion detectors, hardwired carbon monoxide detectors or hardwired glass break detectors.
To connect a hardwired zone, use 22 gauge wire if the run is no more than 50 feet, 20 gauge for no more than 80 feet and 18 gauge for 125 feet. Route the wire from the contact through the back of the 2GIG GC3’s panel cut out. Connect the wire to terminal 6 for zone 1 and terminal 7 for zone 2 on the board (please see install instructions for complete connection and programming).
There are two options to connect the power wires to the 2GIG GC3 control panel.
Connect 2 conductor power wire to the included transformer for the 2GIG GC3 control panel. Run the wire through the back panel cutout.
Insert the positive wire to the PWR+ on the terminal board and tighten with the terminal screw. Insert the negative wire to the PWR- on the terminal board and tighten with the terminal screw.
Do not plug the transformer into the outlet until all wiring is complete and cell communicator and sensors are installed.
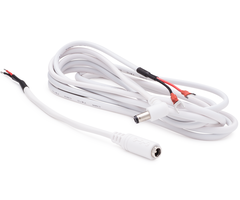
User can also opt to use the 2GIG AC-2 Plug or the LT Cable. Run the cable from the AC-2 Plug or the LT Cable through the back cutout in the GC3 panel and plug in the barrel connector into the DC power adaptor power jack located on the back of the panel
Again, do not plug the transformer into the outlet until all wiring is complete and cell communicator and sensors are installed.
Did you find this answer useful?
We offer alarm monitoring as low as $10 / month
Click Here to Learn MoreRelated Products


Related Categories
- Answered


